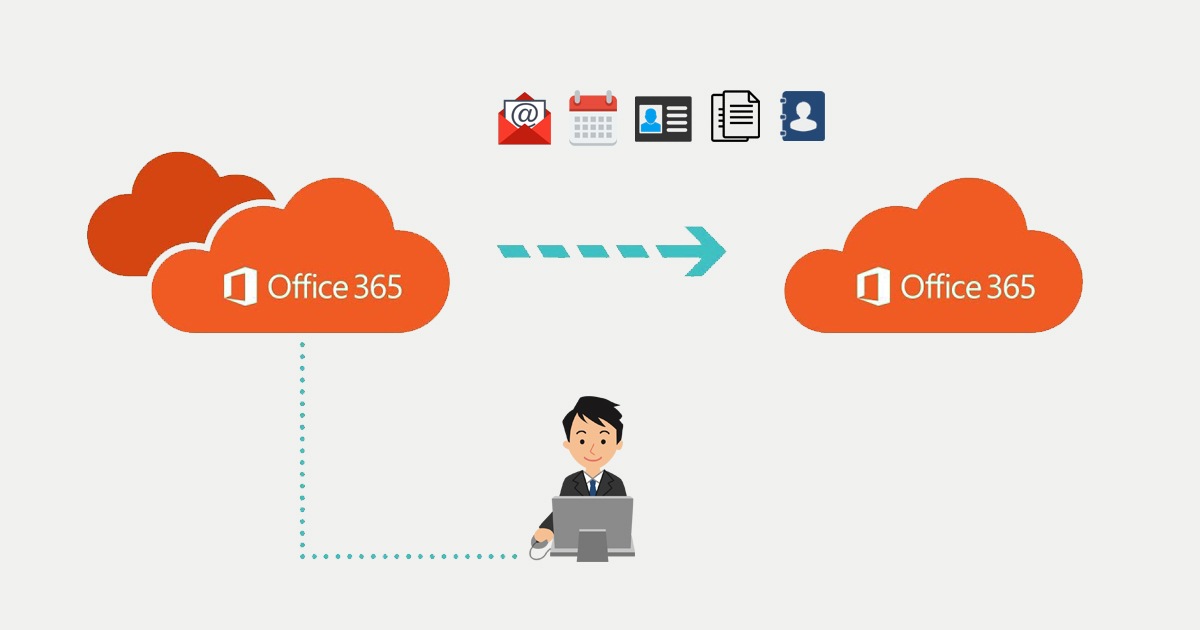
Since the 1st of November 2022 Microsoft has released Cross-Tenant User Data Migration. With that there was a release of cross-tenant mailbox migration and cross-tenant OneDrive migration to make is easier for customers to consolidate different tenants.
In this part I will explain what to setup for a mailbox migration. Microsoft writes:
Cross-tenant mailbox moves use an invitation and consent model to establish an Azure Active Directory application used for authentication between tenants. Using Azure Enterprise Application with Mailbox Migration permissions and a client secret, admins can now manage the authorization and scoping of Exchange Online mailbox migrations from one tenant to another. Additional components, such as an organizational relationship and a migration endpoint, are also required.
I will show how to setup that App registration and will provide the PowerShell commands to use. I Also wrote a PowerShell script to use which will set it up automatically.
Situation
Company Target has bought Company Source. They will work together in the next year but both work already in the Microsoft 365. Company Target is a big company with Exchange Online, Teams, SharePoint and OneDrive as default applications for the users to use. Company Source works with there e-mail in Exchange Online and need to have there e-mail in the tenant of Company Target.
Company Target: GetToTheCloudTarget.onmicrosoft.com with a domain name: user@target.com
Company Source: GetToTheCloudSource.onmicrosoft.com with a domain name: user@source.com
Index
- Target Tenant App Registration
- Adding application to SOURCE tenant
- Target Tenant Exchange Online Powershell
- Source Tenant
- Source Tenant Relationship
Target Tenant App Registraton
At first you need to create an App registration with the correct permissions at the Company Target tenant. The target tenant is the destination where to you want to consolidate the users and there data. In our example case: GetToTheCloudTarget.onmicrosoft.com will be the destination of the data.
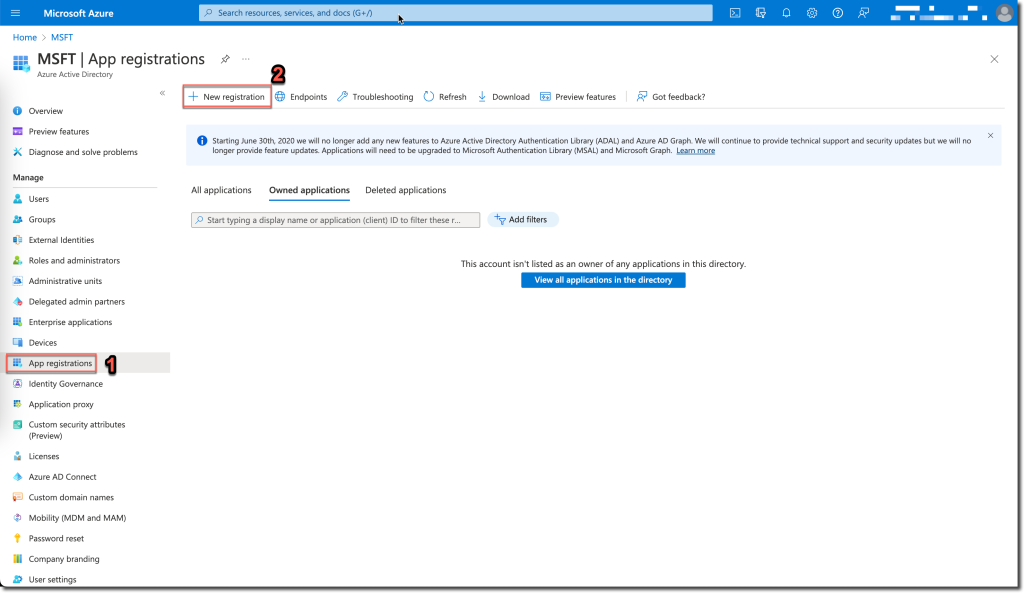
In Azure Active Directory you can select 1. App Registrations and next to 2. New Registration
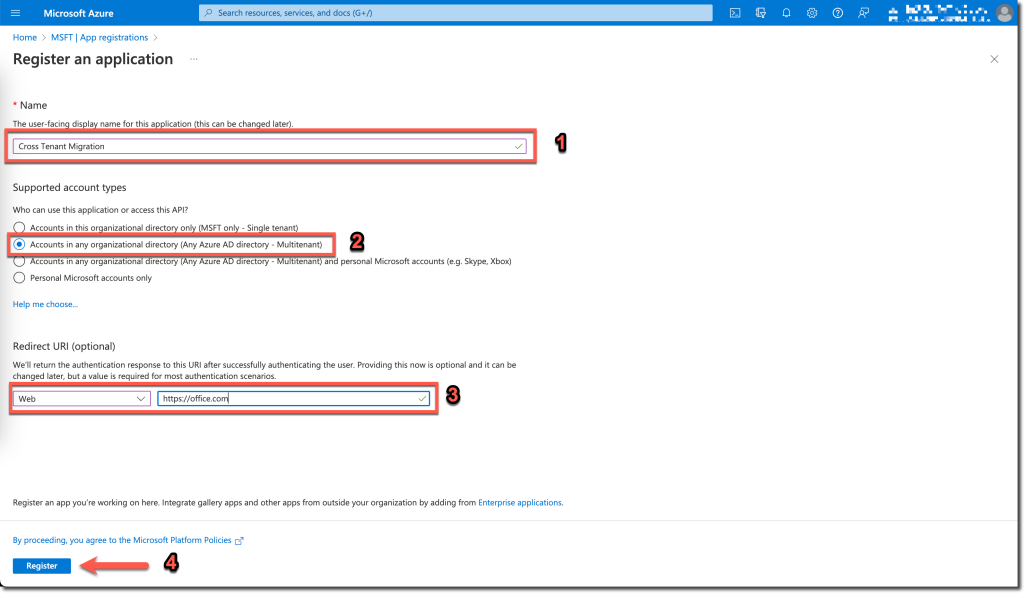
1. Enter a name: Cross Tenant Migration and select
2. Accounts in any organisational directory (Any Azure AD Directory – MultiTenant).
3. WEB https://office.com
4. Register
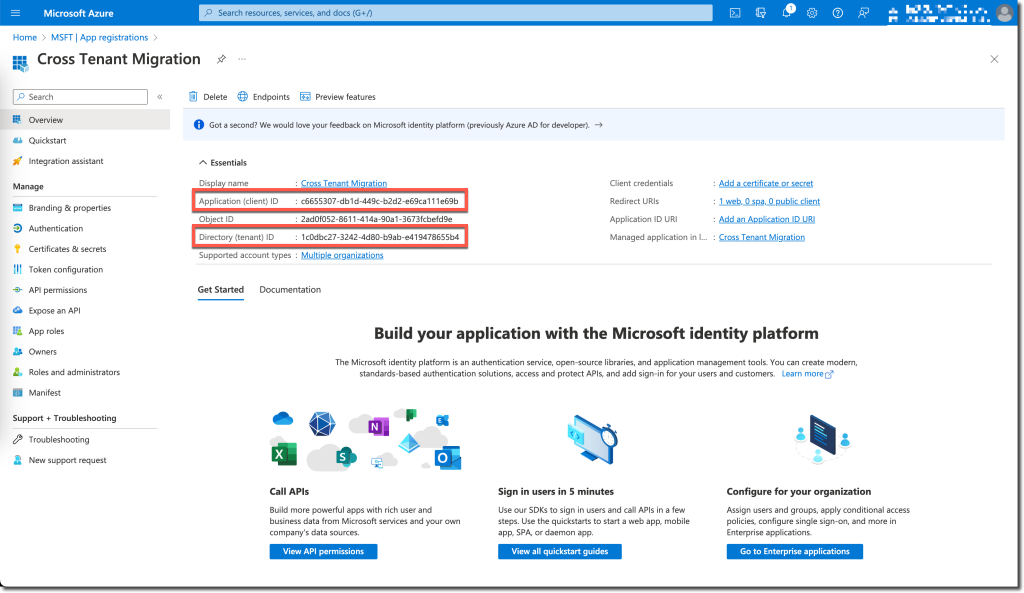
Write down the client ID and the tenant ID
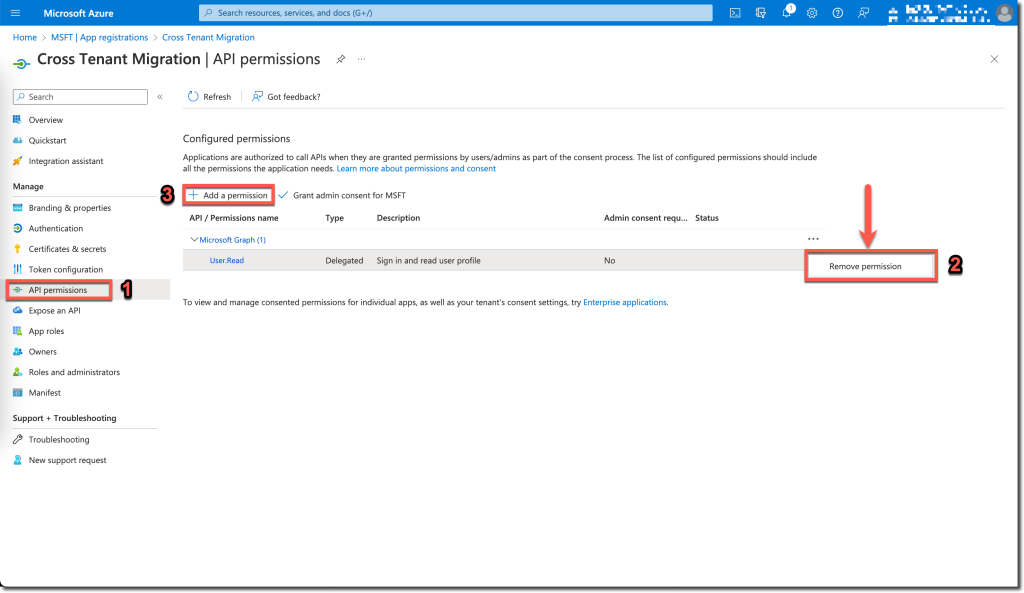
- Click API Permissions
- Remove User.Read permissions
- Click Add a Permission
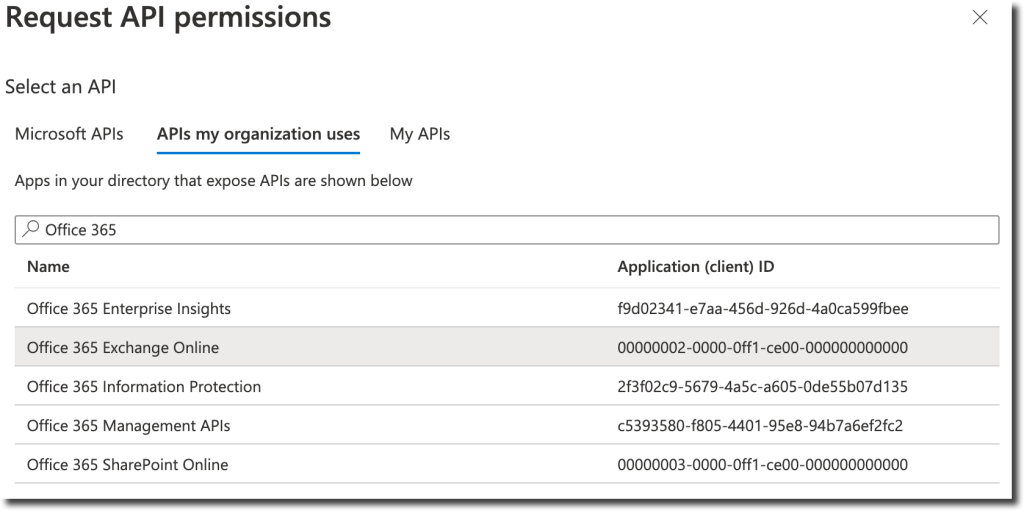
Select the APIs my organization uses and search for Office 365. Select Office 365 Exchange Online API.
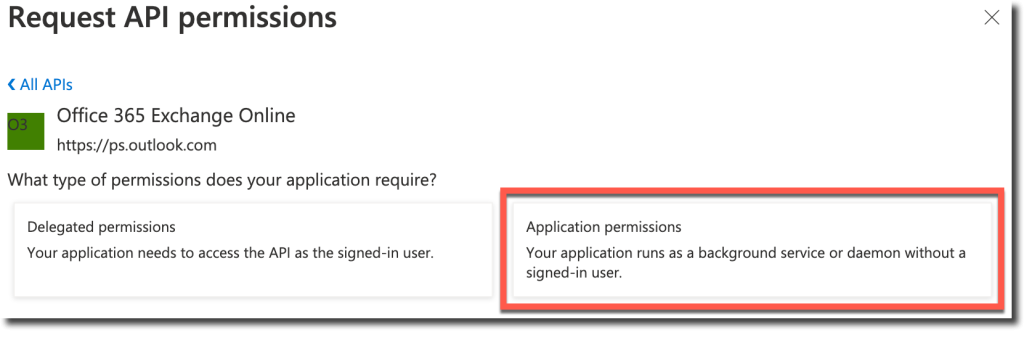
Select Application permissions

Search for Migration and select Mailbox.Migration
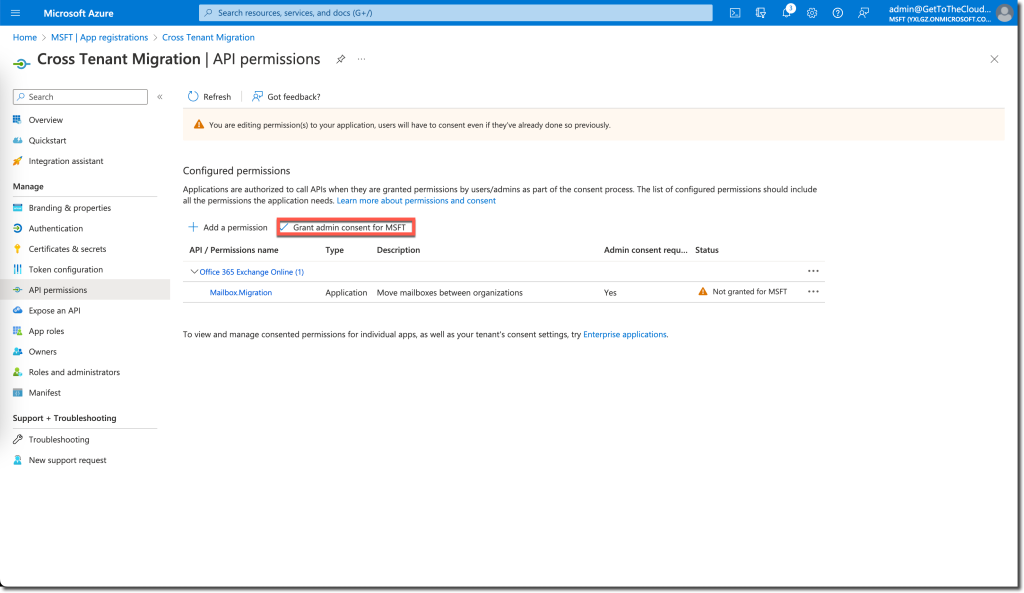
After adding the permissions you need to Grand admin consent for [ORGANIZATION NAME]
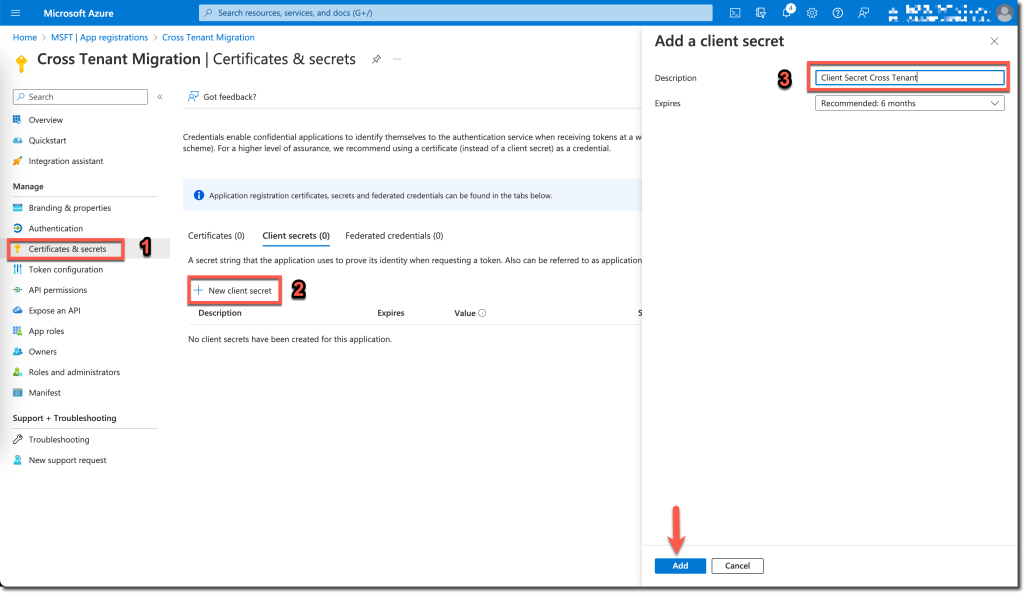
Add a Client Secret by clicking 1. Certificates & secrets and 2. New client secret. Enter a description and select the preferred Expiration time.
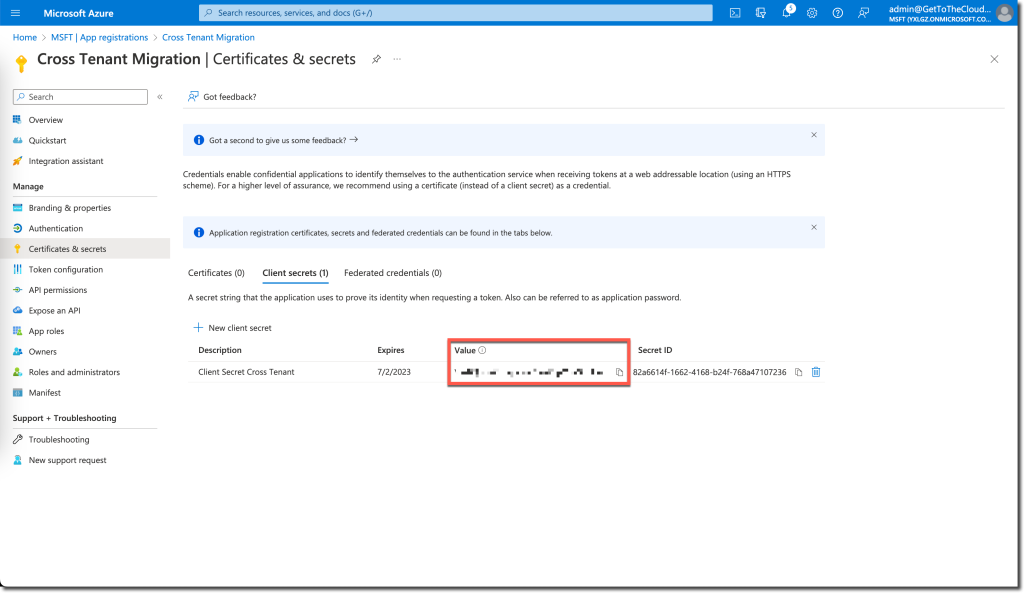
After adding the client secret you will find it in the VALUE column. Copy/paste it because it cannot be revealed once left the page.
Adding application to SOURCE tenant
After creating an App registration in the target tenant, you will need to add this application to the Source tenant. This can be done formatting an url with the correct information and run this in a browser:
https://login.microsoftonline.com/GetToTheCloudSource.onmicrosoft.com/adminconsent?client_id= application_id_of_the_app_you_just_created]&redirect_uri=https://office.com
Target Tenant Exchange Online Powershell
For the actual migration between the tenant, you will need an Exchange Endpoint and an Organization Relationship. Like when there is a migration between Exchange On-premises and Exchange Online, the Hybrid Config Wizard will create this for you. Now you have to do it yourself using some PowerShell commands. Start an elevated PowerShell window
#Exchange Online Management v3 Powershell module
Install-Module -Name ExchangeOnlineManagement -RequiredVersion 3.0.0 -Force
#Connect to Exchange Online
Connect-ExchangeOnline
Preparing the Target Tenant you will need to have an Exchange Endpoint to receive the incoming mailboxes.
# Enable customization if tenant is dehydrated
$dehydrated=Get-OrganizationConfig | select isdehydrated
if ($dehydrated.isdehydrated -eq $true) {Enable-OrganizationCustomization}
$AppId = "[guid copied from the migrations app]"
$Credential = New-Object -TypeName System.Management.Automation.PSCredential -ArgumentList $AppId, (ConvertTo-SecureString -String "[this is your secret password you saved in the previous steps]" -AsPlainText -Force)For $AppID you use the CLIENTID from figure 3. The password is what you wrote down in Figure 10
New-MigrationEndpoint -RemoteServer outlook.office.com -RemoteTenant "GetToTheCloudSource.onmicrosoft.com" -Credentials $Credential -ExchangeRemoteMove:$true -Name "Receive from GetToTheCloudSource" -ApplicationId $AppIdNow we can create an Organization Relationship. This is the TenantID from the tenant where the mailboxes are hosted currently.
$sourceTenantId=[GUID FROM FIGURE 3 CALLED DIRECTORY (TENANT) ID]
$orgrels=Get-OrganizationRelationship
$existingOrgRel = $orgrels | ?{$_.DomainNames -like $sourceTenantId}
If ($null -ne $existingOrgRel)
{
    Set-OrganizationRelationship $existingOrgRel.Name -Enabled:$true -MailboxMoveEnabled:$true -MailboxMoveCapability Inbound
}
If ($null -eq $existingOrgRel)
{
    New-OrganizationRelationship "Relation with GetToTheCloudSource" -Enabled:$true -MailboxMoveEnabled:$true -MailboxMoveCapability Inbound -DomainNames $sourceTenantId
}Source Tenant
To prepare the source tenant you need to rerun the AdminConsent url formatted with the correct information:
https://login.microsoftonline.com/GetToTheCloudSource.onmicrosoft.com/adminconsent?client_id= application_id_of_the_app_you_just_created]&redirect_uri=https://office.com
We need to create a security group in https://admin.exchange.microsoft.com and go to Groups
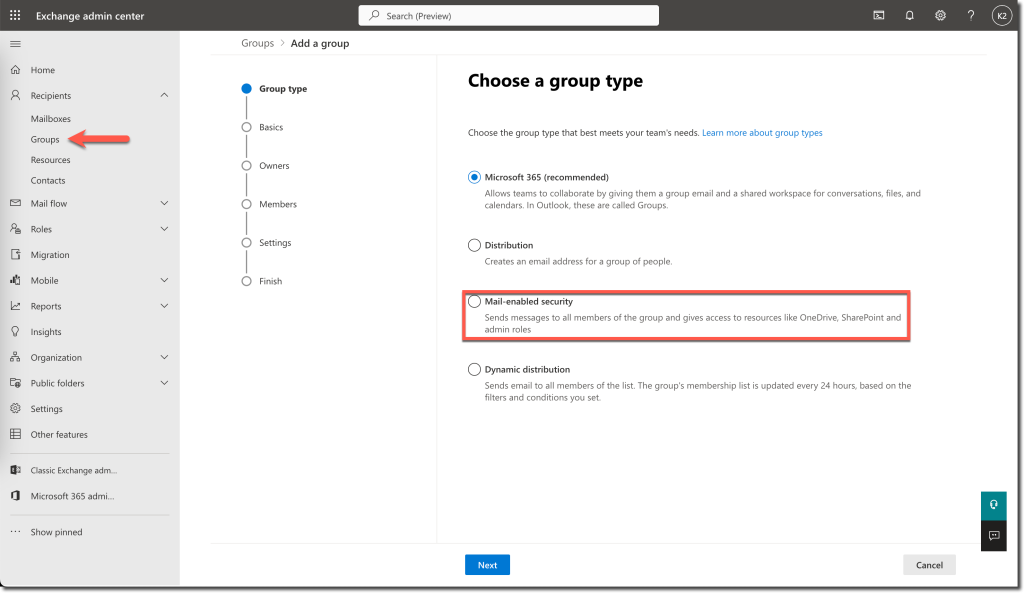
This security group have as members the users that needed to be migrated. In the Organizational Relationship we have to define the security group that is holding these users. We select Mail-enabled security.
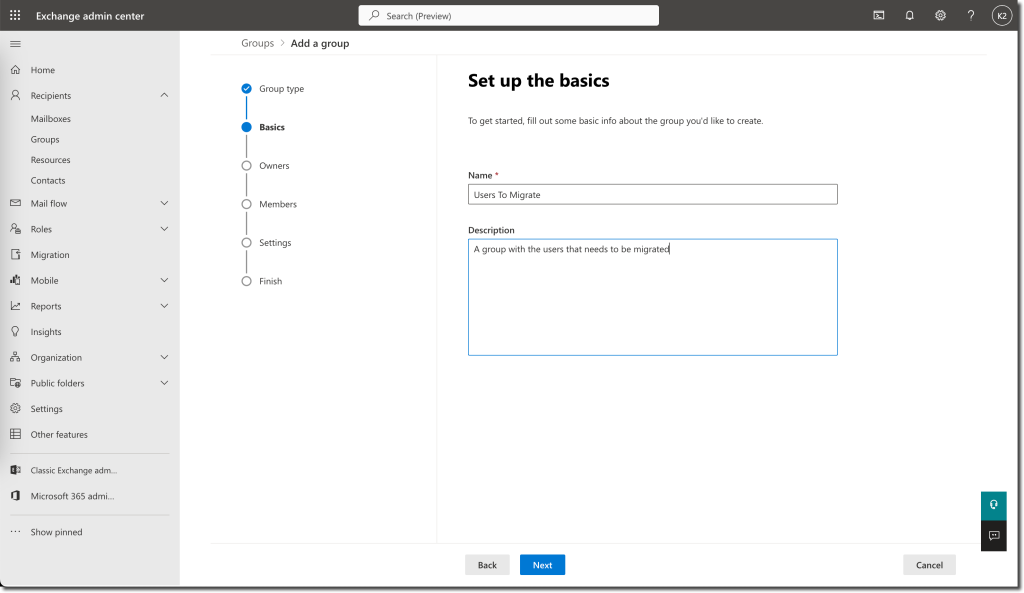
Provide a name for the security group and a description
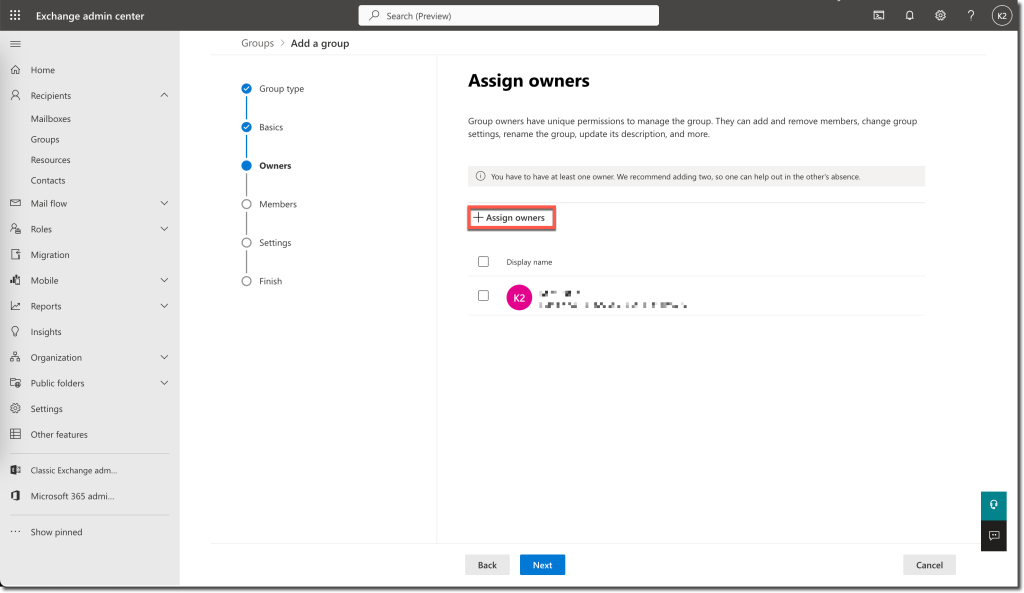
Assign an Owner of the group
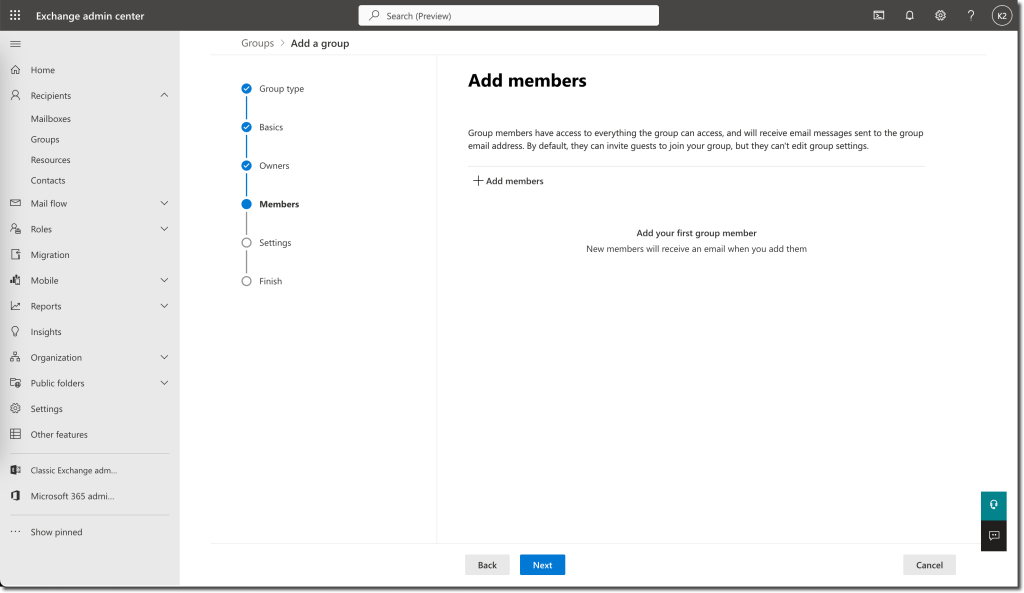
Add the members that needs to be migrated to the new tenant
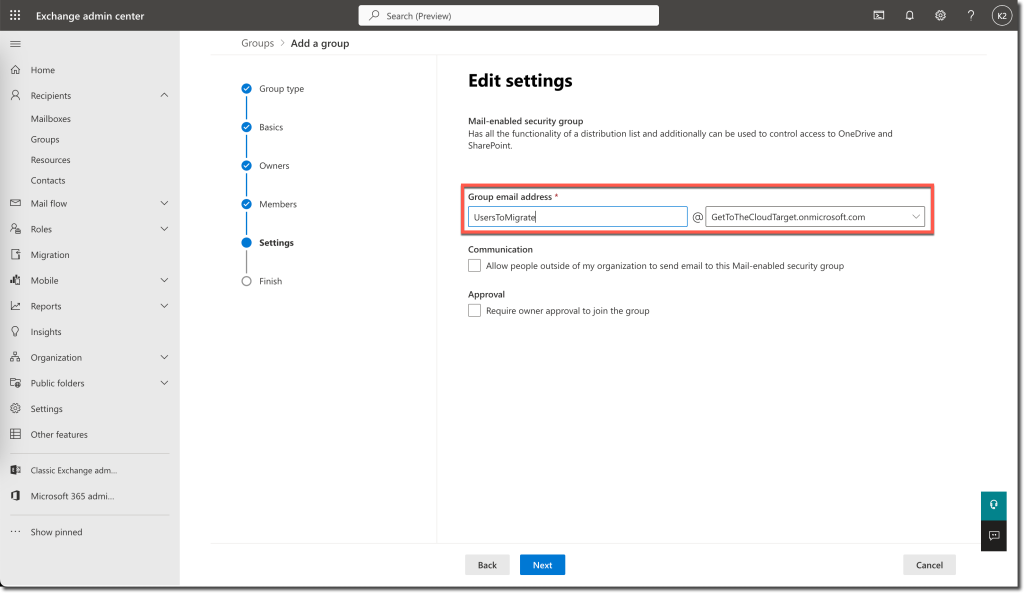
Provide a Group Email Address for the group and click Next. After the summary select Create Group.
Source Tenant Relationship
The source tenant needs to have a relationship with the Target Tenant. Before we already created a part of the relationship in PowerShell at the Target Tenant.
Start an elevated PowerShell prompt
$targetTenantId=[guid id from source tenant called tenantid]
$appId="[application id of the mailbox migration app you consented to]"
$scope="Users To Migrate"
$orgrels=Get-OrganizationRelationship
$existingOrgRel = $orgrels | ?{$_.DomainNames -like $targetTenantId}
If ($null -ne $existingOrgRel)
{
    Set-OrganizationRelationship $existingOrgRel.Name -Enabled:$true -MailboxMoveEnabled:$true -MailboxMoveCapability RemoteOutbound -OAuthApplicationId $appId -MailboxMovePublishedScopes $scope
}
If ($null -eq $existingOrgRel)
{
    New-OrganizationRelationship "Relationship with GetToTheCloudTarget" -Enabled:$true -MailboxMoveEnabled:$true -MailboxMoveCapability RemoteOutbound -DomainNames $targetTenantId -OAuthApplicationId $appId -MailboxMovePublishedScopes $scope
}
Final
Now we have created an Organizational Relationship between GetToTheCloudTarget and GetToTheCloudSource with an Exchange Endpoint to migrate users from Source to Target.