Azure Local | HomeLab – Add Storage and SoFS
In a previous series, we successfully deployed an Azure Local Node within a Hyper-V environment for testing purposes. The detailed setup process can be found in our earlier guide: https://www.gettothe.cloud/azure-local-homelab-setup/. As part of that configuration, we provisioned three additional 1TB disks to enhance storage capacity and support our workload requirements.
We are now planning to extend the cluster’s storage capabilities by adding an additional 1TB disk. This step will allow us to accommodate future growth, improve performance, and maintain flexibility for testing scenarios. In this article, we will walk through the process of integrating the new disk into the existing cluster, ensuring proper configuration and alignment with best practices for Azure Stack HCI environments.
The purpose of this additional storage is to host FSLogix profiles for the Azure Virtual Desktops that we have being creating https://www.gettothe.cloud/azure-local-homelab-azure-virtual-desktop/
Add a disk
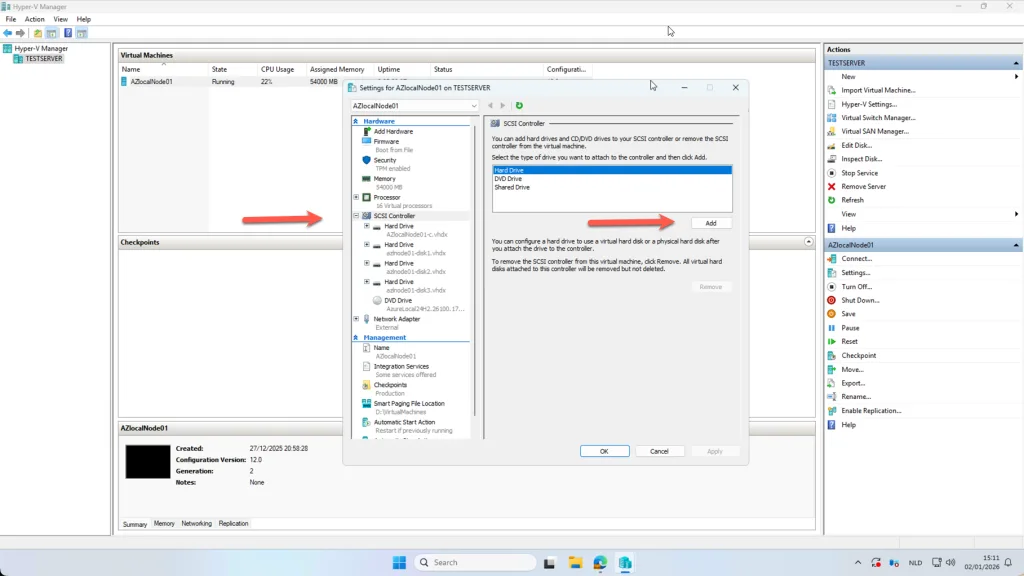
To add an additional 1 TB disk to the Azure Local Node running on Hyper-V, start by logging into the Hyper-V Manager. Locate the virtual machine hosting your Azure Local Node and open its settings. Within the settings panel, navigate to the SCSI Controller section. From there, select the option to Add Hard Drive. This will allow you to attach a new virtual disk to the node.
When creating the new disk, ensure that you specify the correct size (1TB) and choose the appropriate disk type (e.g., VHDX) for optimal performance and compatibility. After the disk has been added, it will be automatically added to the clustervolume
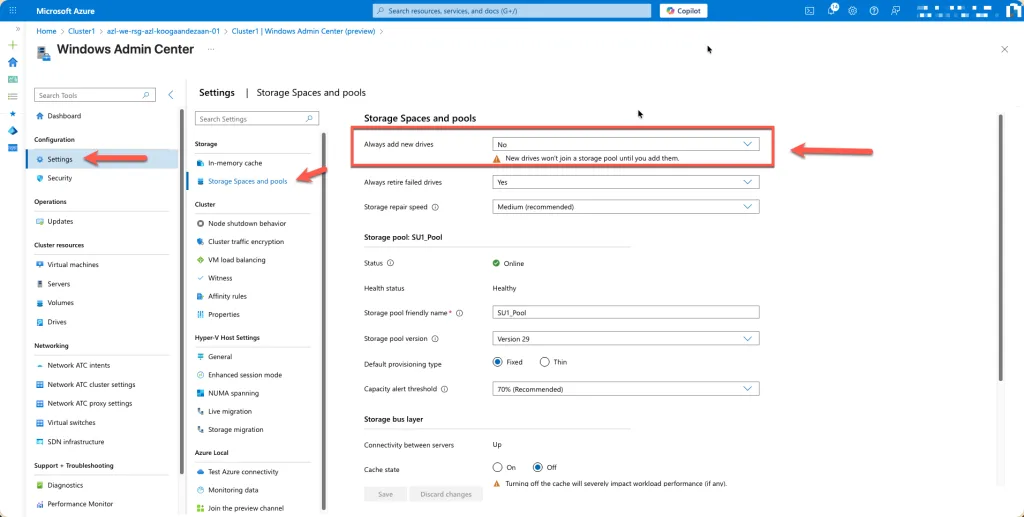
By default new drives will be added automatically to the storage pool. this way it is not possible to use it as a different pool. You can change that in the Windows Admin Center (https://www.gettothe.cloud/azure-local-homelab-windows-admin-center/) going to Settings -> Storage Spaces and Pools and changing the top option: Always add new drives from Yes to No.
Scale-out File Server
A Scale-Out File Server (SOFS) is a clustered file server role in Windows Server designed for high availability and performance in enterprise environments. Unlike a traditional file server, SOFS provides active-active access, meaning all nodes in the cluster can serve SMB shares simultaneously. This eliminates single points of failure and enables SMB Transparent Failover, so clients maintain uninterrupted access during node maintenance or failures.
SOFS is commonly used with Cluster Shared Volumes (CSV) and Storage Spaces Direct (S2D), making it ideal for hosting virtual machine files, application data, and workloads requiring continuous availability. It supports advanced SMB features like SMB Multichannel, SMB Direct (RDMA), and encryption, ensuring secure and efficient data transfers. In hyper-converged infrastructures such as Azure Local, SOFS plays a critical role in delivering resilient, scalable storage for modern hybrid cloud deployments.
Configuration
To simplify the demonstration process, I will be using Failover Cluster Manager on my management server rather than relying solely on PowerShell commands. This approach provides a clear, visual representation of the cluster configuration, making it easier to follow and understand. After connecting to the cluster, we gain full visibility into its roles, storage, and networking components, which allows us to manage and validate settings efficiently. Using the graphical interface ensures that the steps are transparent and accessible, especially for those who prefer a more intuitive method over scripting. This foundation will help us proceed with configuring high-availability features and verifying that the cluster is ready for the next stages of deployment.
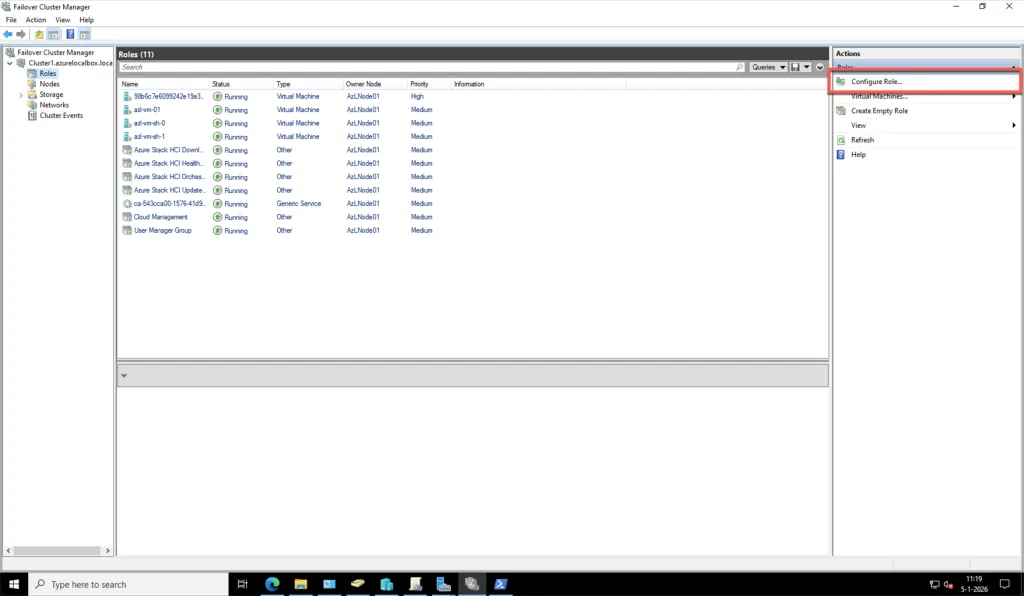
The next step in our configuration process is to enable the Scale-Out File Server (SOFS) functionality by creating a dedicated cluster role. This role is essential for providing continuously available SMB shares across the Azure Local cluster, ensuring high availability and resilience for workloads such as FSLogix profile containers. By configuring SOFS as a cluster role, we leverage the built-in failover capabilities of Windows Server clustering, which guarantees uninterrupted access even during node maintenance or failover events. This approach eliminates the need for additional file server VMs and simplifies management while delivering enterprise-grade performance and reliability.
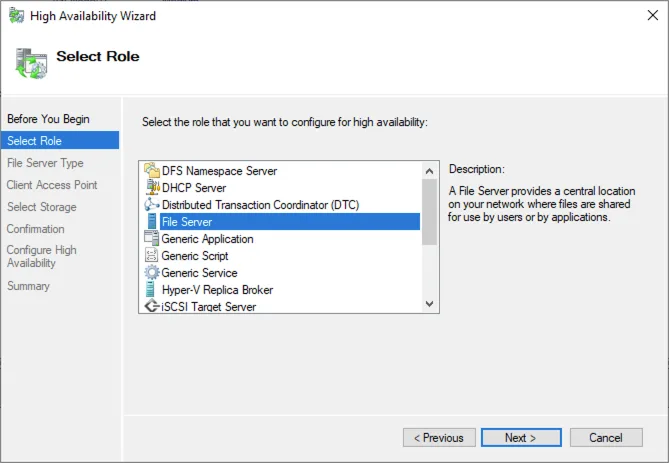
Select File Server
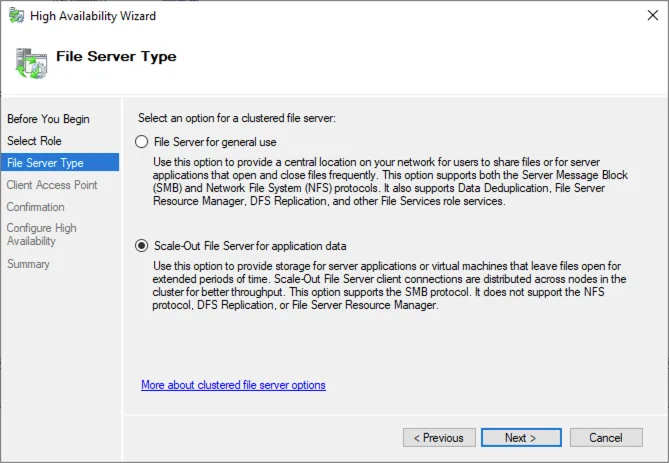
Select the Scale-Out File Server for Application Data
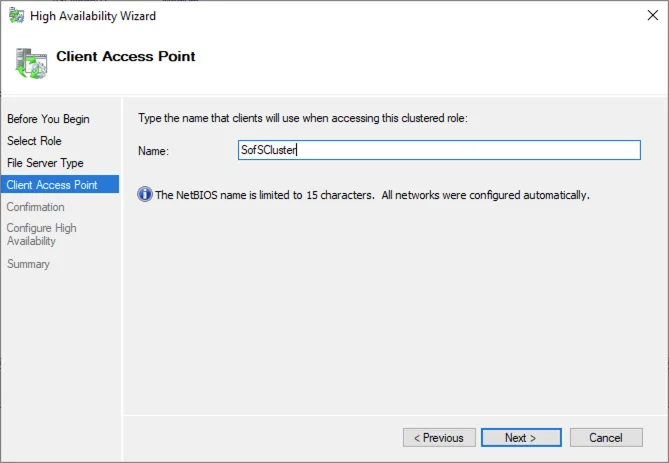
Choose a Client Access point. This will be the NETBIOS name of the cluster.
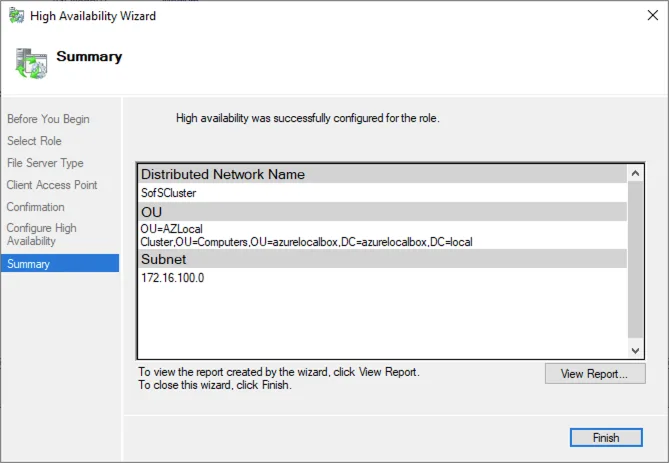
Finish after review.
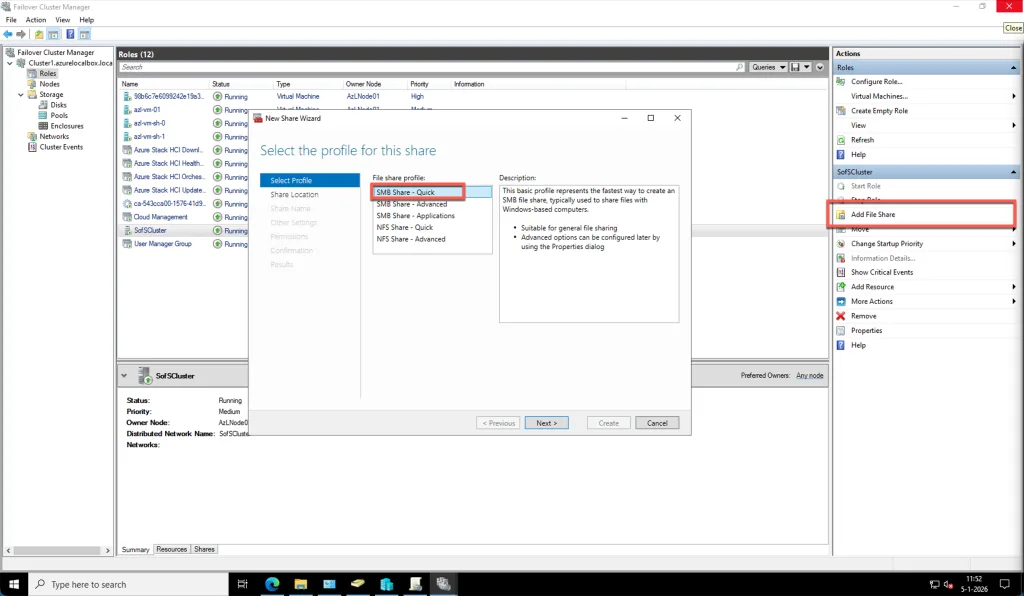
Select the role and choose for Add File Share
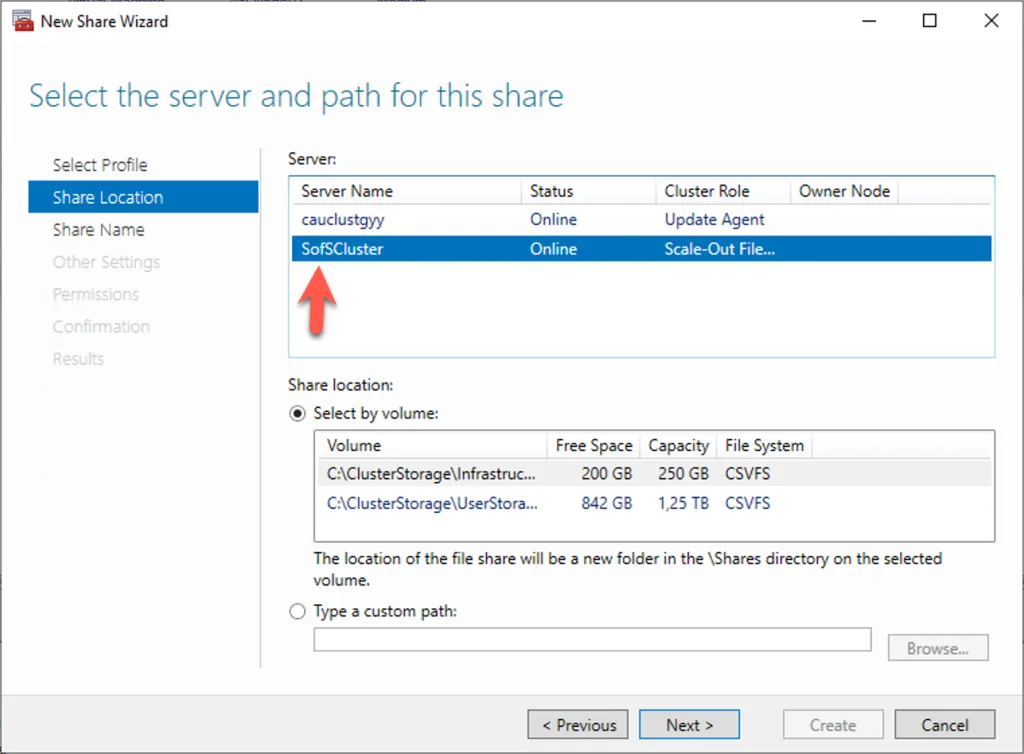
Select the correct cluster
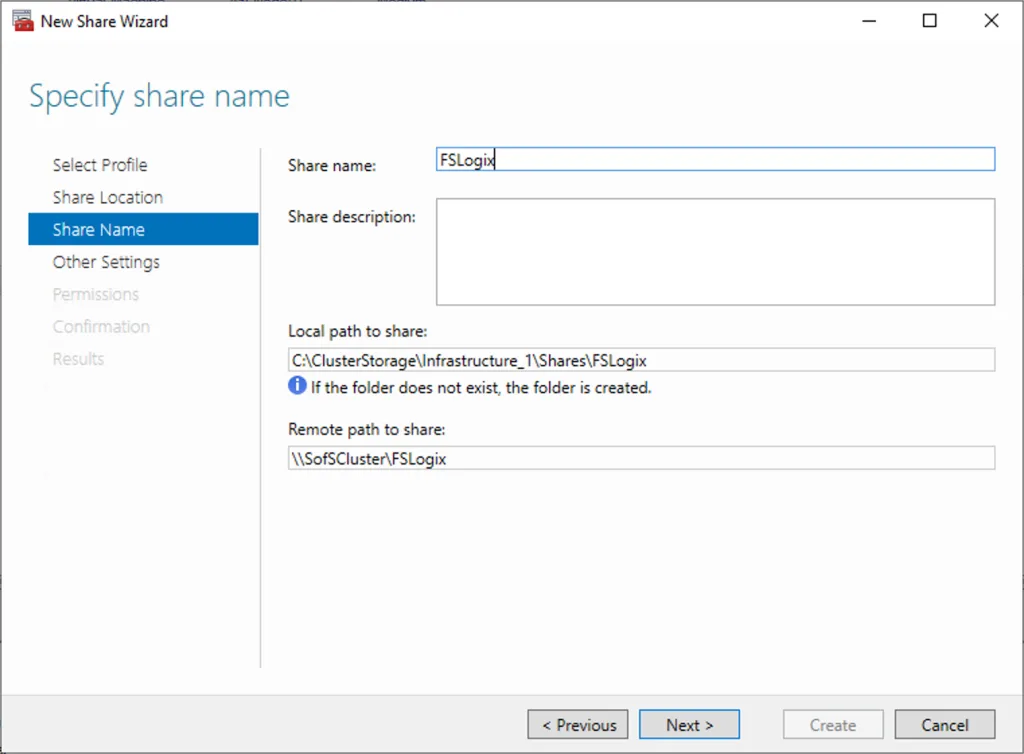
Choose a name for the share
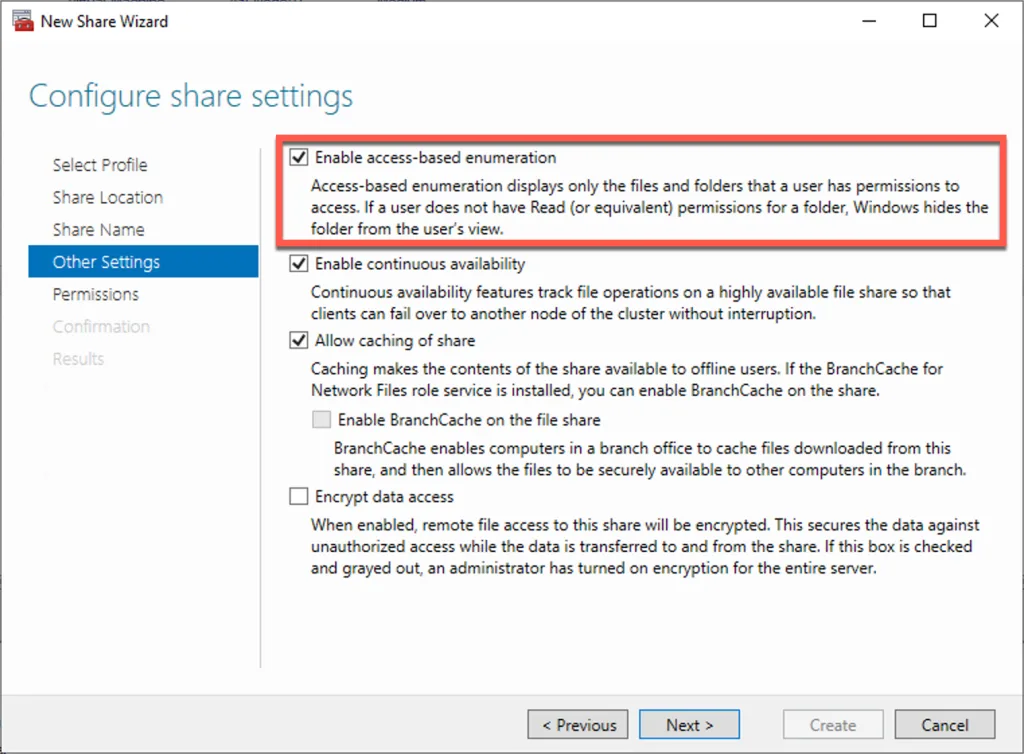
I have selected Enabel access-based enumeration. This is totally up to yourself.
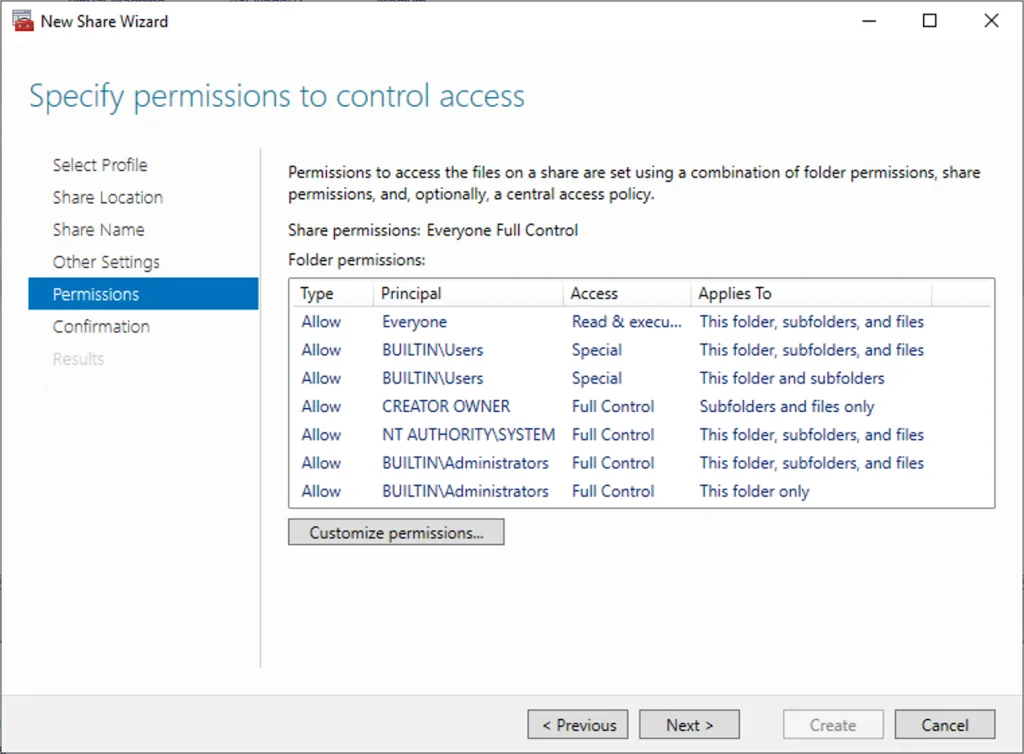
I accept the current permissions because in a next blogpost I will change the permissions correctly for FSLogix.

I confirm and create.At this point, the Azure Local cluster has been successfully configured with a storage share that is accessible via SMB. This share is now available for users and can serve as the central location for workloads such as FSLogix profile containers or other data required by Azure Virtual Desktop. By leveraging the Scale-Out File Server role, the share is continuously available, ensuring high availability and resilience during node failovers. This configuration eliminates the need for additional file servers while providing enterprise-grade performance and reliability directly from the cluster.
The next post we will configure FSLogix to use this share for the profiles.
Little sidenote:
Microsoft does not support this. They say: you use the storage for VM’s/Workloads or just for storage. This is just for a homelab. In basics you need to have a separate SOFS with enough storage. If you want to use this in production, you should know that it is expensive and not supported!