This setup is used to validate a new feature and is part of a dedicated test environment. Please note that this functionality is still in preview. More details can be found here: [link]
Once again, the environment is based on Hyper‑V, following the same foundational approach described in: https://www.gettothe.cloud/azure-local-homelab-setup-part-ii/
The key difference compared to the previous setup is not the Hyper‑V foundation itself, but the deployment method.
In this scenario, the deployment is handled through the Azure portal, picking up exactly at the moment the node is already Azure Arc–registered.
On the Azure Local node, I have created a new local user account named lcmadmin. This account has been added to the local Administrators group to ensure it has the required administrative privileges for management and operational tasks.
From a DNS perspective, the following A records have been configured:
- 172.16.100.10 →
azlnode01.azurelocalbox.local - 172.16.100.11 →
cluster.azurelocalbox.local
These DNS records ensure proper name resolution for the Azure Local node and the cluster endpoint.
Deployment
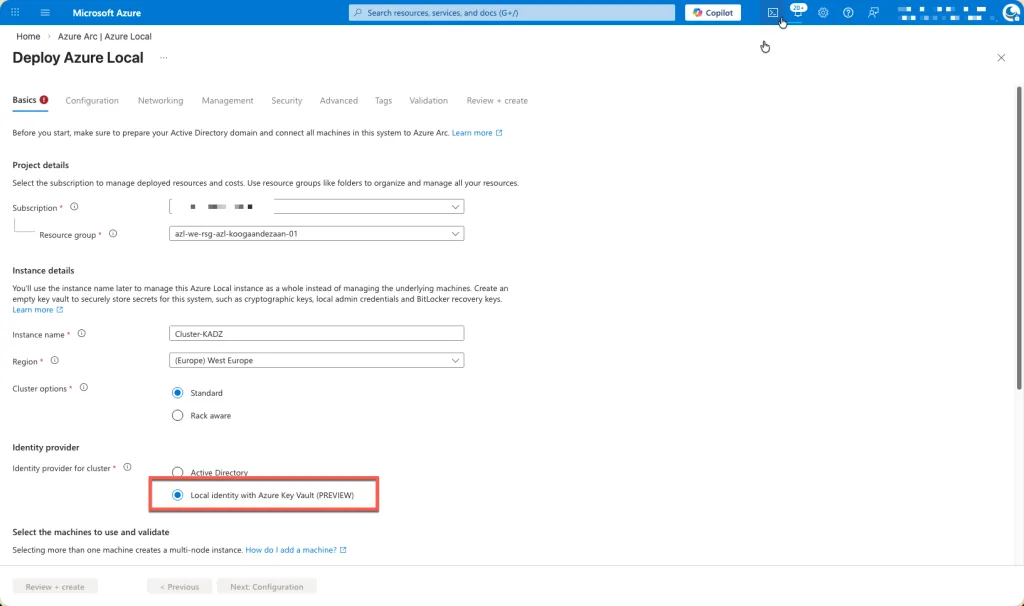
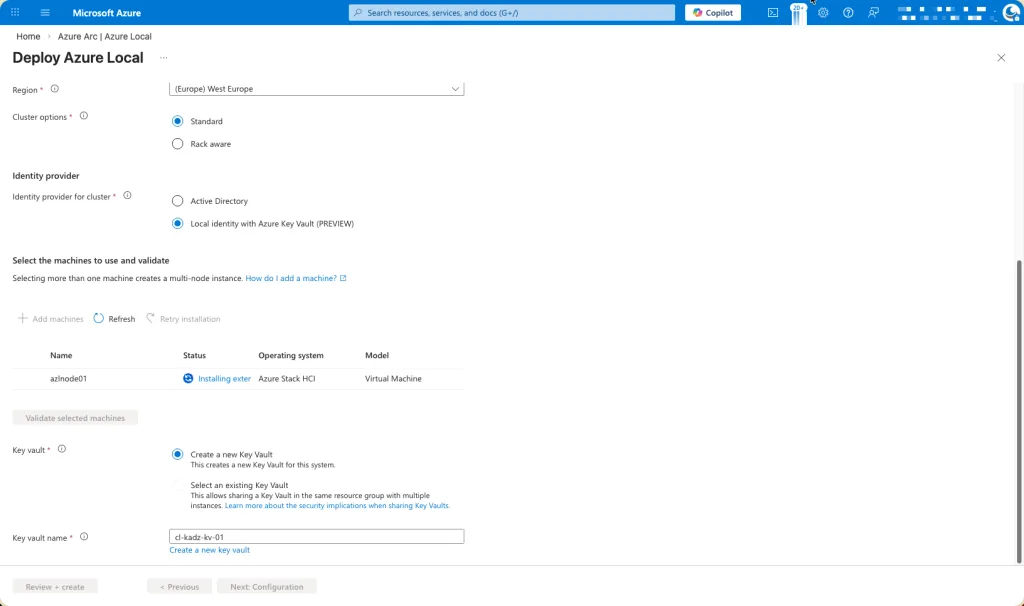
Please select the Local Identity with Azure Key Vault (Preview) option.
This configuration enables the use of a local identity model while securely storing and managing secrets, certificates, and credentials within Azure Key Vault. By choosing this option, you align the deployment with modern security best practices, including centralized secret management, improved auditability, and reduced reliance on traditional directory services.
This approach is particularly suitable for scenarios where Active Directory Domain Services are not required or desired, while still maintaining strong integration with Azure-based security services. As this capability is currently in preview, it is recommended to use it for evaluation, testing, or early adoption scenarios, while keeping potential limitations and support considerations in mind.
Proceed by adding the node to the environment and allowing the required extensions to be installed automatically.
During this phase, the node will be onboarded and configured by the platform, after which all necessary system and Azure extensions will be deployed and initialized. This step is essential to ensure the node is fully integrated, compliant with the selected configuration, and ready for operational use. It is recommended to let this process complete without interruption, as the extensions provide critical functionality for management, security, monitoring, and ongoing lifecycle operations.
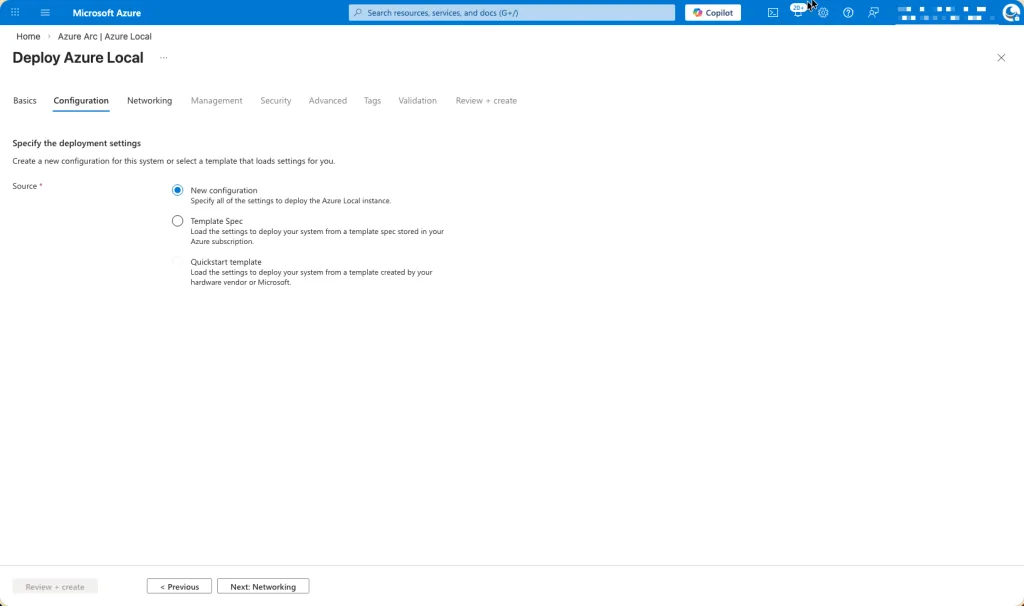
I have opted to proceed with a new configuration, ensuring a clean and standardized setup that aligns with recommended deployment practices.
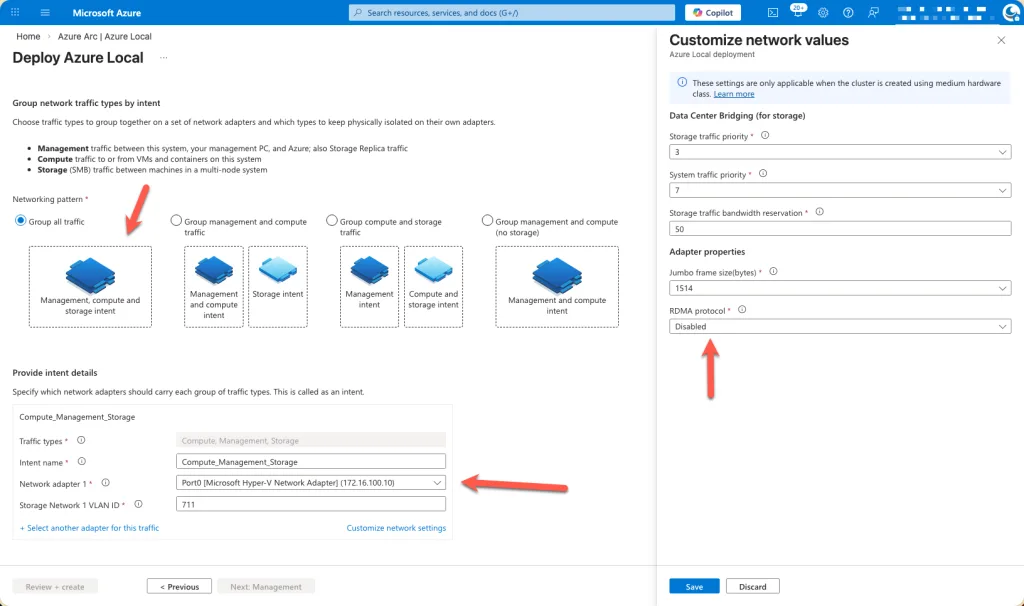
Remote Direct Memory Access (RDMA) has been disabled, and the appropriate network interface card (NIC) has been explicitly selected.
This ensures that the deployment uses the correct network adapter aligned with the intended traffic profile and infrastructure design. Disabling RDMA is a deliberate configuration choice when the underlying hardware, driver versions, or network topology do not fully support RDMA requirements, or when a simplified and more predictable networking model is preferred. Selecting the correct NIC is critical to guarantee proper connectivity, performance consistency, and compatibility with the chosen Azure Local configuration and management extensions.

Complete the network configuration by entering the IP address details and specifying the DNS zone information.
At this stage, provide the required IP address configuration for the node, ensuring that all values (such as IP address, subnet mask, gateway, and DNS settings) accurately reflect the target network design. In addition, specify the DNS zone name along with the corresponding DNS server IP address(es).
This information is essential to guarantee proper name resolution, network connectivity, and integration with existing DNS infrastructure. Accurate DNS configuration ensures that the node can be reliably identified, managed, and accessed by both local components and Azure services throughout the lifecycle of the deployment.
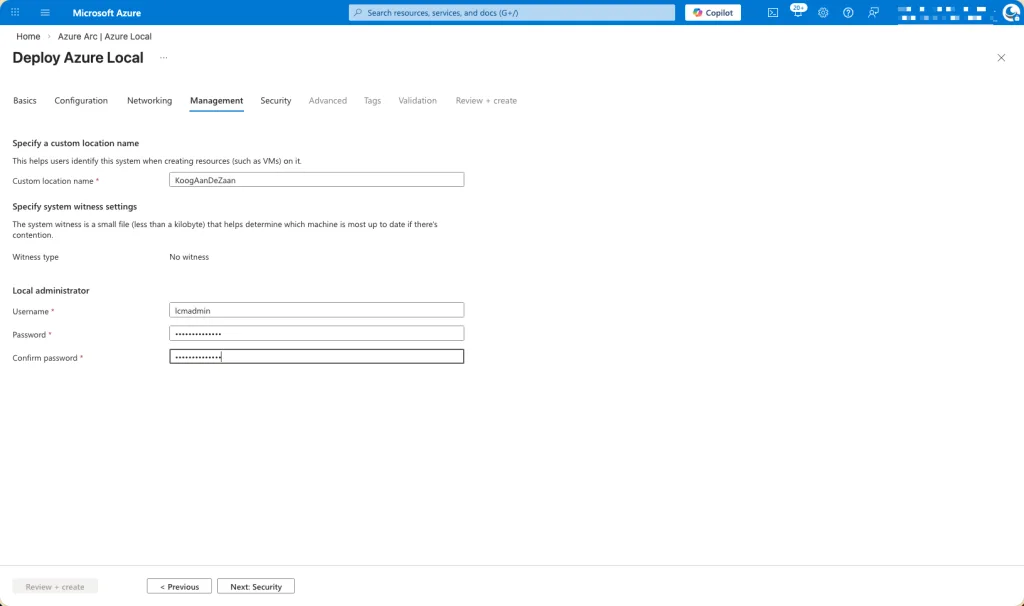
Enter the previously created local administrator account details in this section.
Ensure that the local admin account you created earlier is correctly specified here, including the username and associated credentials as required. This account will be used to authorize configuration actions, complete the deployment steps, and facilitate ongoing management of the node. Providing the correct local administrator credentials is essential to ensure a smooth setup process and to allow the platform extensions and management components to function as expected.
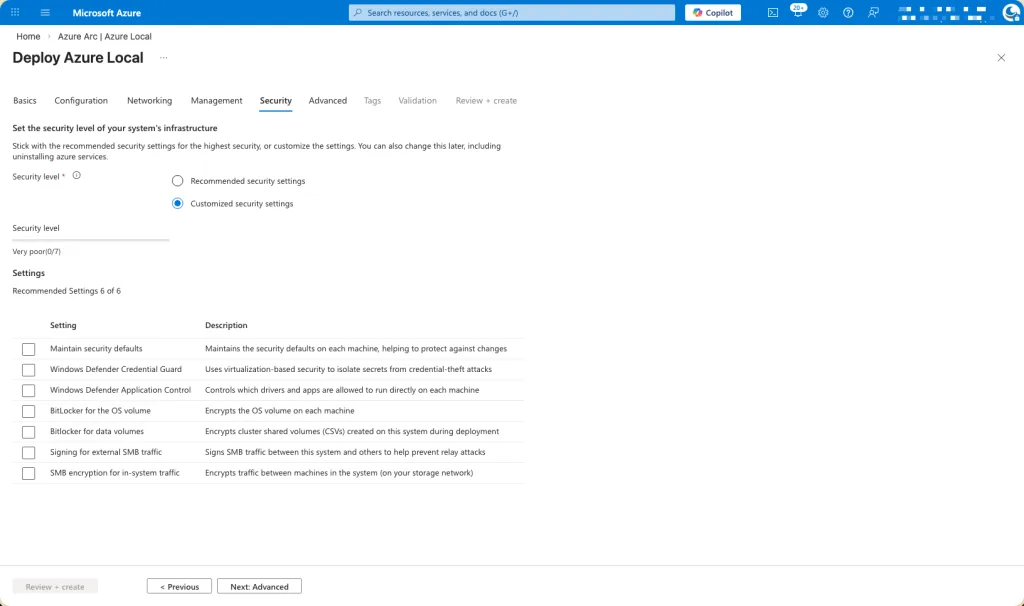
As done previously, all security settings have been intentionally disabled at this stage of the deployment.
This approach allows the configuration and onboarding process to proceed without interruptions or conflicts caused by incomplete dependencies. The security features will be configured and hardened at a later phase, once the environment is fully deployed, validated, and stable. This staged approach supports greater control over security implementation and ensures that settings are applied deliberately and in alignment with the final operational and compliance requirements.
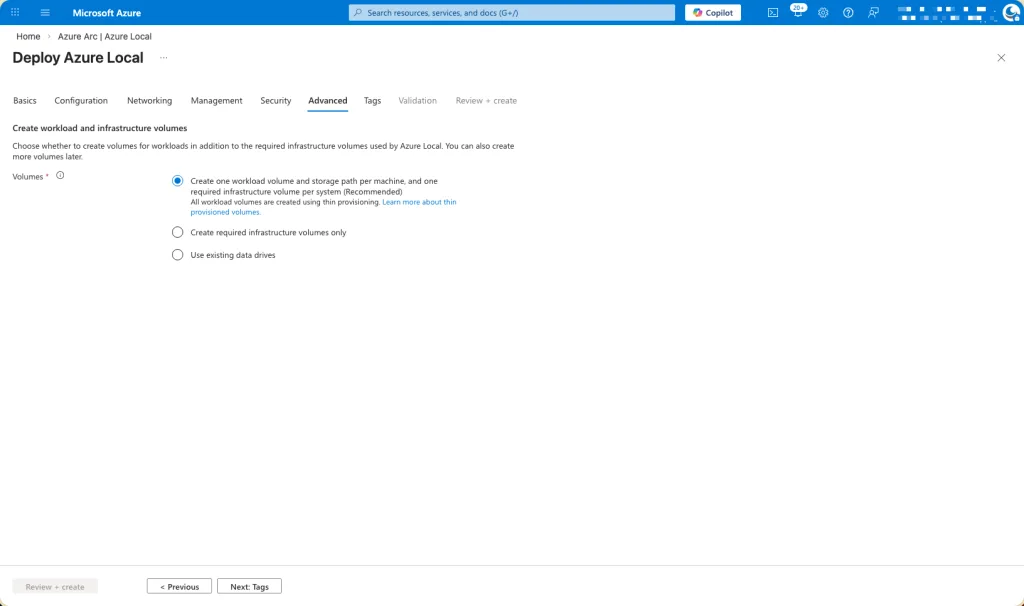
I allowed the deployment wizard to automatically create and configure the required cluster storage volumes.
By using the wizard-driven approach, the cluster storage volumes are provisioned according to Microsoft‑recommended best practices, ensuring correct sizing, layout, and placement across the cluster. This method reduces the risk of misconfiguration, accelerates deployment, and ensures that the storage architecture is properly aligned with the selected workload profiles and operational requirements. It also provides a clean, supported baseline that can be further optimized or expanded if needed at a later stage.
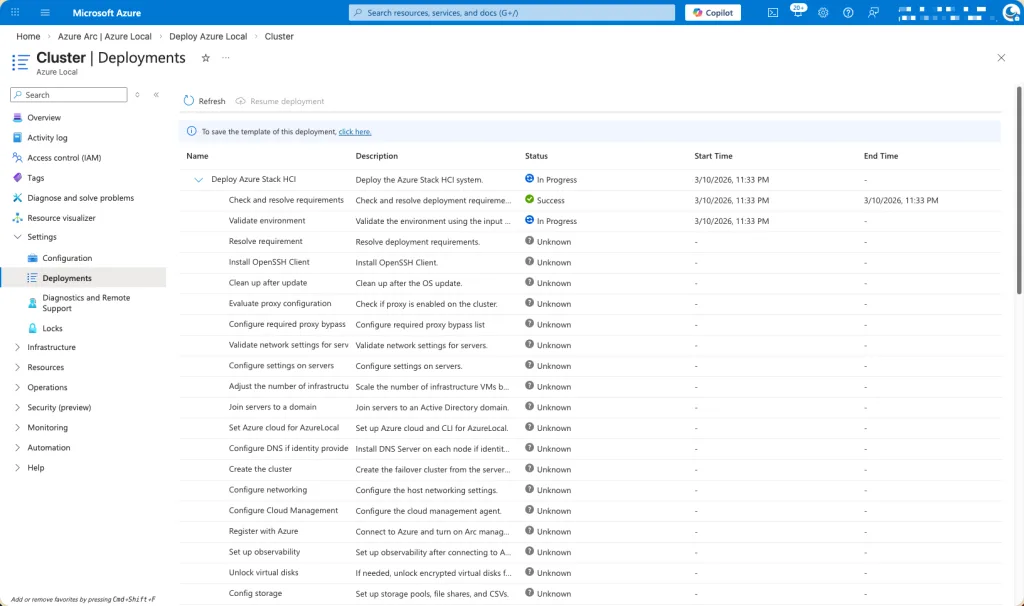
At this point, the deployment process transitions into the execution phase, and the environment begins provisioning in the background.
The system will now complete the remaining configuration and onboarding tasks automatically. This stage primarily involves monitoring progress while the platform finalizes setup and validation activities.
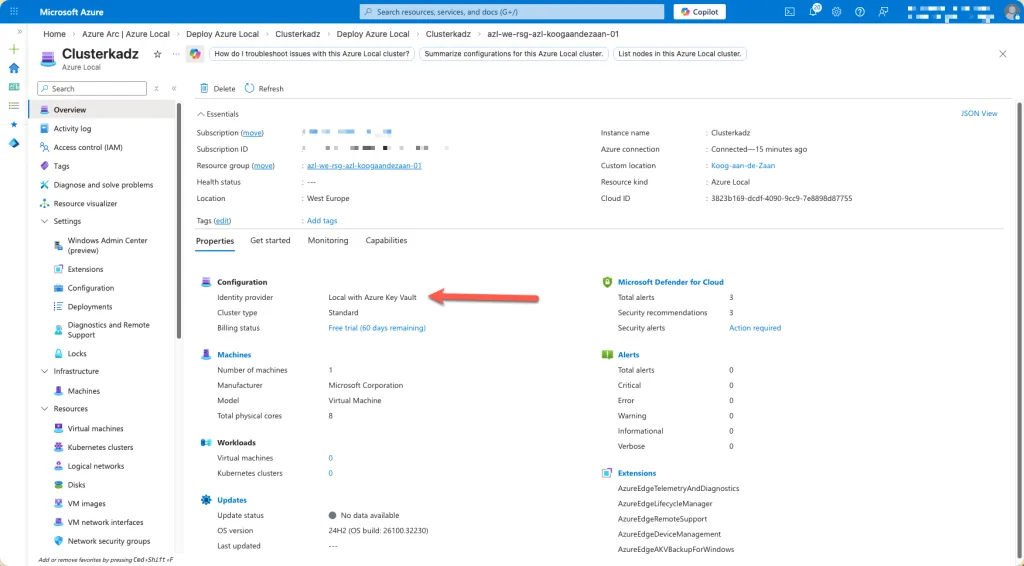
Yes, I’m aware that the cluster name differs from the earlier screenshots.
This change is intentional and expected. Due to an internet outage during the initial deployment, the process could not be completed successfully, which required the deployment to be redone from the beginning. As part of this fresh deployment, a new cluster configuration was created, resulting in a different cluster name compared to the previous screenshots.
The functional design and configuration approach remain consistent; only the cluster identifier has changed as a consequence of restarting the deployment process under stable connectivity conditions.
The deployment process itself is largely identical to a traditional domain‑joined deployment.
The primary distinction lies in the identity and name‑resolution prerequisites. Instead of using a domain account, a local administrator account must be created and used for the deployment. In addition, two DNS records need to be manually created to ensure proper name resolution and platform integration.
Aside from these differences, all other deployment steps, workflows, and validation phases follow the same approach as a domain‑joined configuration, providing a consistent and familiar deployment experience.