Azure Local | HomeLab setup – Part II
In the first post, we covered all the essential groundwork required to prepare for an Azure Local deployment. This included setting up the Azure tenant and configuring Active Directory—two foundational steps that ensure a smooth and secure environment for the cluster to operate in.
Now, with the preparations complete, we’re ready to move forward with the actual on-premises installation. In this post, we’ll begin by provisioning a virtual machine using Hyper-V, which will serve as the host for Azure Local. Once the VM is configured, we’ll proceed with registering it to Azure Arc. This step is critical, as it enables centralized management and visibility of the node directly from the Azure portal, bridging the gap between on-premises infrastructure and cloud-native tooling.
Running Setup
After starting the virtual machine, I promptly pressed a key during the boot sequence to ensure it launched from the ISO image. This step is crucial, as it initiates the installation process for Azure Local. Missing this brief window would result in the VM booting from the default disk, requiring a restart to retry the ISO boot. By catching it early, the setup proceeds smoothly, allowing the environment to load the installer and begin configuration without delay.
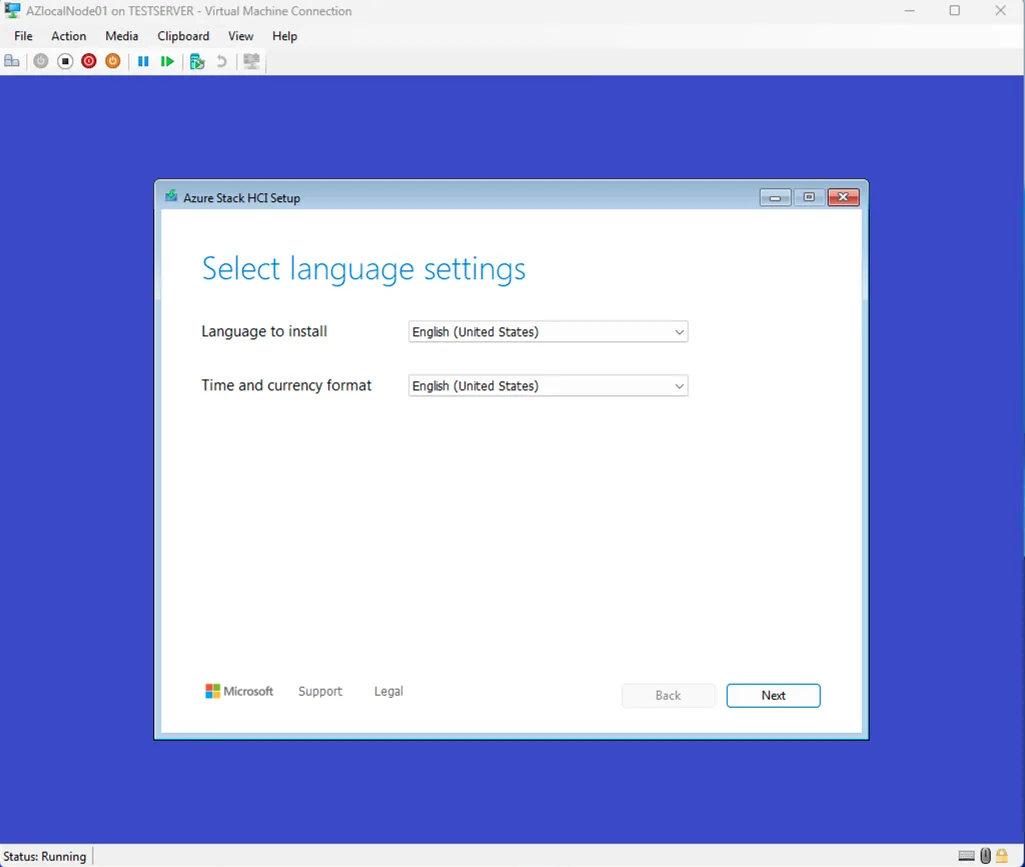
Selecting Dutch as your time and currency format is a perfectly natural choice when you’re working in a Dutch environment. It keeps the system aligned with your regional standards—dates appear in the familiar dd‑mm‑yyyy format, currency displays in euros, and time follows the conventions you’re used to. It also helps avoid small but annoying inconsistencies later in the setup, especially when logs, updates, or regional settings come into play.

I choose to use the United States-International Keyboard setup.
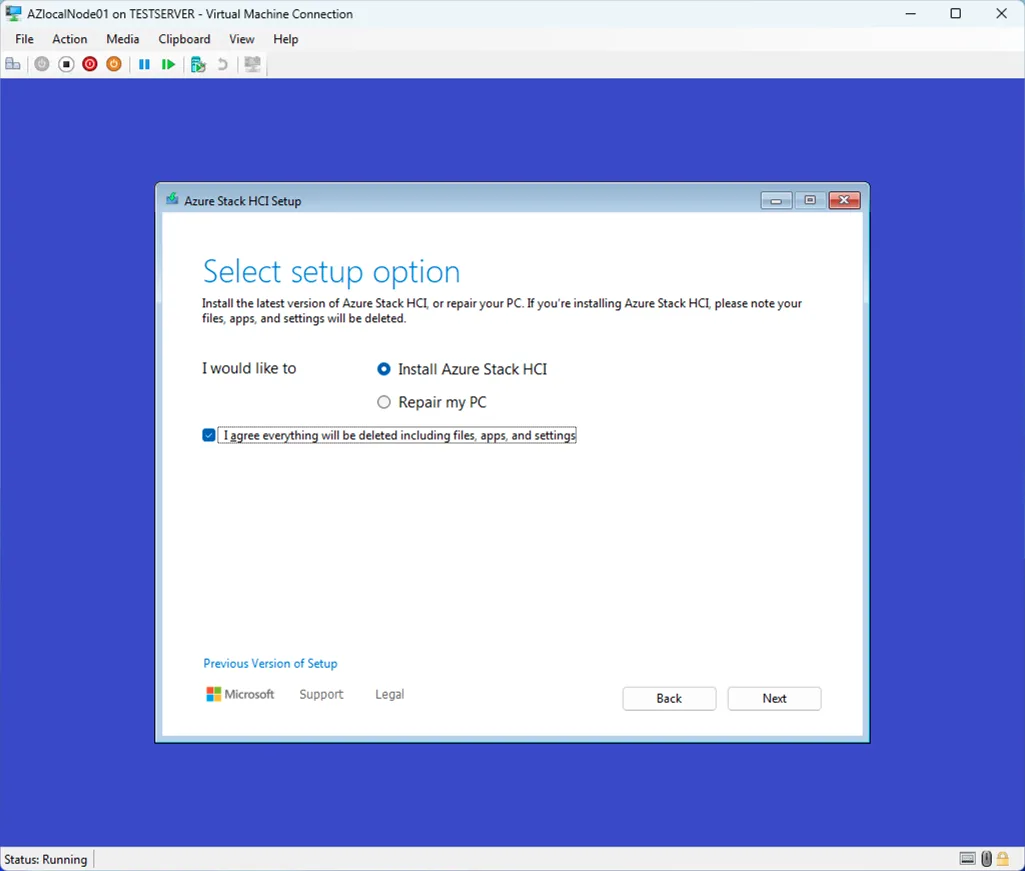
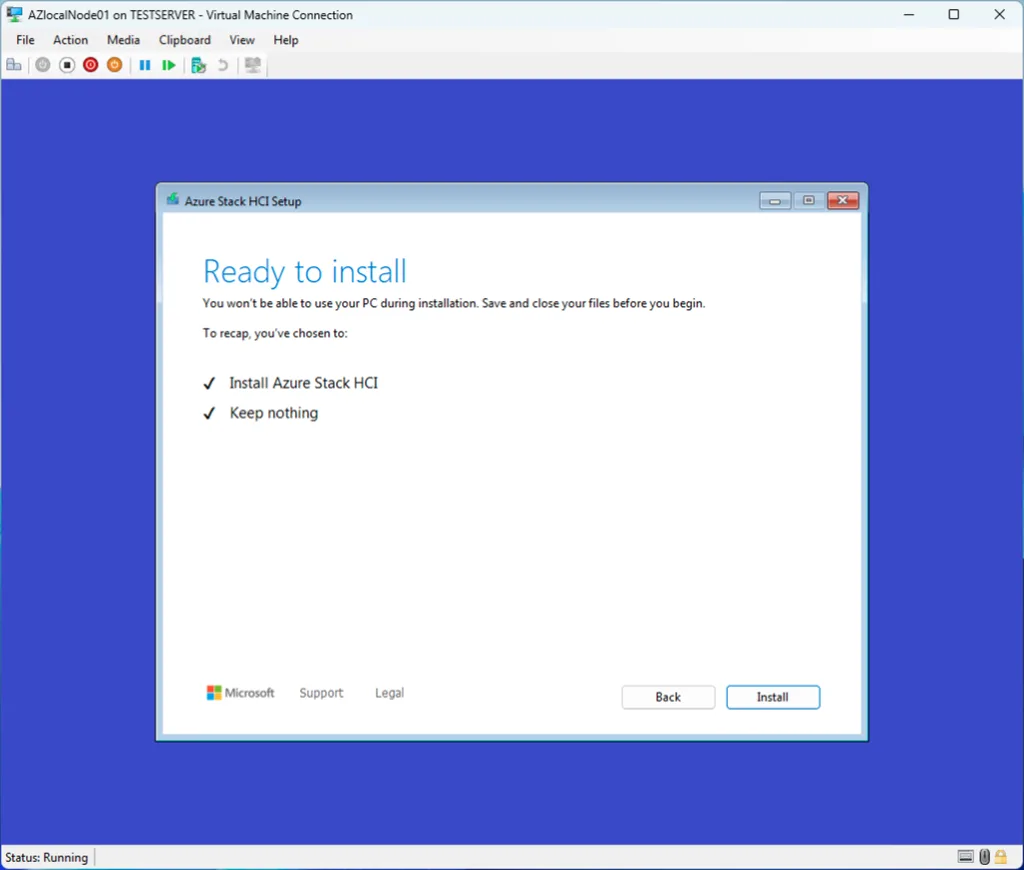
This step is fairly straightforward: we proceed with installing Azure Stack HCI. If you’re wondering what happened to Azure Local—don’t worry. Microsoft is not that fast with rebranding everything if they decide to use a new name. Azure Local was formally known as Azure Stack HCI.
By confirming this option, we also acknowledge that the installation will completely wipe the selected disk. All existing data, partitions, and configurations will be removed to prepare the system for a clean deployment. Since this VM is dedicated to Azure Local, that’s perfectly fine and ensures a stable, predictable foundation for the cluster.
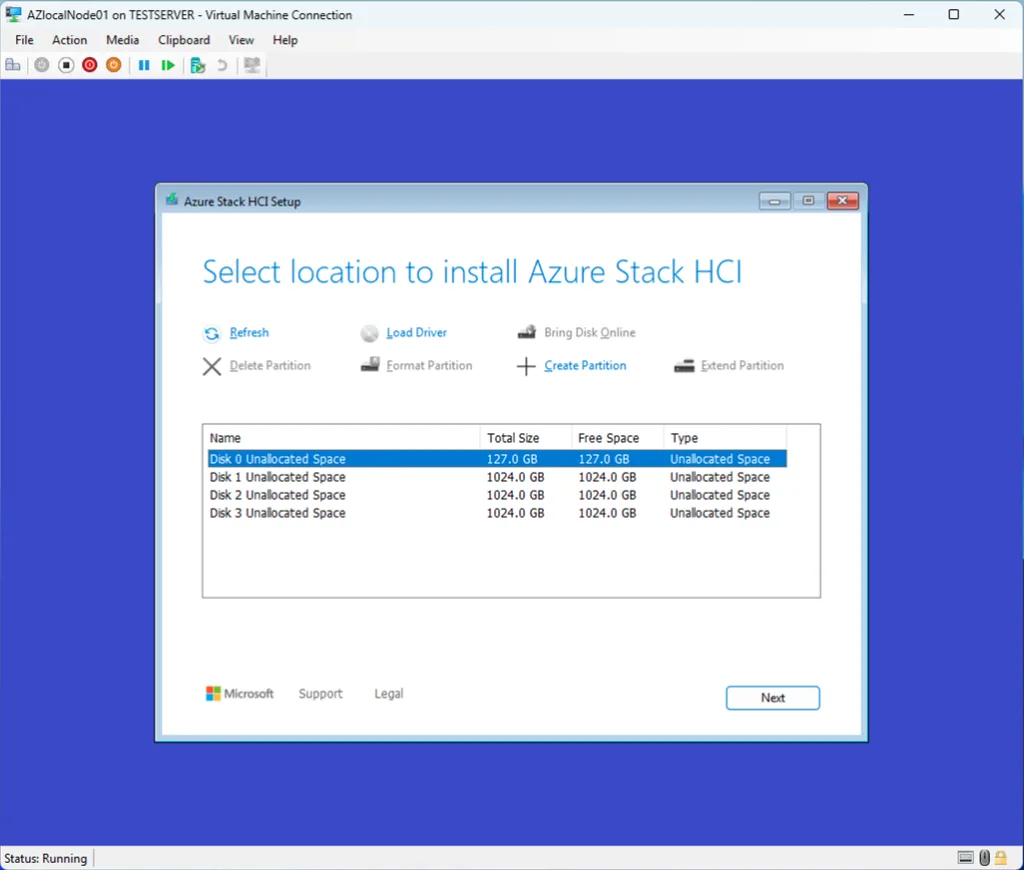
I selected the first disk, a 127 GB virtual drive, because it will serve solely as the boot disk for the operating system installation. Since this disk is dedicated to hosting the Azure Stack HCI base OS, its size is more than sufficient, and all workload‑related storage will be handled separately on the additional data disks.
After the installation completes, the system will reboot several times—much like a standard Windows Server deployment. When the process finishes, the node will start in Server Core mode. From here, you’ll be prompted to configure the initial system settings, including basic networking and the hostname. These steps are expected and form part of the normal post‑installation workflow.
One critical point to highlight: do not join the node to the domain at this stage. Although it may feel like the natural next step, Azure Local handles domain‑joining automatically during the configuration process in the Azure portal. Manually adding the node to the domain now will interfere with the deployment and can cause the setup to fail. Keeping the node in a workgroup until the portal-driven configuration begins ensures a clean and supported installation path.

Setting the Administrator password is one of the final steps before the node becomes ready for Azure Local configuration. In Server Core, this prompt appears immediately after the first boot sequence completes. At this stage, you simply provide the password that will later be used for the AsBuiltInAdmin account once Azure Local automatically renames it during setup.
This password becomes the local break‑glass credential for the node, so it’s worth choosing something strong and storing it securely. Even though day‑to‑day management will eventually happen through Azure Arc and domain‑based identities, this local admin password remains essential for maintenance and recovery scenarios.
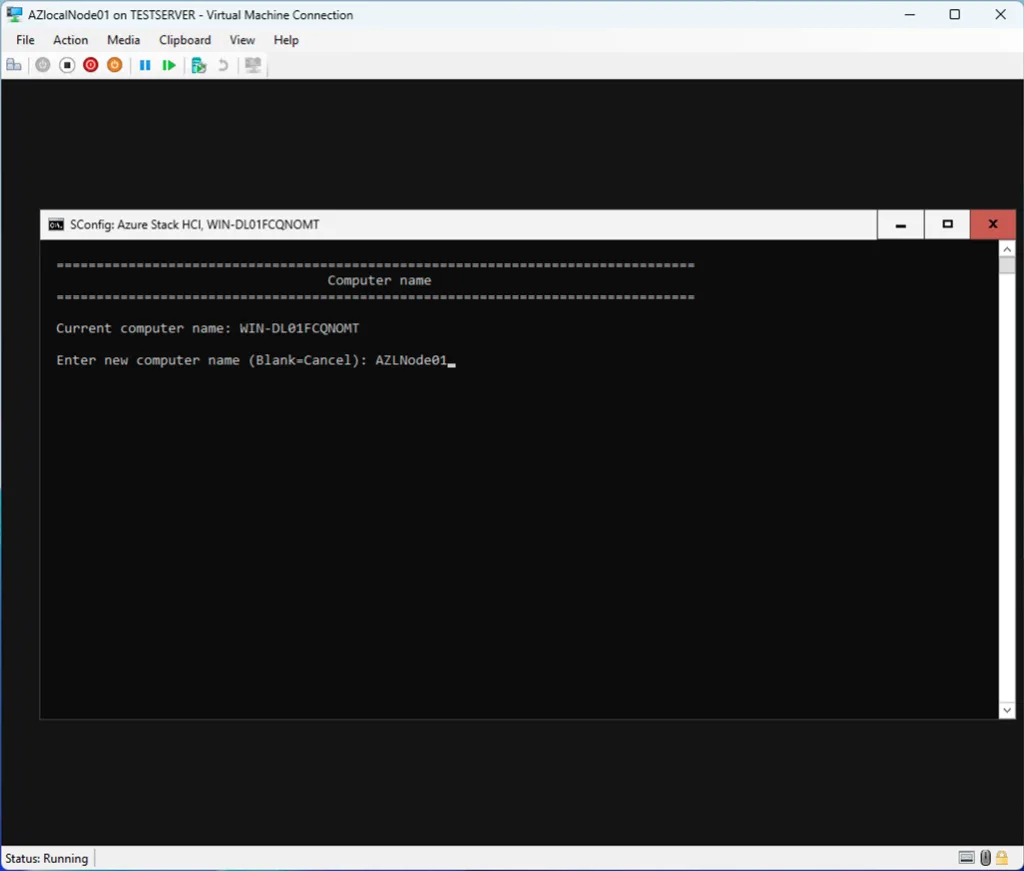
Choose a name that is unique within your environment, but also meaningful to you. It’s a good practice to incorporate details such as the physical location, datacenter, or even the rack where the node resides. This makes it much easier to identify and manage nodes later on, especially as your environment grows. A clear naming convention helps maintain structure and avoids confusion when troubleshooting or expanding the cluster.
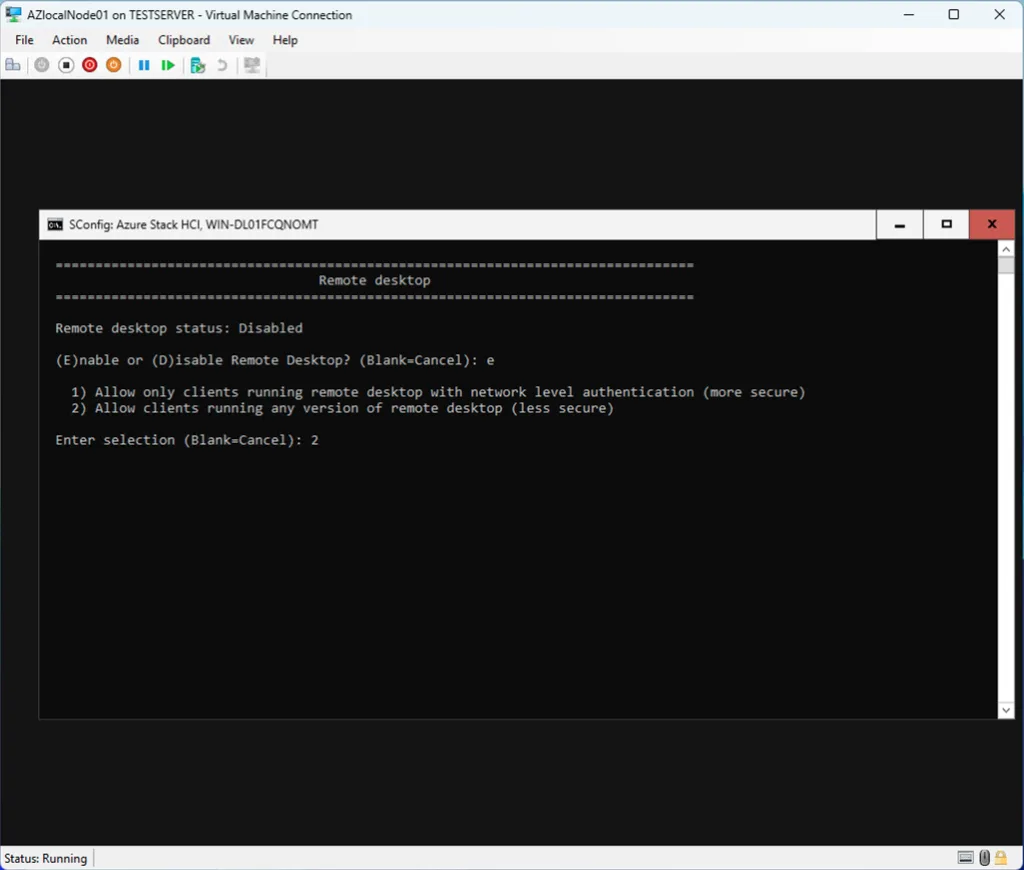
I enabled Remote Desktop on the node to simplify the next steps in the setup process. Having RDP access makes it much easier to run the required PowerShell commands for onboarding the server into Azure Arc. While it’s possible to perform the registration directly from the console, using Remote Desktop provides a more comfortable and efficient workflow—especially when copying commands, handling authentication prompts, or reviewing output during the Arc connection process.

Setting the correct timezone is an important part of the initial configuration, especially in environments where logs, updates, and authentication rely heavily on accurate timekeeping. After selecting the appropriate timezone on the node, there’s one additional step that’s easy to overlook but absolutely essential when running Azure Local inside Hyper‑V.
Hyper‑V includes a set of Guest Services, and one of them is Time Synchronization. By default, this feature keeps the VM’s clock aligned with the Hyper‑V host. While that’s useful for many workloads, it can interfere with Azure Local’s own time management. Azure Local expects to control time synchronization itself—typically through domain controllers or its internal time services. If Hyper‑V continues to override the VM’s clock, you may run into issues later during cluster validation, domain joining, or certificate handling.
For that reason, it’s important to disable Time Synchronization for this VM in the Hyper‑V settings. This ensures the node maintains its own time source and behaves consistently with the rest of your environment.
Once the timezone is set and Hyper‑V time sync is disabled, the node is ready to move on to the next configuration steps without risking time drift or conflicts.

After configuring the network settings, rebooting the machine ensures that all changes are properly applied. Once the node comes back online, you can connect to it via Remote Desktop. Using RDP at this stage makes the upcoming steps—especially running the Azure Arc onboarding commands—much more convenient. Copying scripts, handling authentication prompts, and reviewing output is simply smoother in a full remote session compared to working directly in the Server Core console.
A clean reboot and an RDP session set you up nicely for the Arc registration workflow that follows.
Setup Azure ARC
After connecting with RDP to the server, choose option 15 in the config menu to enter the Powershell window.
$Subscription = "<YOUR SUBSCRIPTION ID>"
$RG = "<YOUR RESOURCE GROUP>"
$Tenant = "<YOUR TENANT ID>"
Connect-AzAccount -SubscriptionId $Subscription -TenantId $Tenant -DeviceCode
$ARMtoken = (Get-AzAccessToken).Token
$id = (Get-AzContext).Account.Id
Invoke-AzStackHciArcInitialization -SubscriptionID $Subscription -ResourceGroup $RG -TenantID $Tenant -Region westeurope -Cloud "AzureCloud" -ArmAccessToken $ARMtoken -AccountID $id
This will trigger a bootstrap installation of the Azure ARC Agent installation, but also the registration of the agent in Azure Arc
When it is done, you will see in https://portal.azure.com/#view/Microsoft_Azure_ArcCenterUX/ArcCenterMenuBlade/~/servers the node appear.