Azure Local | HomeLab setup – Part III
In the previous article (https://www.gettothe.cloud/azure-local-homelab-setup-part-ii/), the foundation of our environment was established by provisioning the virtual machine and configuring Azure Local to run on top of it. We also onboarded the machine into Azure Arc, ensuring that it became fully visible and manageable through the Azure portal. This integration is essential, as it allows us to leverage Azure’s management capabilities while operating within a homelab environment.
With the groundwork now complete, we can move on to the next phase: building the cluster. In this post, we will begin that process by using the guided wizard available in the Azure portal. This wizard will walk us through each configuration step, helping us define all the necessary parameters and settings required to deploy a functional and well‑structured cluster. By following this workflow, we ensure consistency, reduce configuration errors, and streamline the overall deployment experience.
Create Cluster
Browsing to https://portal.azure.com/#view/Microsoft_Azure_ArcCenterUX/ArcCenterMenuBlade/~/allClusters will show this is empty. Click on create and choose for Azure Local Instance.
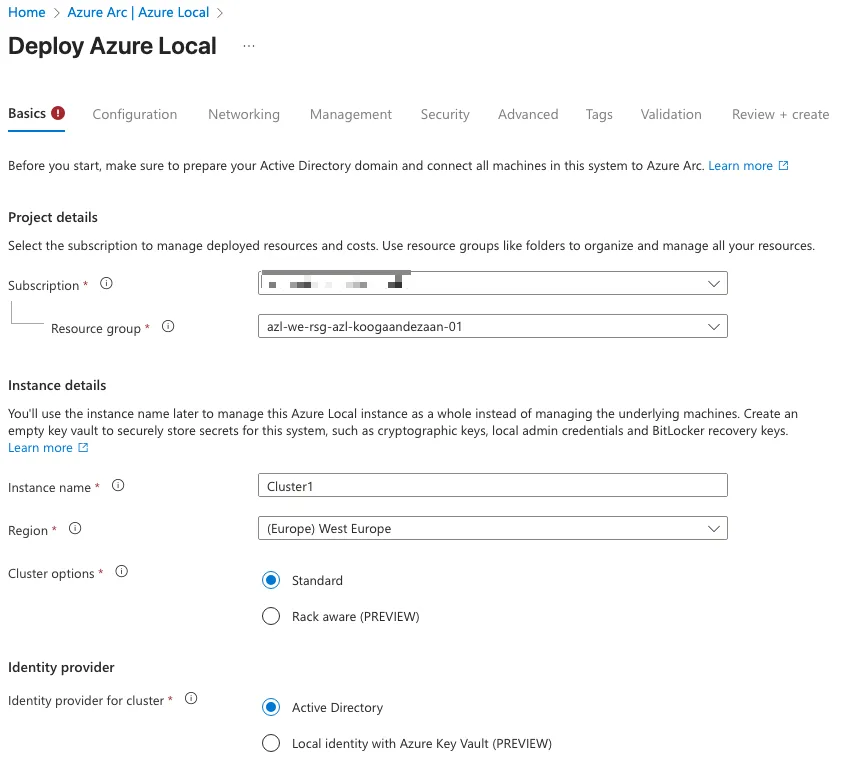
After initiating the cluster creation process, begin by selecting the appropriate subscription and resource group. It is important to ensure that all Azure Local–related resources—including the Azure Arc–enabled server object—reside within the same resource group. Keeping these components together simplifies management, improves visibility, and helps maintain a clean and consistent deployment structure.
Next, specify the instance name and choose the region in which the cluster will be registered. For this deployment, I opted to use Active Directory as the identity provider for the cluster. This approach integrates seamlessly with existing domain services and provides a familiar authentication model.
Starting with Azure Local version 2510, an additional identity option is available: Local Identity backed by Azure Key Vault. When using this method, each node in the cluster must share the same local username and password. Ensuring this consistency across nodes is essential for successful authentication and cluster operations.
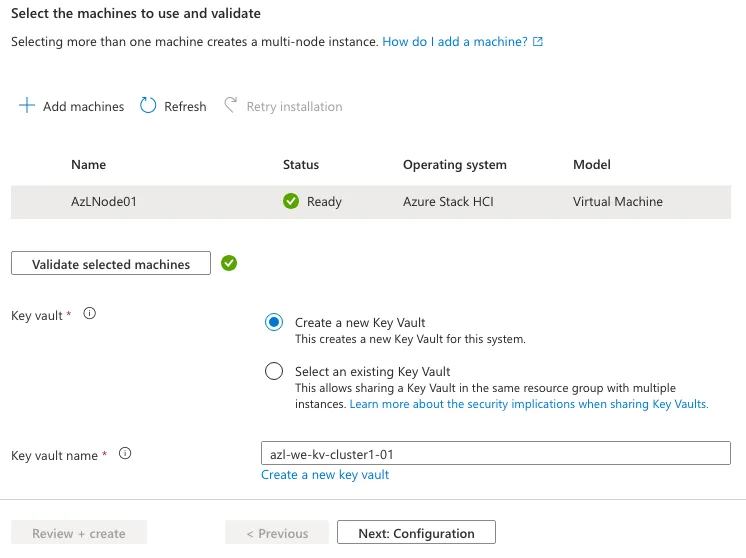
After adding the node to the environment, I allowed the system to complete the automated extension installation process. These extensions are essential, as they verify that the node meets all prerequisites and is capable of running the required Azure Local services. This validation step ensures that the cluster will operate reliably once deployed.
Since no Key Vault was available in the resource group at the time, I created a new one to support the identity and security requirements of the deployment. Once the node successfully passed all validation checks, I proceeded to the configuration phase to continue building out the cluster.
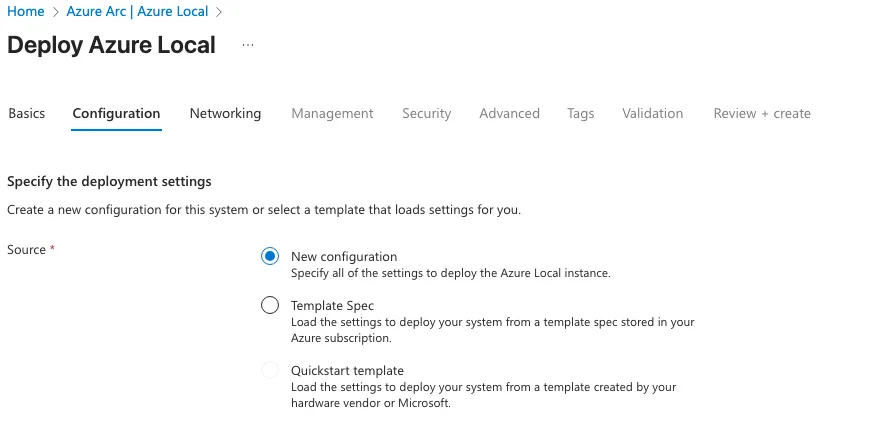
I selected a New Configuration.
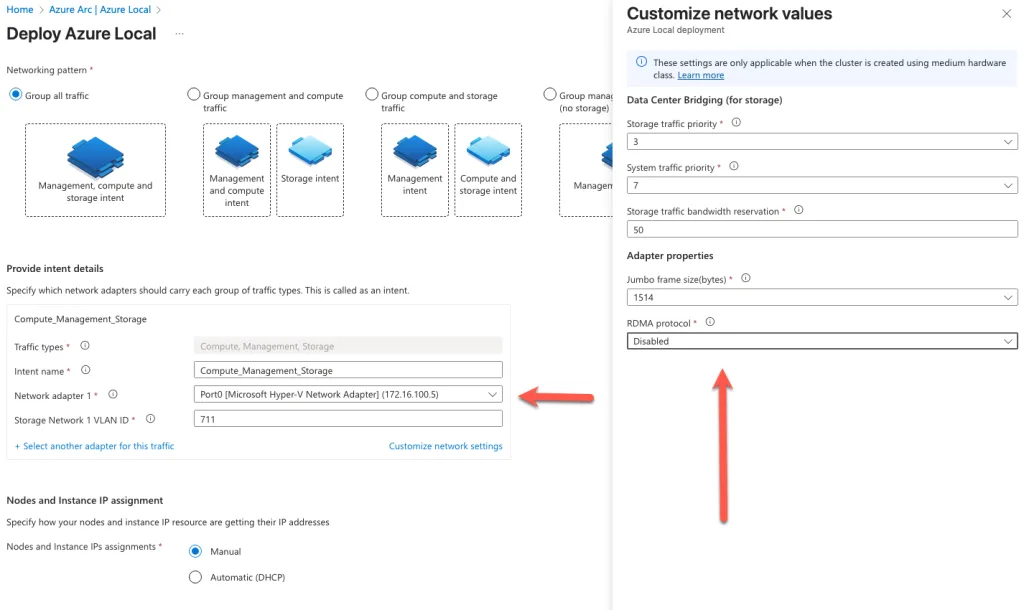
Since Hyper-V is being used as the underlying virtualization platform, it is necessary to modify the network adapter settings to ensure compatibility with Azure Local. Specifically, the RDMA (Remote Direct Memory Access) protocol must be disabled. RDMA is typically used to enhance performance in high-throughput environments, but it is not supported in this configuration and can interfere with proper network operations within the homelab setup.
Additionally, when deploying a multi-node configuration, Microsoft provisions a default storage VLAN to facilitate internal communication between nodes. This VLAN automatically assigns IP addresses within the 10.71.1.x subnet range and is used to handle east-west traffic—either directly between nodes or routed through a switch. This dedicated network segment ensures efficient and isolated data transfer for storage-related operations, contributing to the overall stability and performance of the cluster.
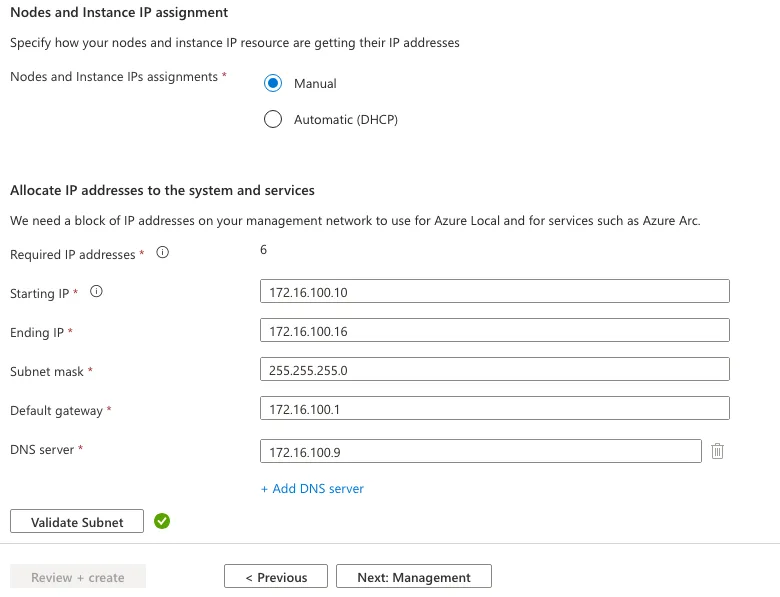
As part of the cluster configuration process, it is mandatory to allocate a contiguous set of at least six free IP addresses within the same subnet. These IPs will be automatically assigned by the system to various roles within the Azure Local cluster. Manual assignment of specific IPs to individual roles is not supported; instead, the platform dynamically maps each IP to its designated function based on internal logic.
The IPs will be used for the following critical components:
- Host IP: Facilitates basic management access to the node.
- Failover Cluster IP: Supports cluster communication and ensures high availability across nodes.
- Azure Resource Bridge IP: Powers the management stack that integrates Azure Local with Azure services.
- VM Update Role IP: Manages and orchestrates updates for virtual machines within the cluster.
- OEM VM IP: Reserved for vendor-specific virtual machines, if applicable to the deployment.
Providing a clean, unused IP range within a single subnet ensures seamless provisioning and avoids conflicts during setup. This requirement is essential for maintaining network stability and enabling the cluster to function as intended.
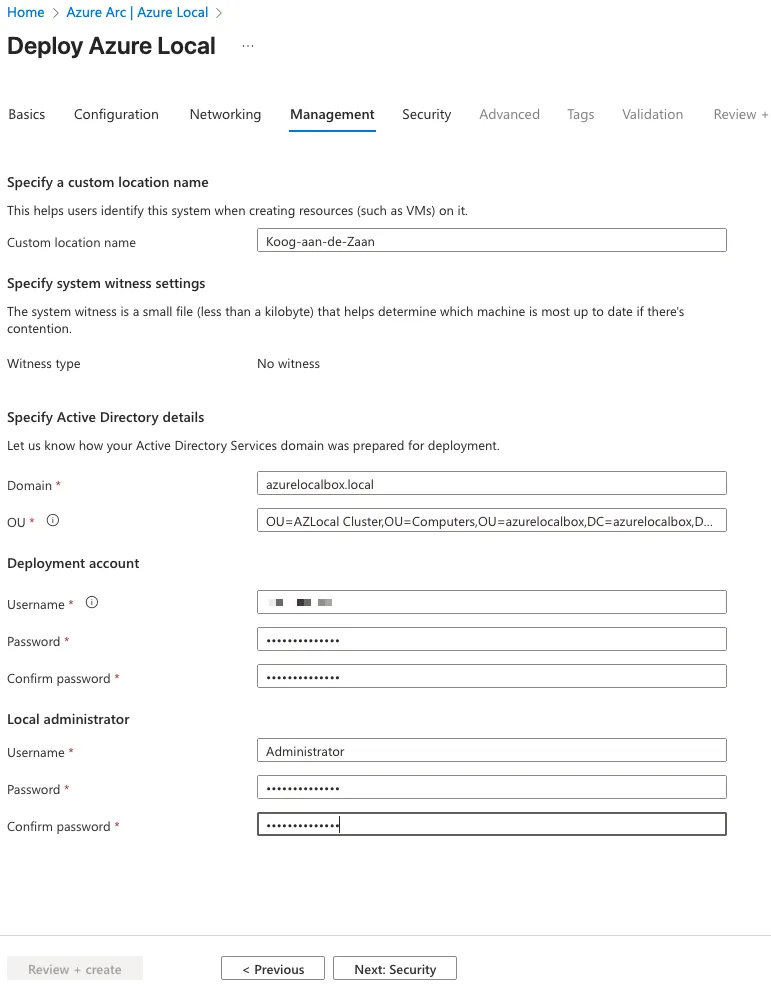
Because Active Directory was selected as the identity provider, the next step is to supply all required domain‑related information. The Organizational Unit (OU) used for the cluster was already created during the preparation phase in the earlier posts. It is important to ensure that GPO inheritance is disabled on this OU so that no unintended Group Policy settings are applied to the cluster resources during deployment or operation.
The deployment account you specify here should be the same account that was created during the Active Directory preparation steps. This account requires the appropriate permissions to join machines to the domain and manage objects within the designated OU. Providing these details ensures that the cluster can be correctly domain‑joined and that identity integration functions as expected.
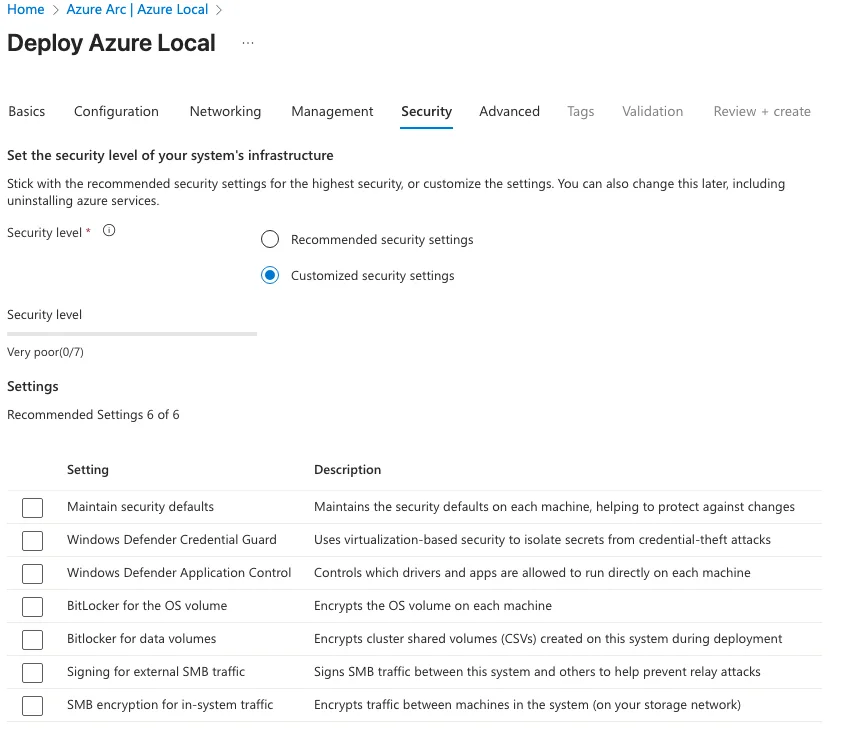
In this scenario, I chose to temporarily disable the security settings. This decision was made to ensure that the deployment process could proceed without interruption and to allow me to apply the required security configurations manually afterward. Disabling these settings also helps accelerate the initial deployment, making it easier to validate the environment before enforcing stricter controls.

To simplify the configuration and ongoing management, I opted to use a single workload volume and storage path per machine. By standardizing the layout in this way, all attached disks are automatically aggregated into a unified storage pool. This approach allows the cluster to treat the combined capacity as one cohesive storage unit, streamlining provisioning and ensuring consistent performance across the environment.
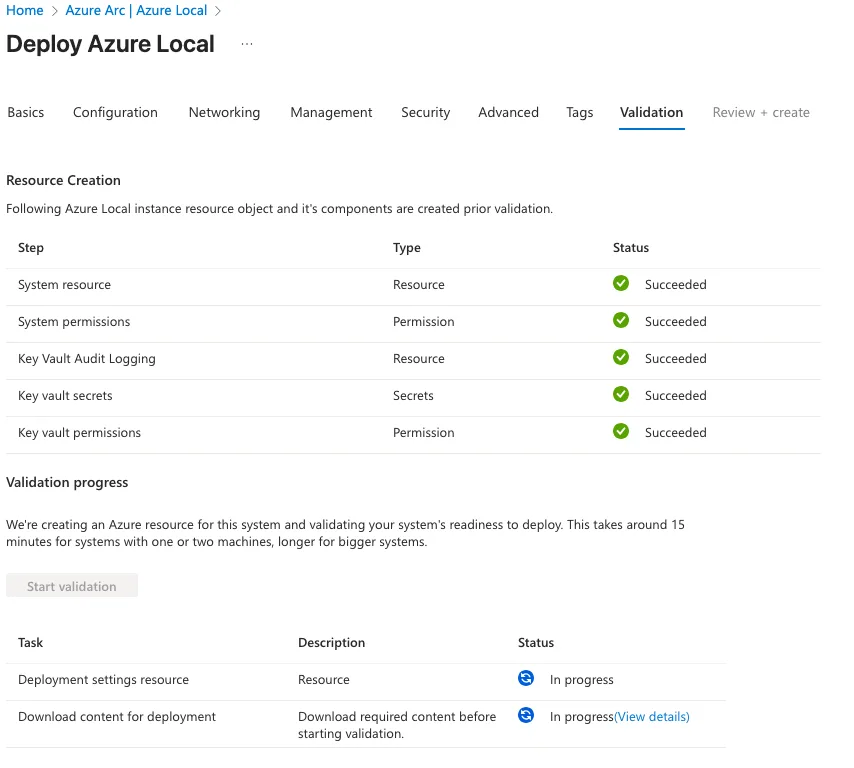
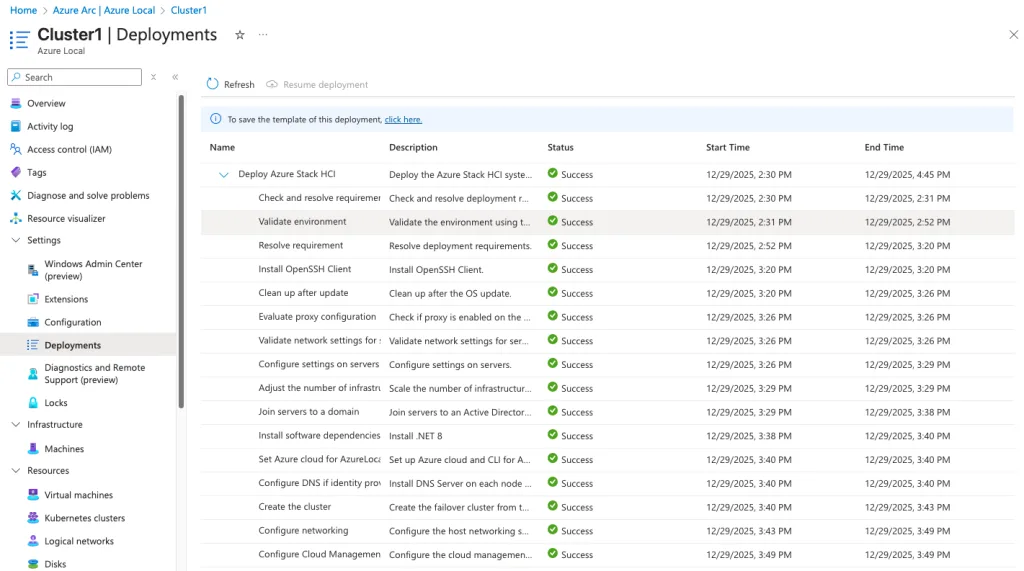
Once the validation process has successfully completed, the option to begin creating the Azure Local cluster becomes available. At this stage, all prerequisites have been confirmed, allowing the deployment workflow to proceed with the actual cluster provisioning.