Azure Virtual Desktop | Image Builder part III

Header Avd Imagebuilder
Reading Time: 3 minutes

In the first post (link) we have prepared the subscription, in the second post (link) we have setup a Azure Compute Gallery with an Image Definition. Now everything is prepared to start creating a template.

Image Template

By default, you are able to use the marketplace images from microsoft. Those images are in the basics enough to start Azure Virtual Desktop or use it as base image for your personal golden image.

An image template in Azure Virtual Desktop is a JSON file that contains your choices of source image, distribution targets, build properties, and customizations. Azure Image Builder uses this template to create a custom image, which you can use as the source image for your session hosts when creating or updating a host pool.

Custom image templates enable you to easily create a custom image that you can use when deploying session host virtual machines (VMs). Using custom images helps you to standardize the configuration of your session host VMs for your organization.

You can leverage a variety of built-in customizations or add your own customization scripts to install applications or configurations. For example, you can add built-in scripts to install language packs, set the default language of the operating system, enable time zone redirection, disable Storage Sense, install FSLogix and configure Profile Container, enable FSLogix with Kerberos, enable RDP Shortpath for managed networks, enable screen capture protection, configure Teams optimizations, configure session timeouts, add or remove Microsoft Office applications, and apply Windows Updates.

When the custom image is being created and distributed, Azure Image Builder uses a user-assigned managed identity. Azure Image Builder uses this managed identity to create several resources in your subscription, such as a resource group, a VM used to build the image, Key Vault, and a storage account. The VM needs internet access to download the built-in scripts or your own scripts that you added.

Create a template

Image

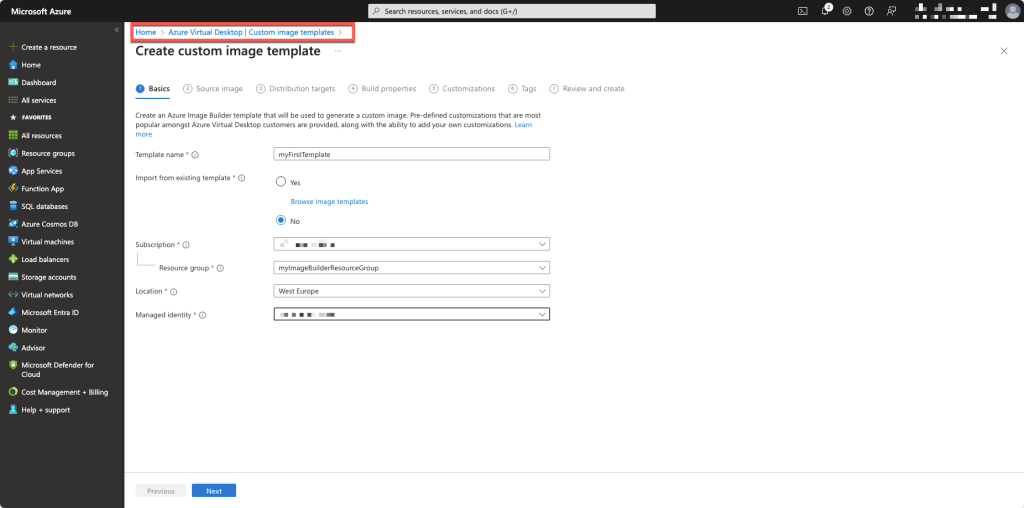
In the portal, go to Azure Virtual Desktop and click create. Enter your details and click next.

Image

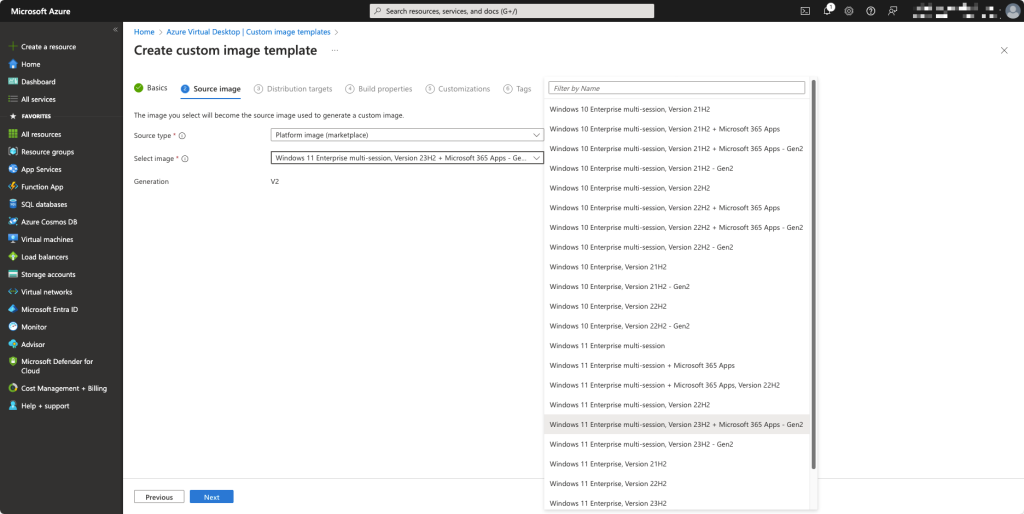
Choose your favorite image from the marketplace. Keep in mind that all versions are in English. Adding a different language is possible though this process or with a custom script like is described here.

Image 1

Select your created gallery and definition

Image 2

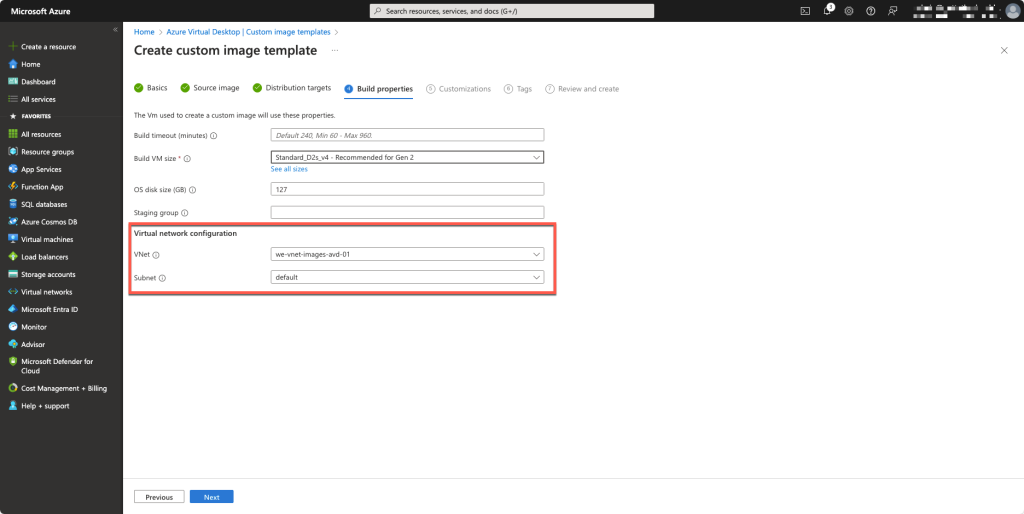
Select the correct VNET for the image to use during build. It is also possible to provide a maximum build time for the image.

Image 3

Using the built-in scripts, you are able to do a lot of customisation during the build. You can configure just the way you like it.

Image 4

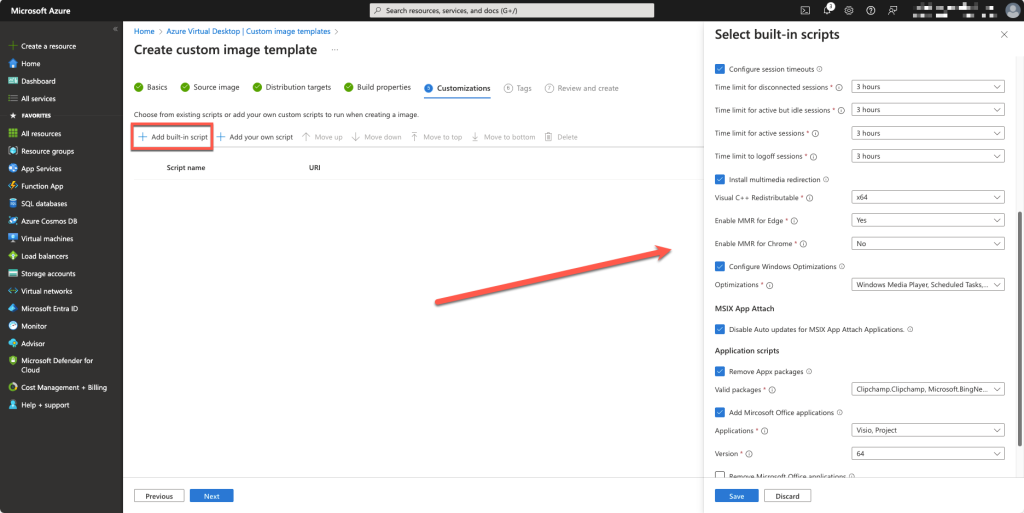
Configuring Session TimeOuts, Optimizations, remove AppX Packages which are not needed, adding VISIO or Project and apply windows updates.

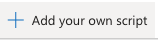
You can also add your own script if you have for example custom applications to install. This script can be stored on azure storage or GitHub and be added using :

Image 5

When everything is ready and in place, you can export the JSON of course if you want to convert it to Bicep and run it in a DevOps pipeline. Otherwise just create the image template.

Image 6

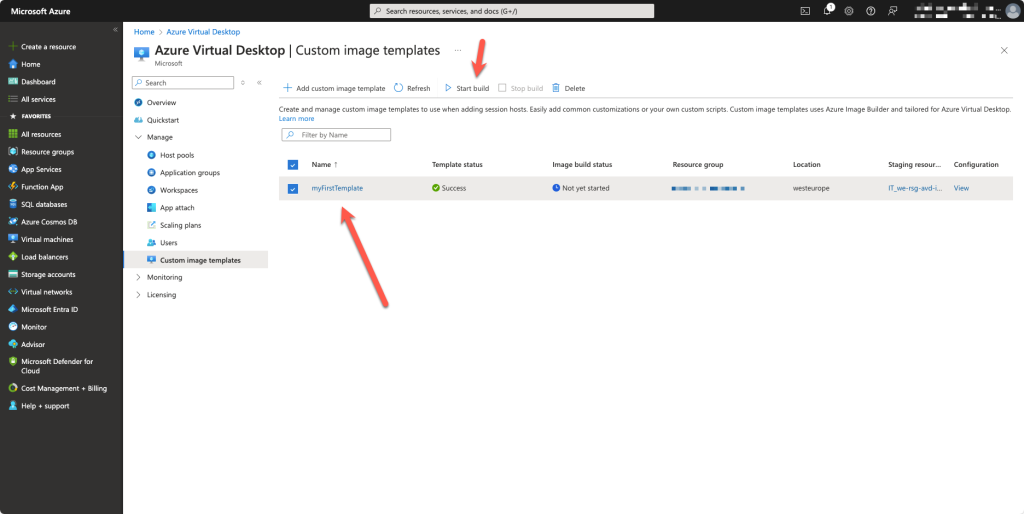
Use the Start build to start the creating of the image. Every time you would like to have a new image, you can use this template to run.

Share and Enjoy !

Shares
Designer (23)

Stay close to the action—follow GetToThe.Cloud across social!
Deep dives and hands‑on how‑tos on Azure Local, hybrid cloud, automation, PowerShell/Bicep, AVD + FSLogix, image pipelines, monitoring, networking, and resilient design when the internet/Azure is down.

🔗 Our channels
▶️ YouTube: https://www.youtube.com/channel/UCa33PgGdXt-Dr4w3Ub9hrdQ
💼 LinkedIn Group: https://www.linkedin.com/groups/9181126/
✖️ X (Twitter): https://x.com/Gettothecloud
🎵 TikTok: https://www.tiktok.com/@gettothecloud
🐙 GitHub: https://github.com/GetToThe-Cloud/Website
💬 Slack: DM us for an invite
📲 WhatsApp: DM for the community link

WP Twitter Auto Publish Powered By : XYZScripts.com
We use cookies to personalise content and ads, to provide social media features and to analyse our traffic. We also share information about your use of our site with our social media, advertising and analytics partners. View more
Cookies settings
Accept
Privacy & Cookie policy
Privacy & Cookies policy
Cookie name Active

Who we are

Our website address is: https://www.gettothe.cloud

Comments

When visitors leave comments on the site we collect the data shown in the comments form, and also the visitor’s IP address and browser user agent string to help spam detection. An anonymized string created from your email address (also called a hash) may be provided to the Gravatar service to see if you are using it. The Gravatar service privacy policy is available here: https://automattic.com/privacy/. After approval of your comment, your profile picture is visible to the public in the context of your comment.

Media

If you upload images to the website, you should avoid uploading images with embedded location data (EXIF GPS) included. Visitors to the website can download and extract any location data from images on the website.

Cookies

If you leave a comment on our site you may opt-in to saving your name, email address and website in cookies. These are for your convenience so that you do not have to fill in your details again when you leave another comment. These cookies will last for one year. If you visit our login page, we will set a temporary cookie to determine if your browser accepts cookies. This cookie contains no personal data and is discarded when you close your browser. When you log in, we will also set up several cookies to save your login information and your screen display choices. Login cookies last for two days, and screen options cookies last for a year. If you select "Remember Me", your login will persist for two weeks. If you log out of your account, the login cookies will be removed. If you edit or publish an article, an additional cookie will be saved in your browser. This cookie includes no personal data and simply indicates the post ID of the article you just edited. It expires after 1 day.

Embedded content from other websites

Articles on this site may include embedded content (e.g. videos, images, articles, etc.). Embedded content from other websites behaves in the exact same way as if the visitor has visited the other website. These websites may collect data about you, use cookies, embed additional third-party tracking, and monitor your interaction with that embedded content, including tracking your interaction with the embedded content if you have an account and are logged in to that website.

Who we share your data with

If you request a password reset, your IP address will be included in the reset email.

How long we retain your data

If you leave a comment, the comment and its metadata are retained indefinitely. This is so we can recognize and approve any follow-up comments automatically instead of holding them in a moderation queue. For users that register on our website (if any), we also store the personal information they provide in their user profile. All users can see, edit, or delete their personal information at any time (except they cannot change their username). Website administrators can also see and edit that information.

What rights you have over your data

If you have an account on this site, or have left comments, you can request to receive an exported file of the personal data we hold about you, including any data you have provided to us. You can also request that we erase any personal data we hold about you. This does not include any data we are obliged to keep for administrative, legal, or security purposes.

Where we send your data

Visitor comments may be checked through an automated spam detection service.
Save settings
Cookies settings