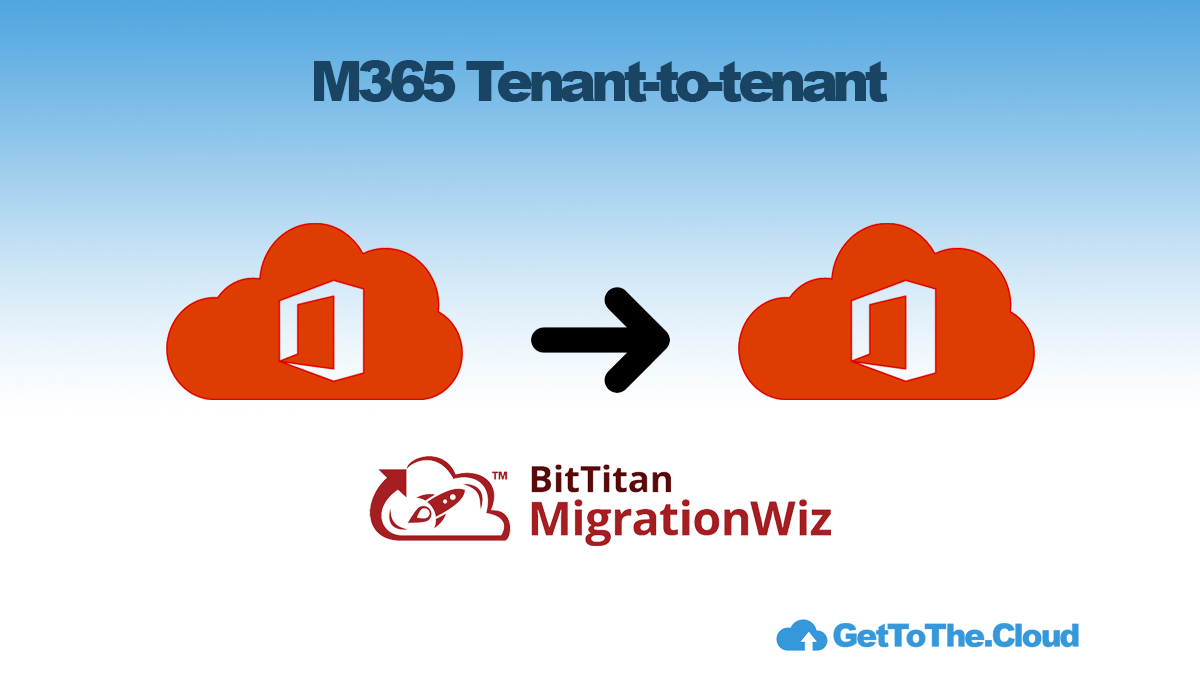
There are couple of ways to preform a tenant-to-tenant migration. For email you can use the native Microsoft MRS proxy but you will need an enterprise agreement before that is possible. Other tooling like Quest-on-demand and BitTitan use API’s which make it slower but will do the job for you. The downside that it is only one-way migration and compared to the Microsoft native MRS proxy it is not synchronising. In M365 Cross Tenant Migration | Part I – GetToTheCloud I explain how to use the native tooling.
Using BitTitan can be a struggle. The documentation lacks information and support is not on a good level. Beside that the tooling does what is needs to do.
For this example we use the cheapest license (Pricing – BitTitan MigrationWiz) called Mailbox Migration ($12). It can be used to only one identity and cannot be reused. Keep in mind that Room/Equipment and Shared mailboxes also need a license. For migrating Archives you will need an additional add-on license. In the portal there is an option to assign licenses. For this type of license, you cannot do that within the portal. It will be assigned when you start the Full of Pre-Staged migration.
Full migration
With a full migration you create a cut over moment where all the e-mail is transferred to the new tenant. At that moment you cut over the mx records and the use of the account
Pre-Staged migration
With a pre-staged migration, you will migrate first the last x months to the new tenant. Users will start working with that data and receive the new e-mail in the new tenant. At that moment that users start working, you will start the migration of the rest of the e-mail.
Prepare Source tenant
First you need to do an inventory of the source tenant. M365 Cross Tenant Migration | Exchange Inventory – GetToTheCloud and M365 Migration | Exchange Inventory V2 | GetToTheCloud can be a good help with that. Use that export to determine the scope.
Also you need to create a service administrator account. This account will be used to create the connection to the tenant. This account needs to be Global Administrator without MFA and Exchange Administrator and needs to have an Office 365 license with mailbox. On both tenants you need to increase the EWS Throttling policy through the portal of https://admin.microsoft.com and request a support ticket.
Prepare Target tenant
The target tenant must be secure and setup with all the conditional access policies as required, including the security of Exchange Online. Order the correct amount of licenses and create a group in Azure Active Directory for group-based licensing.
Add the new domain to the tenant. If you are going to use the old domain you would use the .onmicrosoft.com domain for identity mapping.
Also you need to create a service administrator account. This will be used to create the connection to the tenant. This account needs to be Global Administrator without MFA and Exchange Administrator and needs to have an Office 365 license with mailbox.
BitTitan
BitTitan offers an co-existence when you have the other license : User Migration Bundle. The downside is that it is not functioning without a lot of changes. The co-existence will be build with a powershell script running on the backend. It is using basic authentication so that will not work if you not have extended the use of basic authentication. Also all new tenants since 1st April 2023 do not have the ability to enable this.
Using the legacy migration mode will need some work manually. I will explain what to do and how to setup.
Setup BitTitan
Assuming you have already created an account in BitTitan and added the needed licenses we will continue to setup a project.
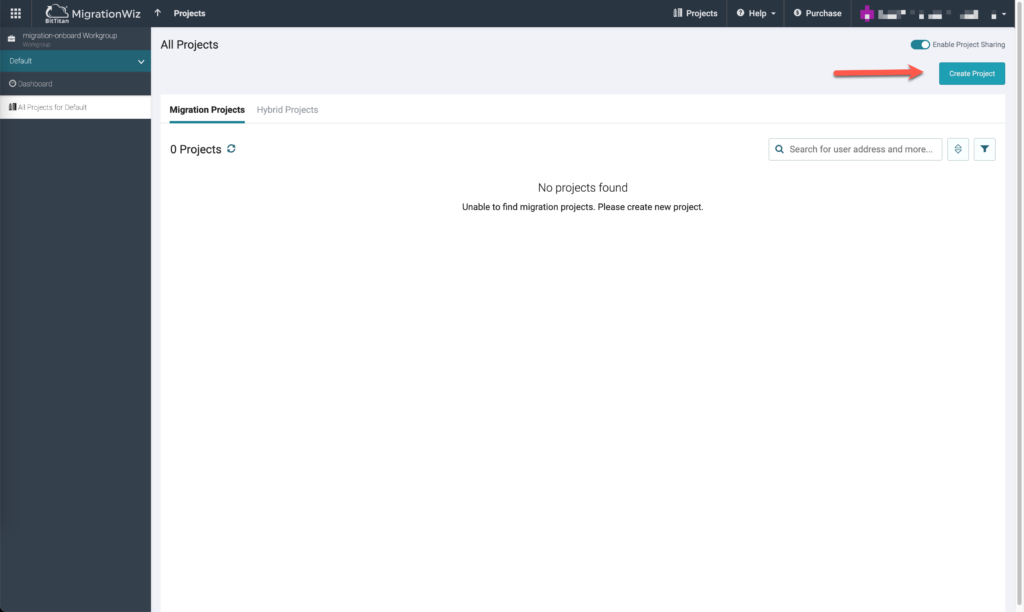
Select Create Project
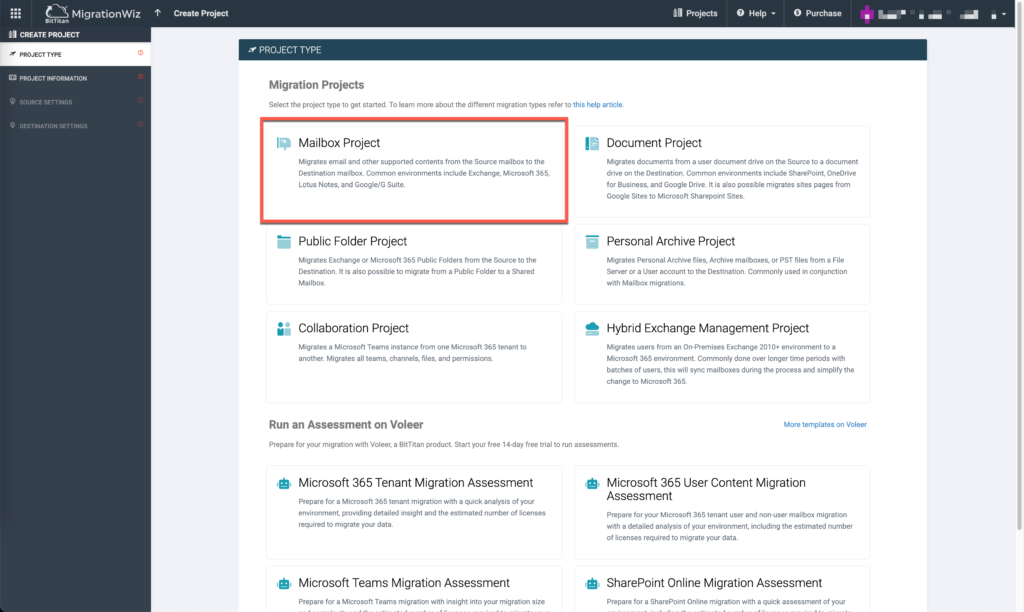
Select Mailbox Project
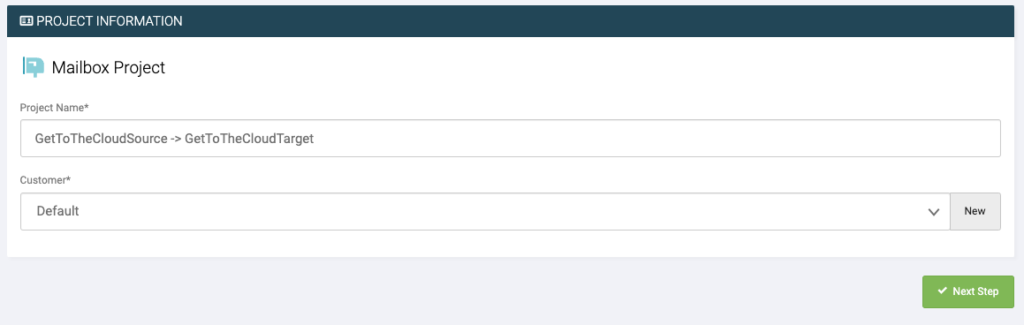
Provide a name for the project and select the customer

Create a new endpoint and fill in the source information
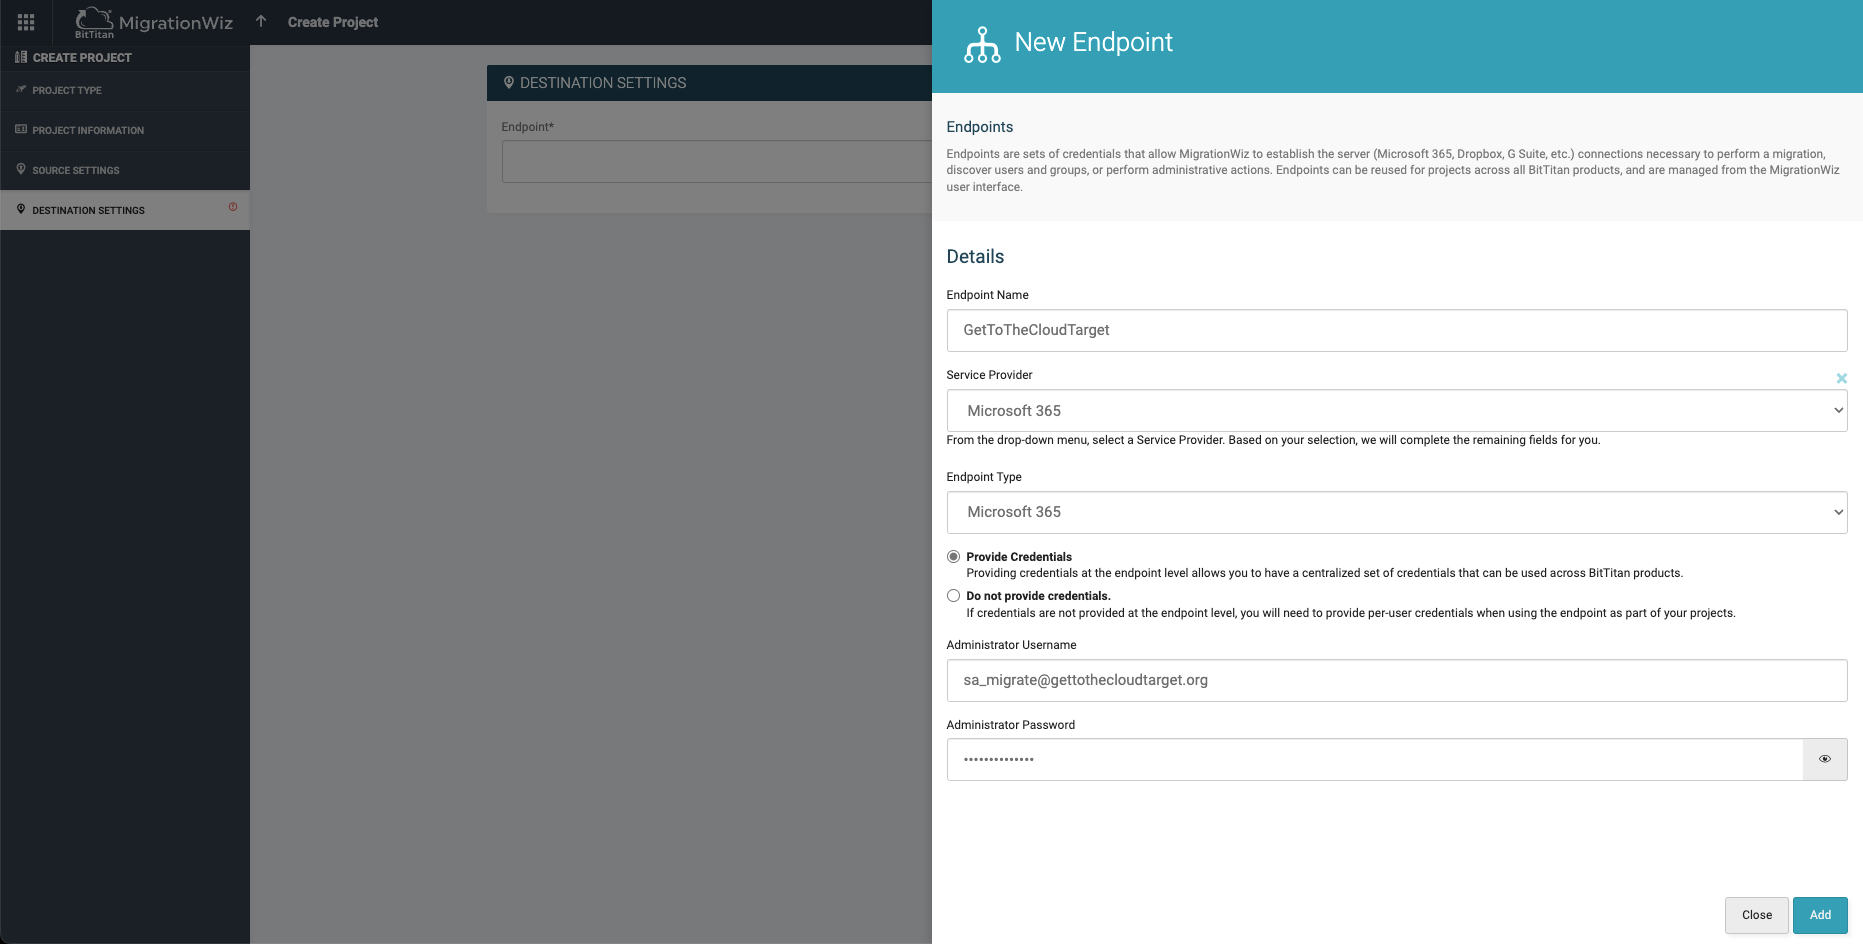
The same needs to be done for the Target tenant.
Skip the settings for the Co-Existence and finish creating the project.
To use the project for authenticating to Exchange Online, you will need Modern Authentication. This is the default in Exchange Online and we are going to use an App Registration for this.
Browse to Register an application – Microsoft Azure in the source tenant.
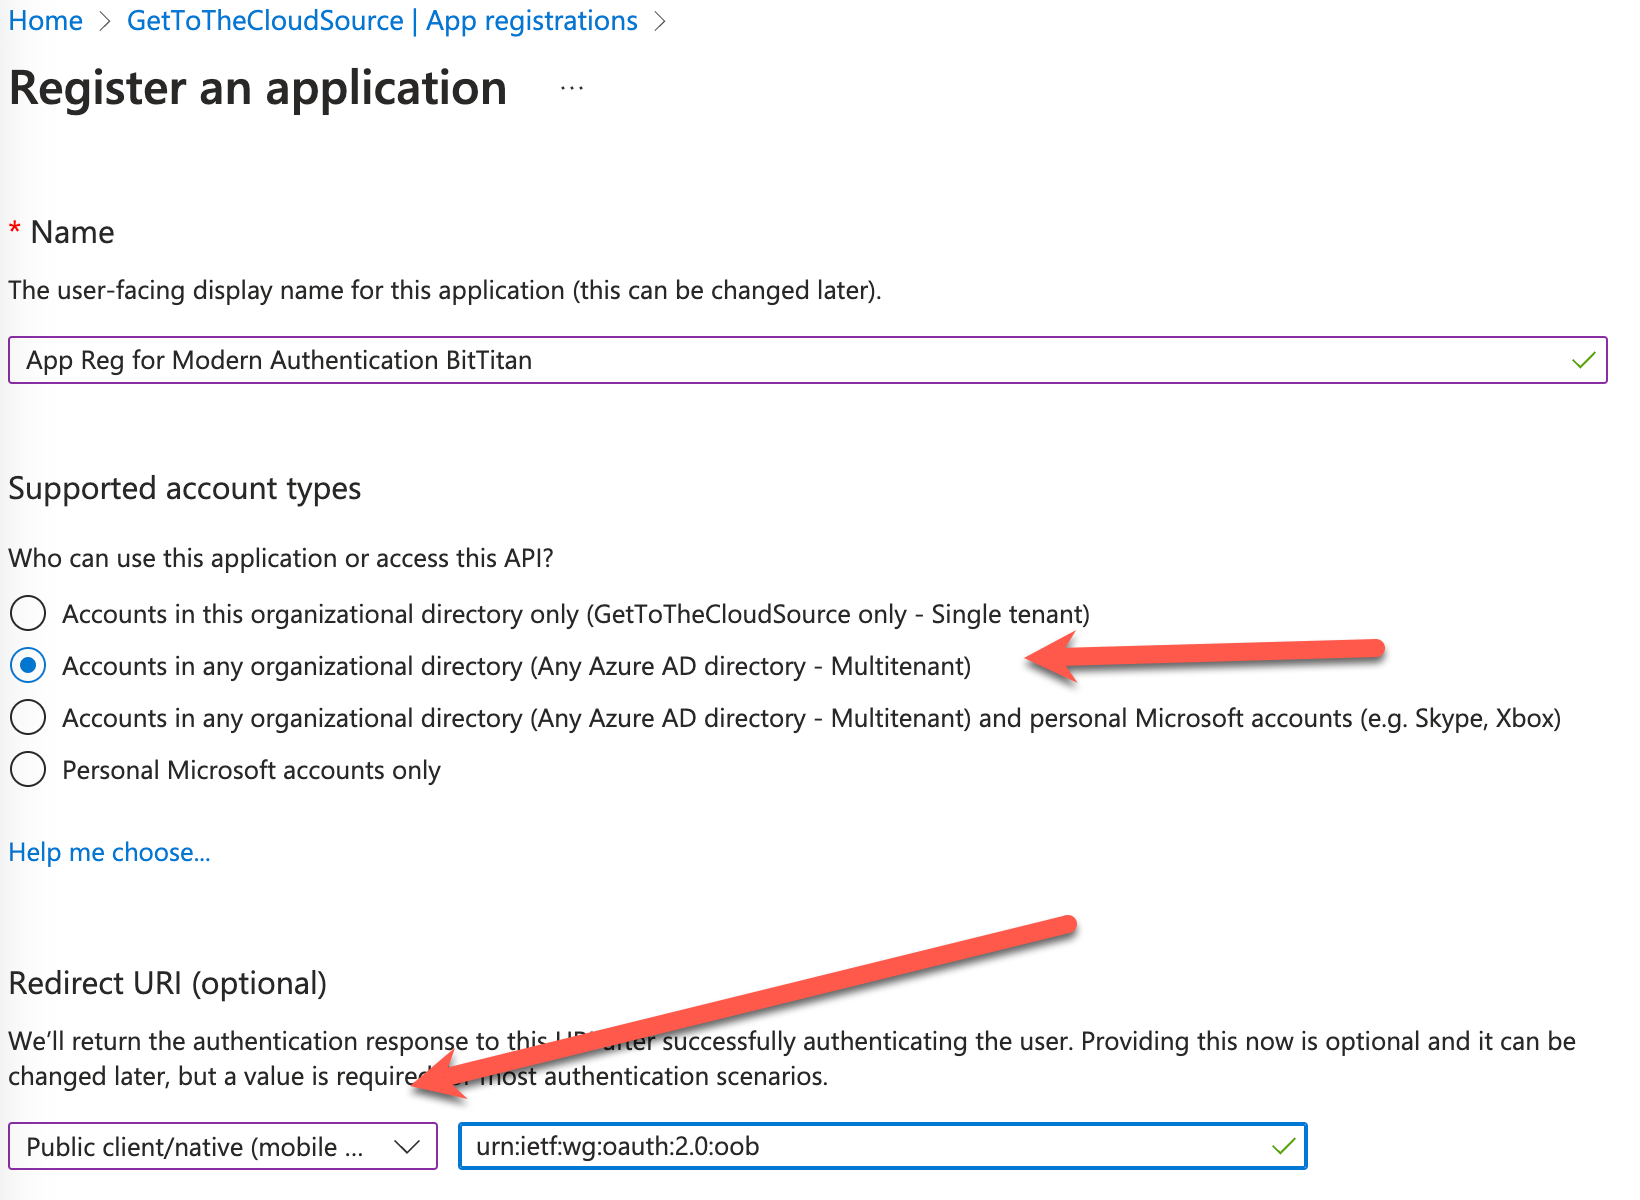
Public client/native (Mobile apps) with Redirect URI: urn:ietf:wg:oauth:2.0:oob
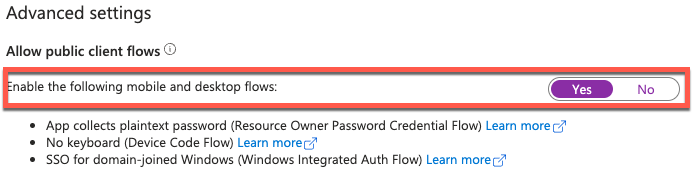
Browsing to the Authentication blade within the app registration, you need to enabled Allow public client flows. By default this is NO.
The app registration needs to be created in both tenants. This so the identity mapping can authenticate and discover. Now add some api permissions
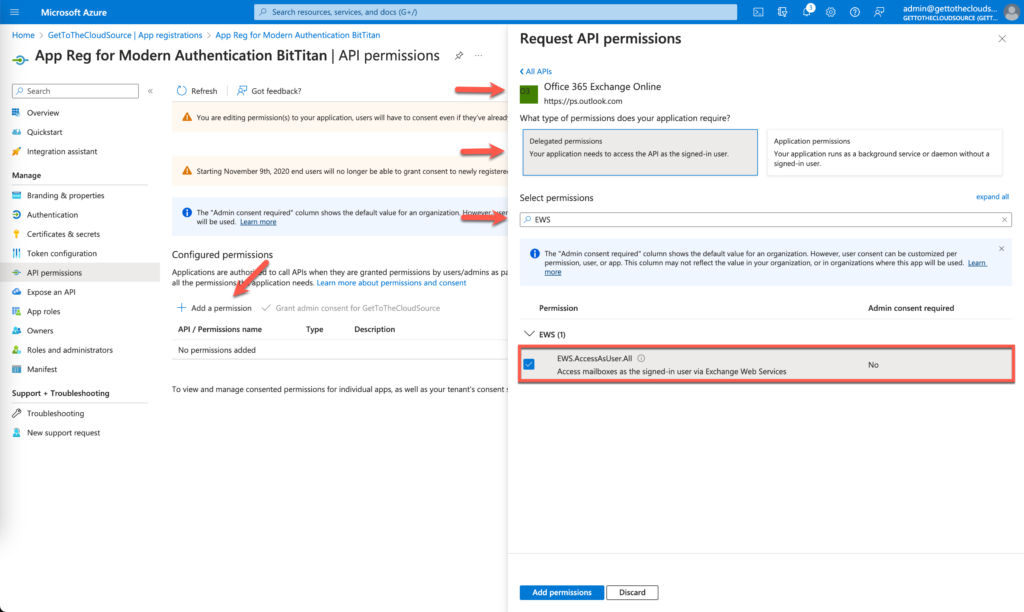
API Permissions -> Add a Permission -> APIs my organization uses -> Office 365 Exchange Online -> EWS.AccessAsUser.All
DON’T FORGET TO GRANT ADMIN CONSENT!!
Again in both tenant this is needed!!
Start an Elevated PowerShell command prompt and run the following commands
#connection to Exchange Online source
Connect-ExchangeOnline
#Customize organization
Enable-OrganizationCustomization
#Enabled impersonation
New-ManagementRoleAssignment -Role "ApplicationImpersonation -user [Service account just created]
#Disconnect Exchange
Disconnect-ExchangeOnline -Confirm:$false
This needs to be run on Source and Target environment.
Back to BitTitan portal, we go to the Advanced Options of the project. We are going to add the AppId and TenantID to this project
ModernAuthClientIdExport=xxxxxxxx-xxxx-xxxx-xxxx-xxxxxxxxxxxx (source tenant)
ModernAuthTenantIdExport=xxxxxxxx-xxxx-xxxx-xxxx-xxxxxxxxxxxx (source tenant)
ModernAuthClientIdImport=xxxxxxxx-xxxx-xxxx-xxxx-xxxxxxxxxxxx (target tenant)
ModernAuthTenantIdImport=xxxxxxxx-xxxx-xxxx-xxxx-xxxxxxxxxxxx (target tenant)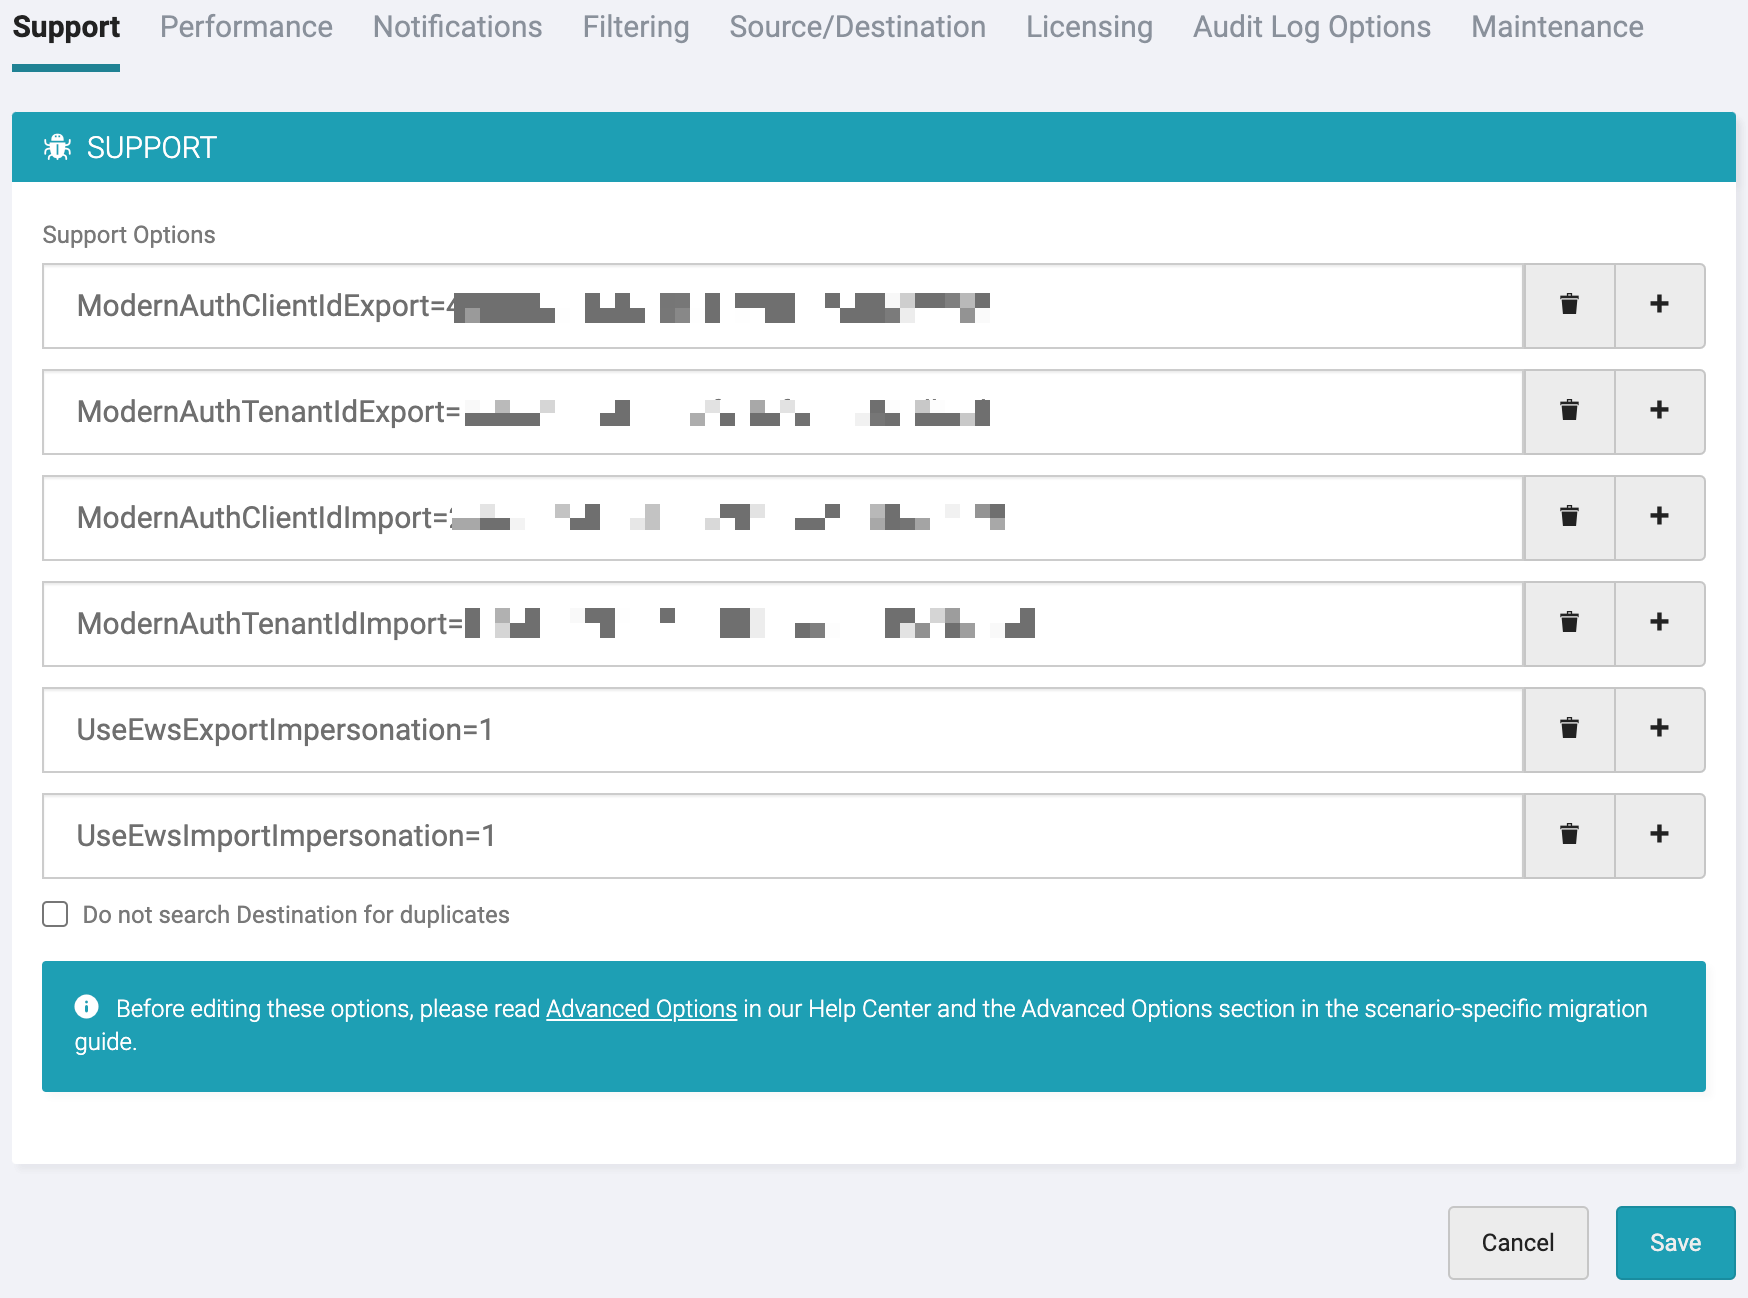
and Save the project !
Now you are all set to add users. This can be done multiple ways.
* Quick add by just providing Source mail address and Target address
* Bulk add by uploading a CSV
* Discovery Items
If you have used the Excel sheet you should be able to use a CSV to add this. In the CSV (which can be downloaded from the portal) only the Source mail address and the destination address required.
To make sure the mailboxes can be migrated you need to create the new mailbox on the target. The UPN is used to map the identity.
I just added two mailboxes to migrate manually

To verify if the mailboxes can be found on both sides, you can select the accounts and click Start -> Verify Credentials. No data will be migrated but only a permission check both sides to check if everything is correct in place for a migration.

If the status is set to Completed (verification), you will be able to start the migration.
Before you migrate
Before you migrate, you might want to forward the e-mail from the start of the migration form the source to the target. Keep in mind you place a forward rule on that mailbox with the option: -DeliverToMailboxAndForward $false
Also you would want to set the LegacyExchangeDN from the Source to the Target. You need to export this (if you use the Inventory script as mentioned above this will be exported to the Users tab) and add this to the NEW account as a X500 address.