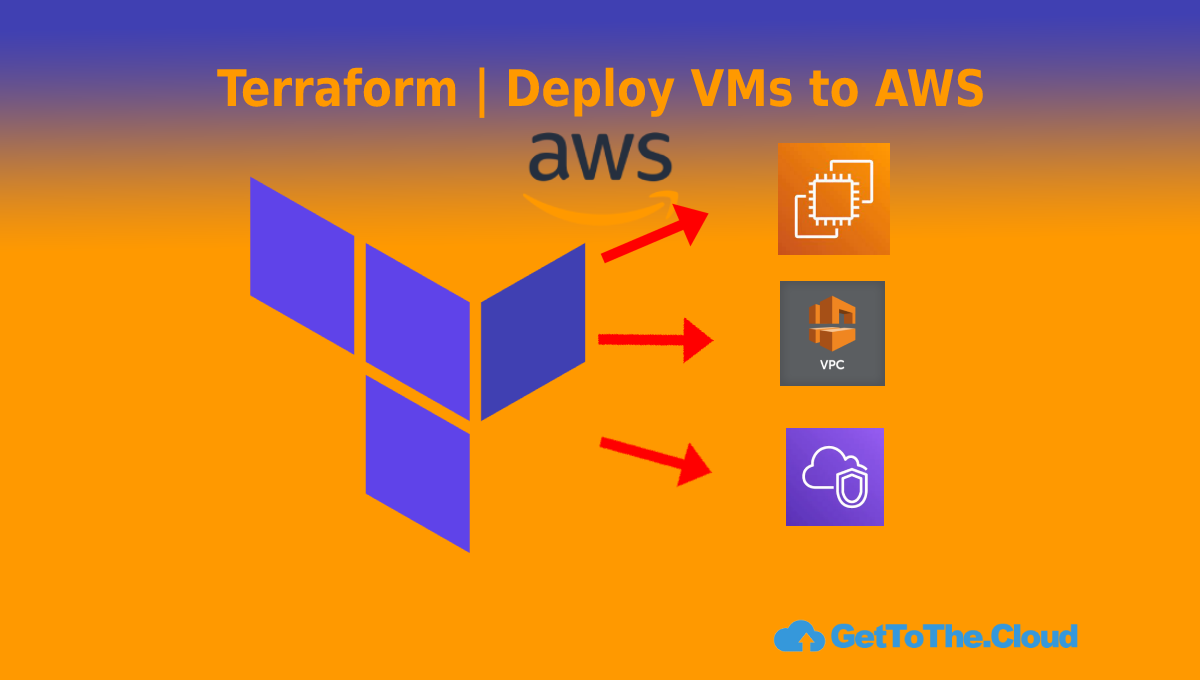
In the blogpost, Terraform | Deploy Virtual Machines to Azure – GetToTheCloud, we saw how to use Terraform for deploying the Testlab Virtual machines to Azure with all the needed resources. We created a DC01, EX01 and WIN11 virtual machine in Azure with also some network security groups for access and security. Now let’s see how that goes if we want to deploy it to Amazon AWS. In Amazon AWS EC2 it is not possible to deploy a Windows 11 virtual machine so we will replace that with a Windows 2019 server (just to see the difference).
Requirements
First you need to have an AWS account and tenant. You can signup here and complete the registration. We are not going to use any costs so no worries. If you use t2.micro you will be eligible for 12 months 750h usage. For this demo and test this will be enough. In this demo port 5985 for remote PowerShell will be opened so you will be able to connect remotely to the machine through PowerShell.
IAM User in AWS
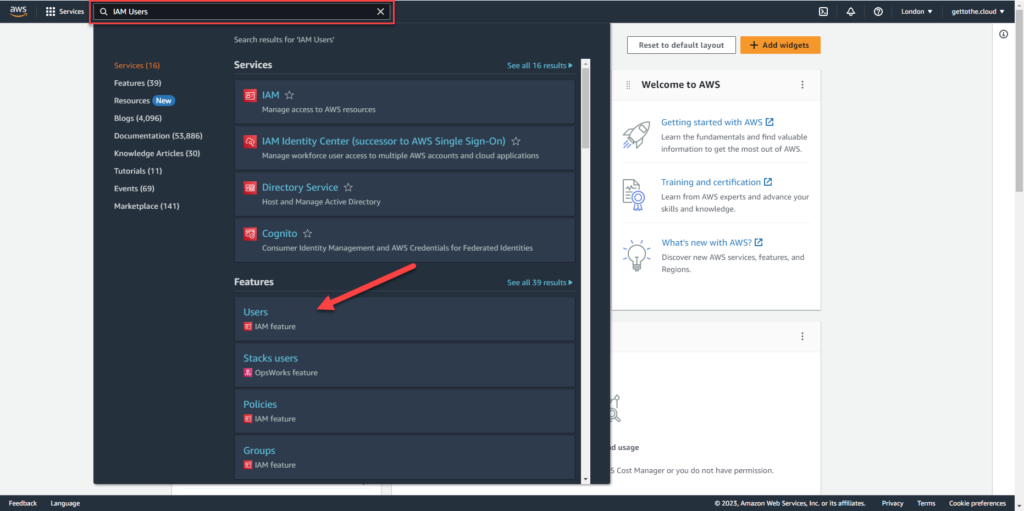
In Azure you create an app registration which has the required permissions in a subscription for creation of resources. In AWS you create an user with those permissions. First you need to login to the portal at AWS and then browse to IAM Feature – Users or search in the top bar.
In the next screen click on Add Users
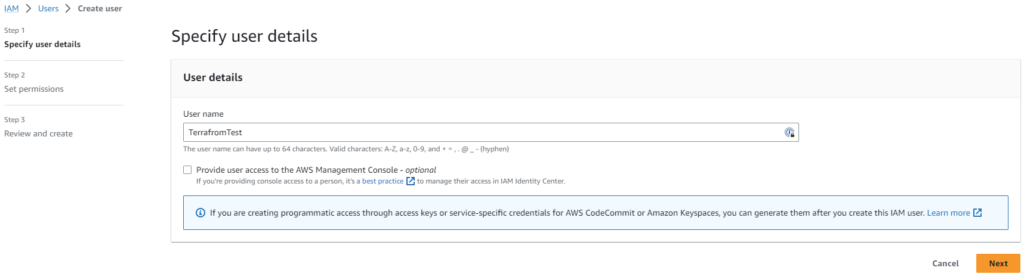
Create an user name and click on next
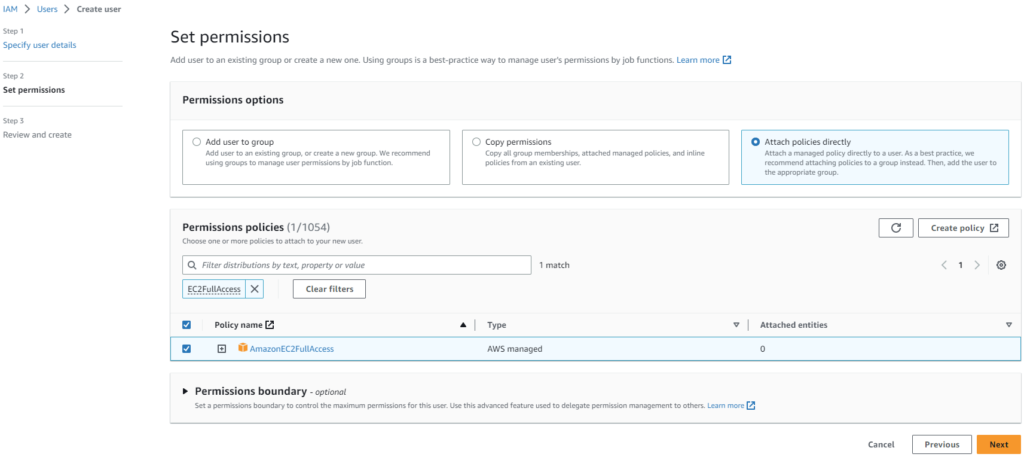
Create a filter and search for EC2FullAccess. Select the result and click next
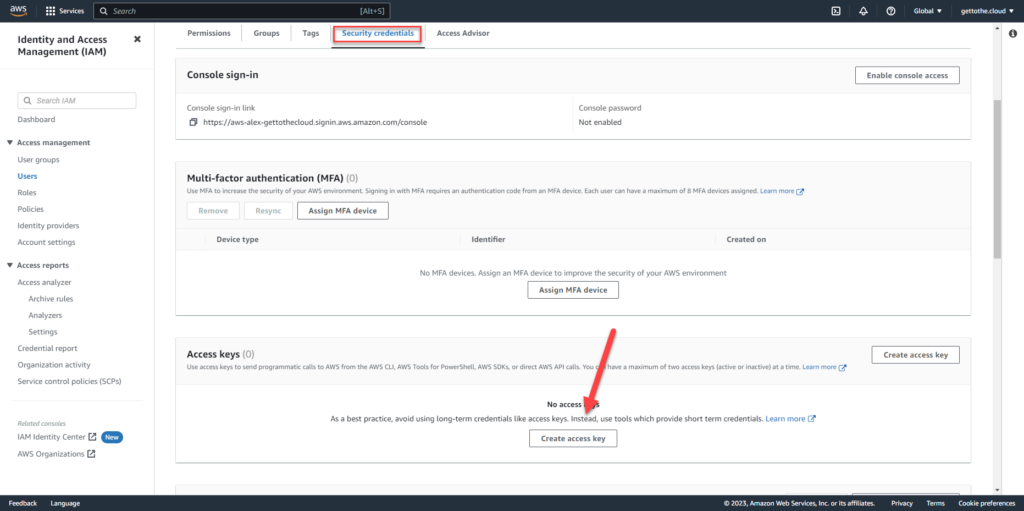
Review and create the user. After creation click on the user and browse to Security credentials. Scroll down to Access keys and click on Create access key.
This will create an access key for the terraform script to authenticate.
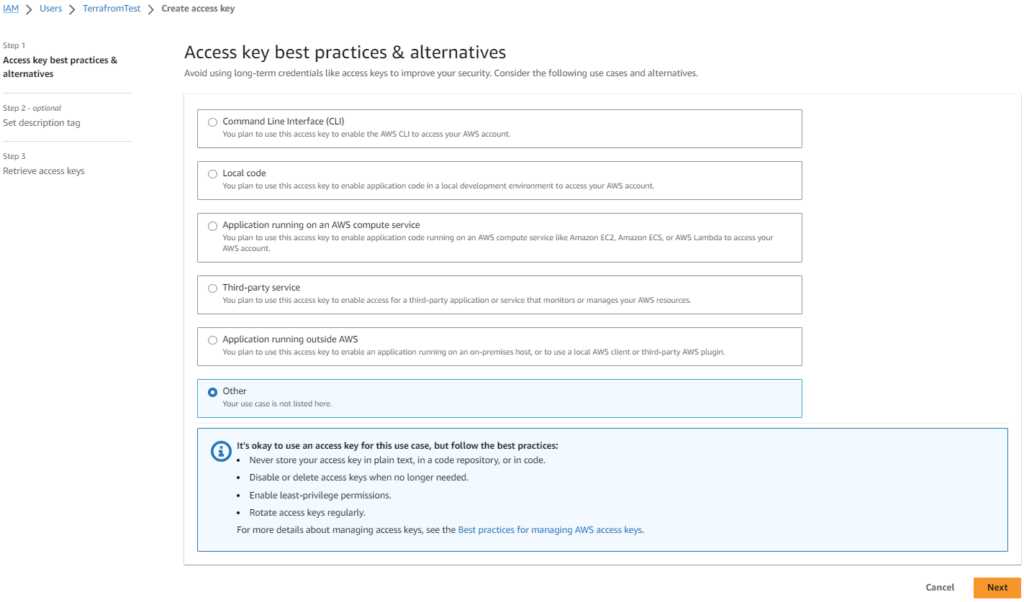
Select Other and click on next
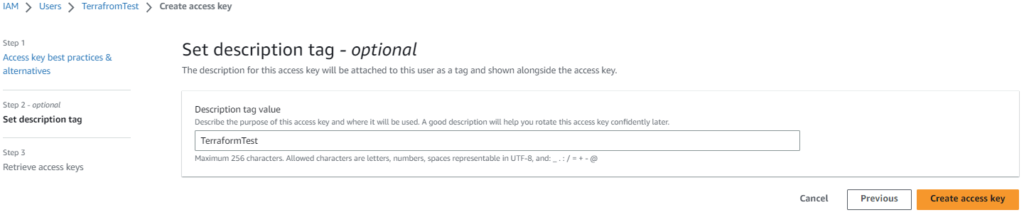
Provide a description tag value and click create access key
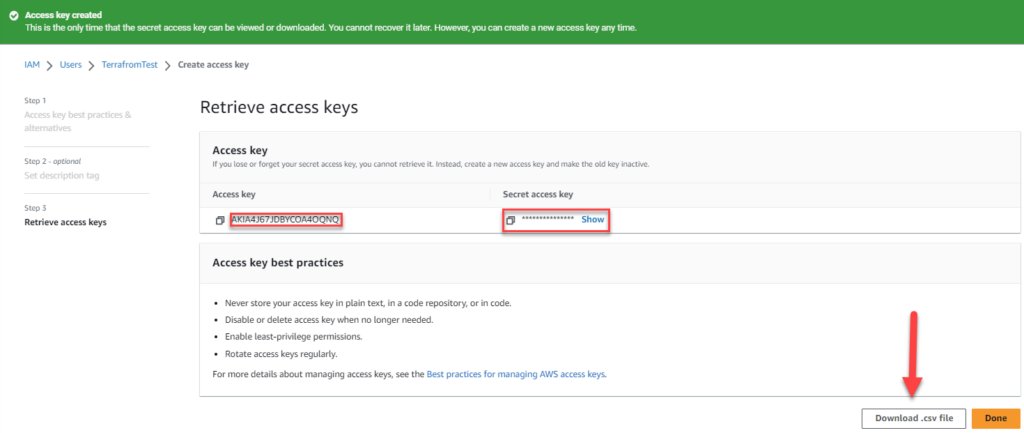
When created you will be able to download the information in a csv file or just to write down your own. Access Key and Secret access key is both needed for the terraform script.
Terraform files
Just like using Terraform with Azure, we have created multiple files:
TestLabAWS.tf
In this file the resources will be defined to be created.
# connection to AWS
provider "aws" {
  region = var.location
  access_key = "xxxxxxxxxxxxxxxxxxx"
  secret_key = "xxxxxxxxxxxxxxxxxxxxxxxxxxxxxxxxxxx"
}
Connection as the created user to AWS for provisioning
# setting the names for the virtual machines
variable "DCcomputername" {
  default = "DC01"
}
variable "EXcomputername" {
  default = "EX01"
}
variable "RDPcomputername" {
  default = "RDP01"
}
The computer names in AWS for tagging
# creating the network
resource "aws_vpc" "testlabvpc"{
  cidr_block = var.node_address_prefix
}
resource "aws_subnet" "testlabsubnet" {
  vpc_id = aws_vpc.testlabvpc.id
  cidr_block = "172.16.10.0/24"
  availability_zone = "eu-west-2b"
  tags = {
    name = var.virtualnetwork
  }
}
Setting the virtual network and subnet
# network security groups for allowing Inbound and outbound ports
resource "aws_security_group" "dc01websg" {
  name = "dc01-sg01"
  vpc_id = aws_vpc.testlabvpc.id
  ingress {
    protocol = "tcp"
    from_port = 5985
    to_port = 5985
    cidr_blocks = [ "0.0.0.0/0" ]
  }
}
# setting de default ports for the "exchange" server
locals {
  ports_in = [
    443,
    5985
  ]
}
resource "aws_security_group" "ex01websg" {
  name = "ex01-sg01"
  vpc_id = aws_vpc.testlabvpc.id
  dynamic "ingress"{
    # doing a for each for each port
    for_each = toset(local.ports_in)
    content {
      from_port   = ingress.value
      to_port     = ingress.value
      protocol    = "tcp"
      cidr_blocks = ["0.0.0.0/0"]
    }
  }
}
resource "aws_security_group" "rdp01websg" {
  name = "rdp01-sg01"
  vpc_id = aws_vpc.testlabvpc.id
  ingress {
    protocol = "tcp"
    from_port = 3389
    to_port = 3389
    cidr_blocks = [ "0.0.0.0/0" ]
  }
}
Everything needed for a virtual machine is set, now creating the instances
resource "aws_instance" "dc01" {
  count = 1
  ami                    = var.windows2022 #windows 2022
  instance_type          = var.instance_type
  key_name               = "TerraformPasswordFile"
  subnet_id              = aws_subnet.testlabsubnet.id
  private_ip             = "172.16.10.5"
  vpc_security_group_ids = [ aws_security_group.dc01websg.id ]
  get_password_data      = true
      tags = {
      Name = var.DCcomputername
    }
}
resource "aws_instance" "ex01" {
  count = 1
  ami                    = var.windows2022 #windows 2022
  instance_type          = var.instance_type
  key_name               = "TerraformPasswordFile"
  subnet_id              = aws_subnet.testlabsubnet.id
  private_ip             = "172.16.10.6"
  associate_public_ip_address = true
  vpc_security_group_ids = [ aws_security_group.ex01websg.id ]
  get_password_data      = true
      tags = {
      Name = var.EXcomputername
    }
}
resource "aws_instance" "rdp01" {
  count = 1
  ami                    = var.windows2019 #windows 2019
  instance_type          = var.instance_type
  key_name               = "TerraformPasswordFile"
  subnet_id              = aws_subnet.testlabsubnet.id
  private_ip             = "172.16.10.7"
  associate_public_ip_address = true
  vpc_security_group_ids = [ aws_security_group.rdp01websg.id ]
  get_password_data      = true
      tags = {
      Name = var.RDPcomputername
    }
}
Each machine has his PrivateIP set in the instance. Using TerraformPasswordFile for authentication.
# decrypt the password what was set by AWS
resource "null_resource" "dc01" {
  count = 1
  triggers = {
    password = "${rsadecrypt(aws_instance.dc01.*.password_data[count.index], file("TerraformPasswordFile.pem"))}"
  }
}
resource "null_resource" "ex01" {
  count = 1
  triggers = {
    password = "${rsadecrypt(aws_instance.ex01.*.password_data[count.index], file("TerraformPasswordFile.pem"))}"
  }
}
resource "null_resource" "rdp01" {
  count = 1
  triggers = {
    password = "${rsadecrypt(aws_instance.rdp01.*.password_data[count.index], file("TerraformPasswordFile.pem"))}"
  }
}
# display passwords on console
output "Administrator_Password_DC01" {
    value = "${null_resource.dc01.*.triggers.password}"
}
output "Administrator_Password_EX01" {
    value = "${null_resource.ex01.*.triggers.password}"
}
output "Administrator_Password_RDP01" {
    value = "${null_resource.rdp01.*.triggers.password}"
}
variables.tf
variable "location" {
  type = string
}
variable "node_address_space" {
  default = "172.16.10.0/16"
}
#variable for network range
variable "node_address_prefix" {
  default = "172.16.10.0/24"
}
variable "virtualnetwork" {
  type = string
}
variable "instance_type" {
  default = "t2.micro"
}
variable "windows2022" {
  default = "ami-073bb7464cc51df7c"
}
variable "windows2019" {
  default = "ami-0ddb10e73cf07b977"
}
terraform.tfvars
location  = "eu-west-2"
virtualnetwork = "TerraformTestDomain"
TerraformPasswordFile.pem
So within Amazon AWS, you are not able just to provide a username and password like you do to Azure. Here fore you need to use a PEM file which is created in Amazon AWS
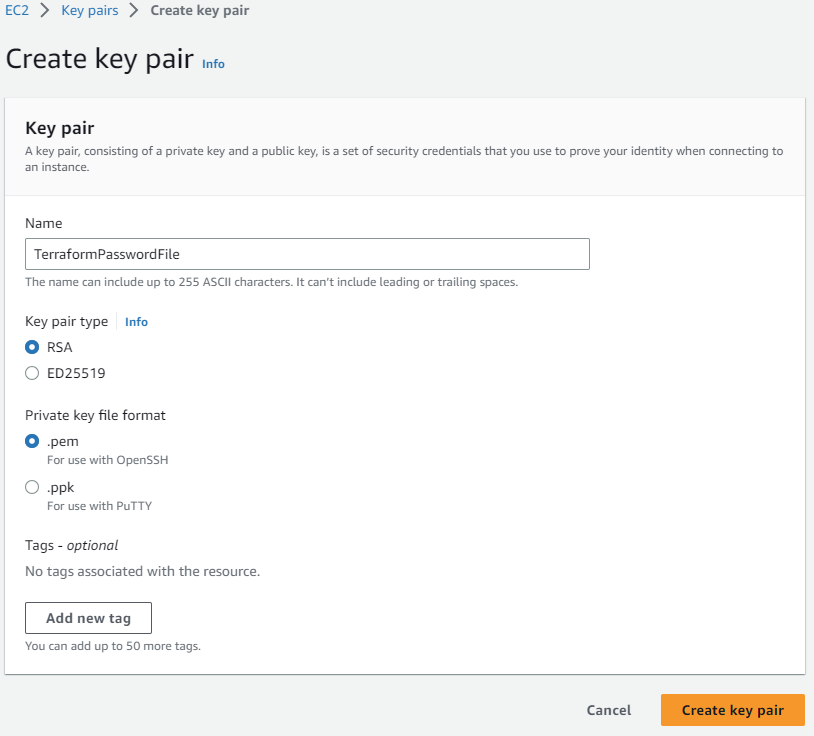
After creating the key pair it will be downloaded automatically. Move this file into the folder with terraform files. This file will be used to generate a default password which will be outputted to the console after creation of the resources within AWS.
Commands for deployment
To deploy the terraform files, you need to install/download terraform. Once downloaded and installed you can browse with a command line to the folder and run commands:
# check if all resources for connection are available
.\terraform.exe init
# plan deployment and check if files are correct
.\terraform.exe plan
# deploy terraform files
.\terraform.exe apply
Remember that at the end of the deployment in the console the passwords will be shown. Write them down for later.
Results

Three virtual machines with an IP range internal 172.16.10.x and two virtual machines with external ip addresses.
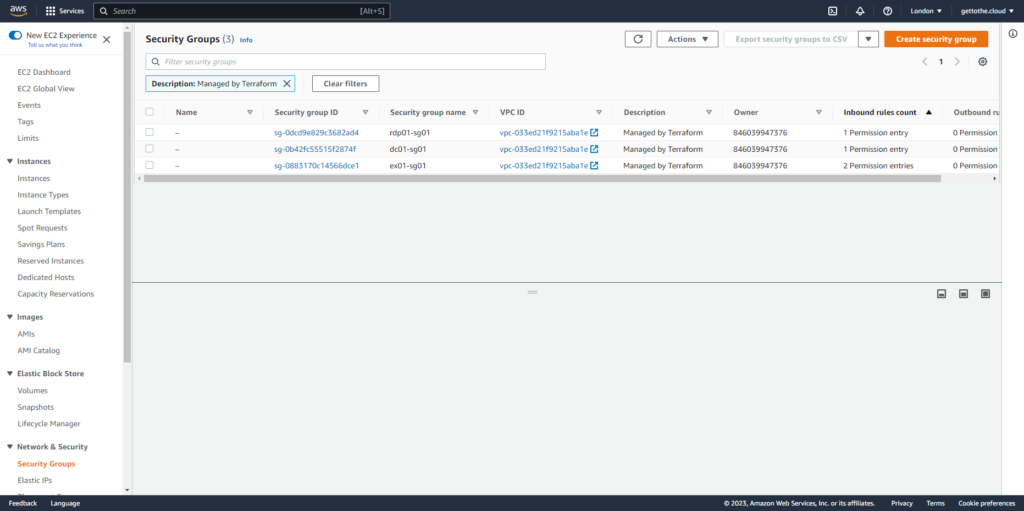
Each virtual machine has his own security group with entries.