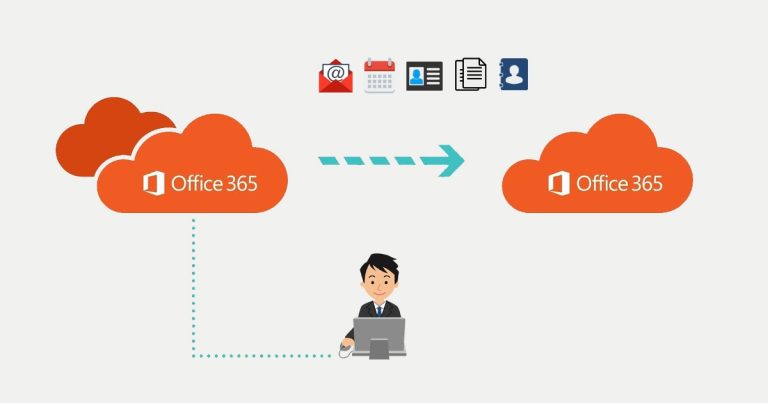
M365 Migration | Exchange Unattended App Registration
For unattended connection to Exchange Online, there is a need of an App registration. Of course Microsoft describes it here, but why would you click in a portal if there is no need for that.
Creating of an App registration with the correct permissions through PowerShell is much easier more fun.
Requirements
For the App registration there are some requirements. The goal is that you can connect Exchange Online unattended for some scripts or for some inventory. Therefore there is a need of some modules. Let’s install them first if not al ready done.
Start an Elevated PowerShell command
#NuGet package provider
Install-PackageProvider -Name "NuGet" -Force

#AZ powerShell module
Install-Module AZ -Force

#MSAL.PS module
Install-Module MSAL.PS -Force

#Exchange Online Management module
Install-Module -Name ExchangeOnlineManagement -RequiredVersion 3.0.0 -Force
Now we have installed those modules, we can start connecting and creating an App registration. Because we are going to upload a certificate, we need to use a password for the private key. I Personally do not use any plain text passwords in my scripts, so I Use a generator. Therefore I have two functions
function Get-RandomCharacters($length, $characters) {
    $random = 1..$length | ForEach-Object { Get-Random -Maximum $characters.length }
    $private:ofs = ""
    return [String]$characters[$random]
}
function Scramble-String([string]$inputString) {
    $characterArray = $inputString.ToCharArray()
    $scrambledStringArray = $characterArray | Get-Random -Count $characterArray.Length
    $outputString = -join $scrambledStringArray
    return $outputString
}
Now we can connect to Azure AD for creating the App registration
#connecting to Azure AD
Connect-AZAccount -Devicecode
Checking is the app with the name: Exchange Connection al ready exists
$AppName = "Exchange Connection"
$Check = Get-AZAdApplication | where-Object { $_.DisplayName -eq $DisplayName }
If (!($Check){
   Write-Host "INFO: The app does not exist."
}
If the app does not exist, we can continue creating the app. First we create the App registration so we can use that for the connection through Graph API. With the connection to Graph API, you will be able to put the App in the Exchange Administrators role.
$permissions = @(
# reference id from : https://learn.microsoft.com/en-us/graph/permissions-reference#all-permissions-and-ids

     "df021288-bdef-4463-88db-98f22de89214" # user.read.all (Application)
     "7ab1d382-f21e-4acd-a863-ba3e13f7da61" # directory.read.all (application)
     "9e3f62cf-ca93-4989-b6ce-bf83c28f9fe8" # RoleManagement.ReadWrite.Directory (application)
)

# creating the app
$AppInfo = New-AzADApplication -DisplayName $DisplayName -Description $Description -SignInAudience $signInAudience -ReplyUrls $web

# adding the Graph API permissions to the app
ForEach ($permission in $permissions) {
    Add-AzADAppPermission -ObjectId $AppInfo.id -ApiId "00000003-0000-0000-c000-000000000000" -PermissionId $permission -Type Role
}

# adding Exchange API permissions to the app
Try {
    Add-AzADAppPermission -ObjectId $AppInfo.id -ApiID "00000002-0000-0ff1-ce00-000000000000" -PermissionId "dc50a0fb-09a3-484d-be87-e023b12c6440" -Type Role
}
catch {
    Write-Output "ERROR: Cannot add Exchange.ManageAsApp to $DisplayName"
    break
}

# check if App is al ready readable
do {
    $check = Get-AzADAppPermission -ObjectId $AppInfo.id
    Start-Sleep -Seconds 2
} while (
    $Check = $null
)

# wait before app is live in azure
Start-Sleep -Seconds 60
Now we created an App registration with the permissions for Graph API and Exchange.ManageAsApp API.
Next you need to give AdminConsent to the new created app.
# giving admin consent to the new permissions
$TenantName = (Get-AZDomain).Domains | Where-Object { $_ -like "*.onmicrosoft.com" }
$TenantName = $Tenantname | Where-Object { $_ -notlike "*.mail.onmicrosoft.com" }
$Tenantid = (Get-AzContext).Tenant.Id

$applicationid = $AppInfo.AppId

#starting a browser with the correct url
start-process "https://login.microsoftonline.com/$Tenantid/adminconsent?client_id=$applicationid"
For an App registration you will need a password/certificate. The password (ClientSecret) is used for the Graph API connection. The certificate is being used for the connection with Connect-ExchangeOnline and the future.
# creating a secret for the app certificate
$password = Get-RandomCharacters -length 9 -characters 'abcdefghiklmnoprstuvwxyz'
$password += Get-RandomCharacters -length 1 -characters 'ABCDEFGHKLMNOPRSTUVWXYZ'
$password += Get-RandomCharacters -length 2 -characters '1234567890'
$password += Get-RandomCharacters -Length 2 -characters '!@#$'
$password = Scramble-String $password

# creating the certificate
$certname = "Exchange Connection"
$CerExportPath = "C:\Temp\" + $certname + ".cer"
$pfxExportPath = "C:\Temp\" + $certname + ".pfx"
$mycert = New-SelfSignedCertificate -Subject "CN=$certname" -CertStoreLocation "Cert:\CurrentUser\My" -KeyExportPolicy Exportable -KeySpec Signature -KeyLength 2048 -KeyAlgorithm RSA -HashAlgorithm SHA256

# Export certificate to .pfx file
$mycert | Export-PfxCertificate -FilePath $pfxExportPath -Password (ConvertTo-SecureString $password -asplaintext -force) -InformationAction SilentlyContinue | Out-Null

# Export certificate to .cer file
$mycert | Export-Certificate -FilePath $CerExportPath -InformationAction SilentlyContinue | Out-Null

$passwordoutput = "C:\Temp\" + "certificate_password.txt"

# document the password private key and export to file
Write-Output "WARNING: Your password for certificate is: $Password" | yellow
Write-OUtput "WARNING: It will be saved to $passwordoutput" | yellow
$password | out-file $passwordoutput

# using this certificate to be placed on the app registration
$cer = New-Object System.Security.Cryptography.X509Certificates.X509Certificate2 $CerExportPath
$binCert = $cer.GetRawCertData()
$credValue = [System.Convert]::ToBase64String($binCert)

$CertSecret = Get-AzADApplication -ApplicationId $applicationId | New-AzADAppCredential -CertValue $credValue -StartDate (Get-Date) -EndDate $Cer.NotAfter
The App registration is now enriched with a certificate. That certificate is located on the computer of the user that is running this. For the Exchange Online connection the App is ready, now for the Graph API connection.
# creating a secret for the app
$AppSecret = Get-AzADApplication -ApplicationId $applicationId | New-AzADAppCredential -StartDate (Get-Date) -EndDate (Get-Date).AddYears(2)
In the future this app can be used for connections. I Personally export it to a XML file with encrypted passwords and every other thing I think I need in the future
$connectionFile = "C:\Temp\connection-details.xml"
$connectionDetails = @{
            'TenantId'            = $Tenantid
            'ClientId'            = $applicationid
            'ClientSecret'        = $AppSecret.SecretText | ConvertTo-SecureString -AsPlainText -Force
            'ThumbPrint'          = $cer.Thumbprint
            "ServicePrincipalId"  = $servicePrincipalId.Id
            'Tenant'              = $TargetTenant
            'CertificatePassword' = $password | ConvertTo-SecureString -AsPlainText -Force
            "cert"                = $pfxExportPath
        }

$connectionDetails | Export-Clixml $connectionFile
In the future you can use this XML file on THIS computer to make unattended connections
$connectionFile = "C:\Temp\connection-details.xml"
$ConnectionDetails = Import-CliXML $connectionFile

Connect-ExchangeOnline -AppId $Connectiondetails.clientId -CertificateThumbprint $Connectiondetails.thumbprint -Organization $connectionDetails.tenant
Let’s continue, because we still need to add the App registration to the Exchange Administrators role in Azure AD. Unfortunately Microsoft still needs to add that role to the App.
# getting the Graph API token for the connection
do {
   try {
       $accessToken = (Get-MSALToken -Clientid $ConnectionDetails.ClientId -ClientSecret $connectionDetails.ClientSecret -TenantId $ConnectionDetails.TenantId).AccessToken
    $mustRetry = 0
    }
    catch {
       $webError = $_
       $mustRetry = 1
       Start-Sleep -seconds 2
    }

} while (
   $mustRetry -eq 1
)

# getting the id from the role
$roles = Invoke-RestMethod -Headers $Header -Method GET -uri "https://graph.microsoft.com/v1.0/directoryRoles"
$id = $roles.value | Where-Object {$_.DisplayName -eq "Exchange Administrator"}

# build the url for Graph API
$uri = "https://graph.microsoft.com/v1.0/directoryroles/" + $id.id + '/members/$ref'

# setting headers for connection
$header = @{
      'Authorization' = "BEARER $accesstoken"
}

# building the POST body
$body = @{
     '@odata.id' = "https://graph.microsoft.com/v1.0/directoryObjects/$($ConnectionDetails.ServicePrincipalId)"
} | ConvertTo-Json

# adding App registration to role
Try {
  Invoke-RestMethod -Method POST -Headers $header -Body $body -Uri $uri -ContentType application/json
}
catch {
 Write-Host $_
}
And we are done. We created through PowerShell an App registration for unattended connection to Exchange Online which we can use in the future.
# connecting to Exchange Online
Connect-ExchangeOnline -AppId $Connectiondetails.clientId -CertificateThumbprint $Connectiondetails.thumbprint -Organization $connectionDetails.tenant