As described in the previous post, Azure Active Directory Assessment | Part I – GetToTheCloud, we need an App registration with the correct Graph API permissions. When an app was created with the GUI, there is a need to write down all the information like tenantId, cliendId and client_secret. The permissions need to be added manually in the portal.
Creation through GUI
Browse to the Azure Portal : https://portal.azure.com/#view/Microsoft_AAD_IAM/ActiveDirectoryMenuBlade/~/Overview
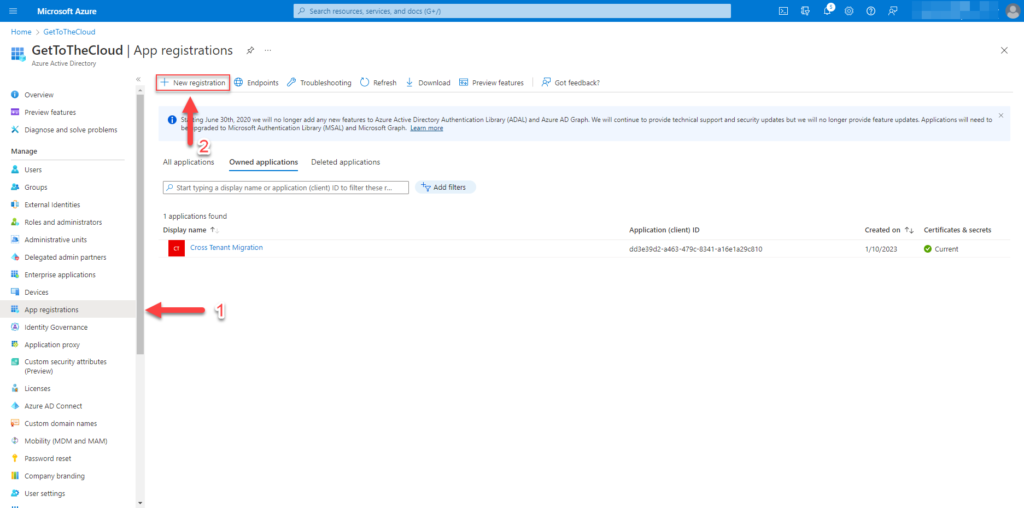
Go to App registrations (1) and click on New registration (2)
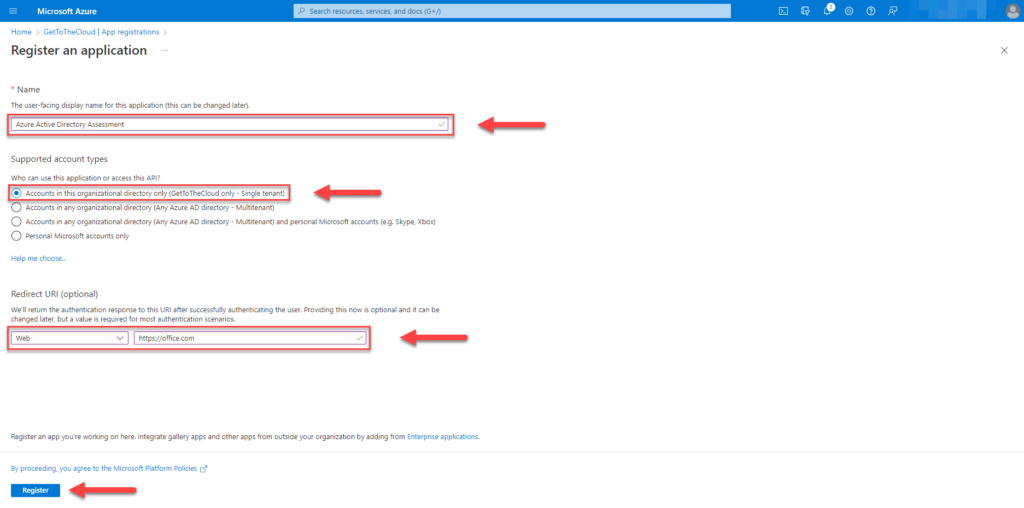
Provide a Name and select Accounts in this organizational directory only – Single tenant. RedirectURL can be anything.
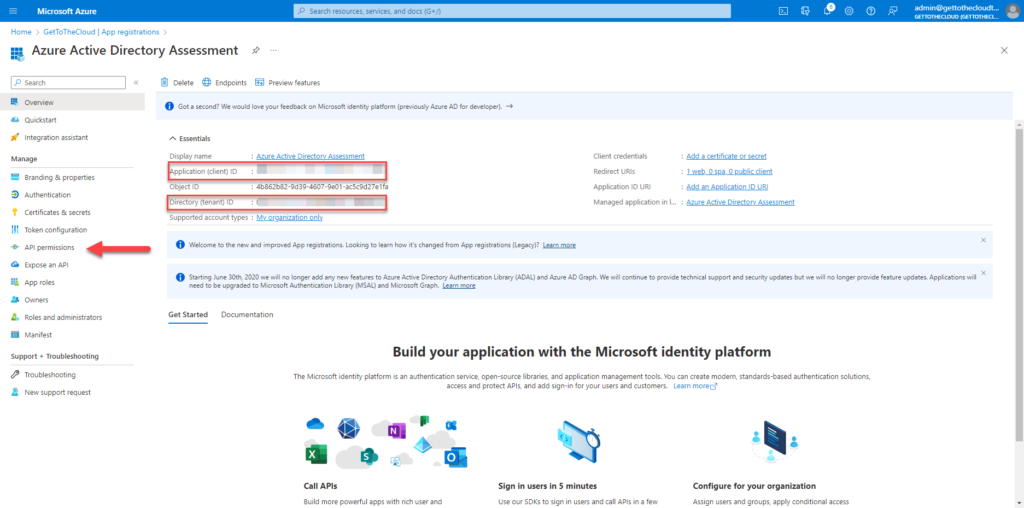
Write down the Application (client) ID and the Directory (tenant) ID. Proceed to the API permissions
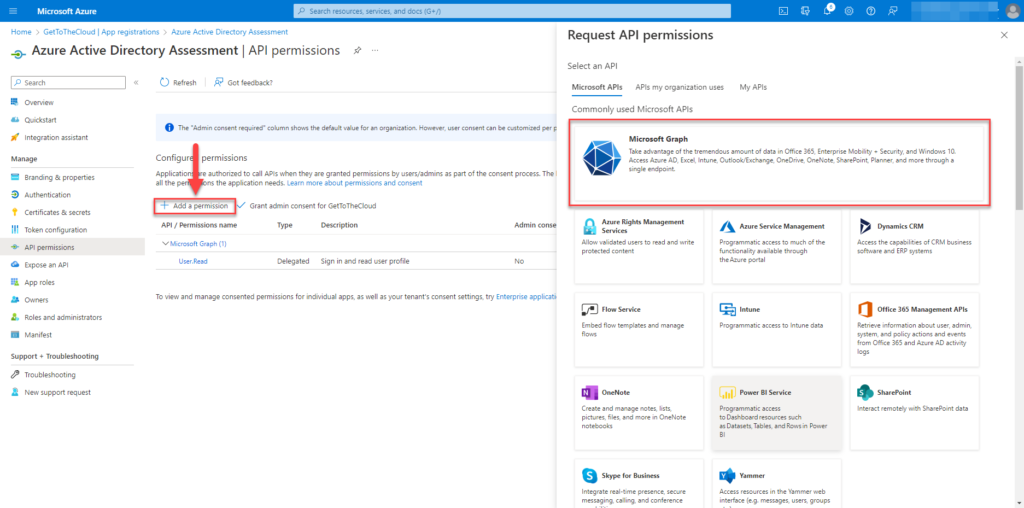
Via Add a permission select Microsoft Graph

Select Application permissions and at the Select permissions search for the permissions in the previous post (link)
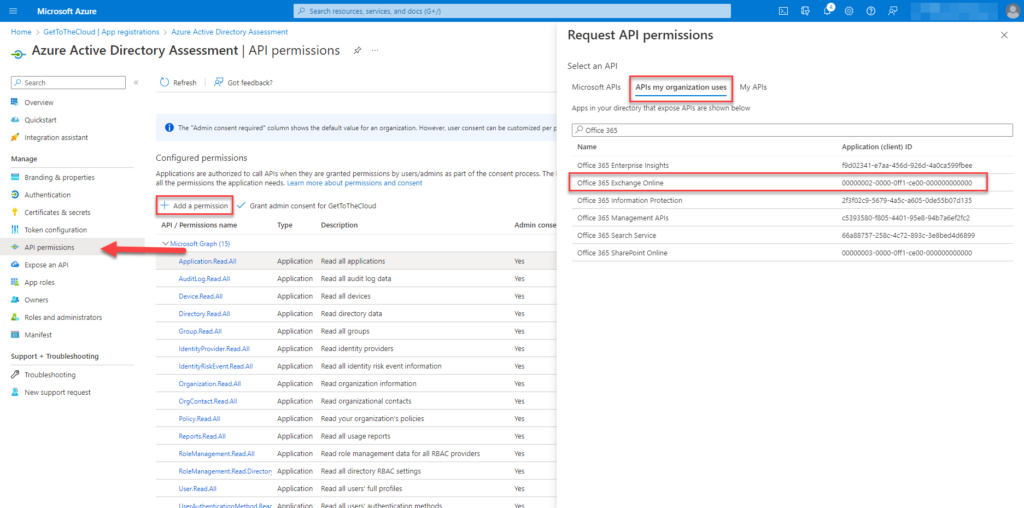
Search for API permissions under APIs my organization uses for Office 365 Exchange Online.
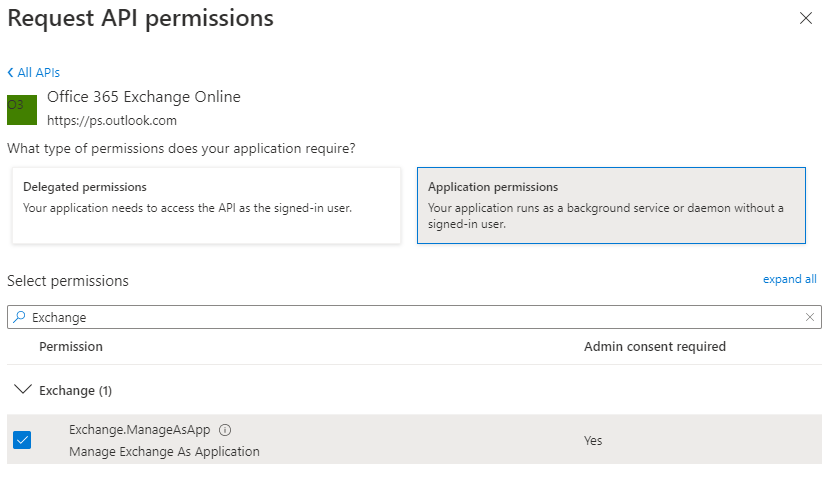
Select Application permissions and search for Exchange.ManageAsApp
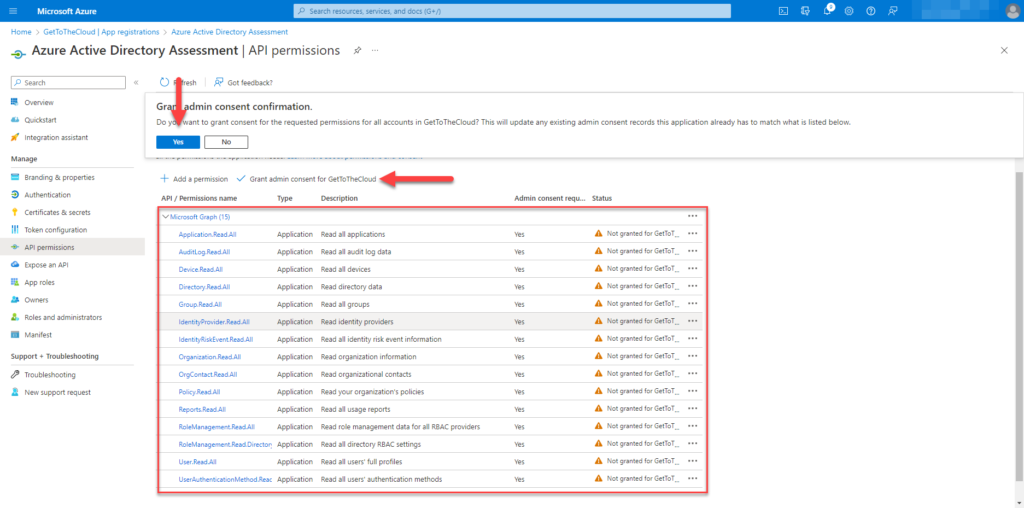
When all the permissions where added, give Grant admin concent for [tenant]
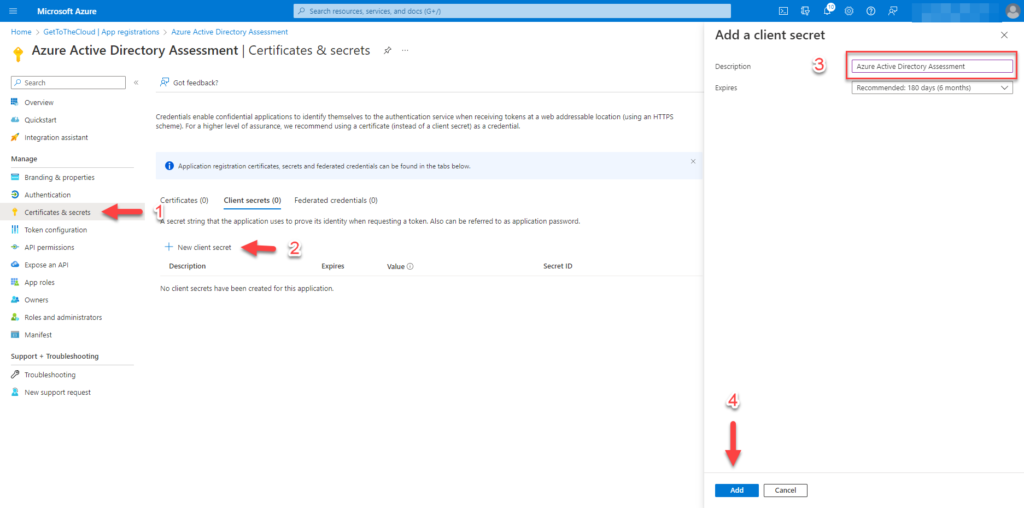
Go to Certificates & secrets (1) and create New client secret (2). Provide a Description (3) and click on Add (4)

Write down the Value of click on the Copy icon.
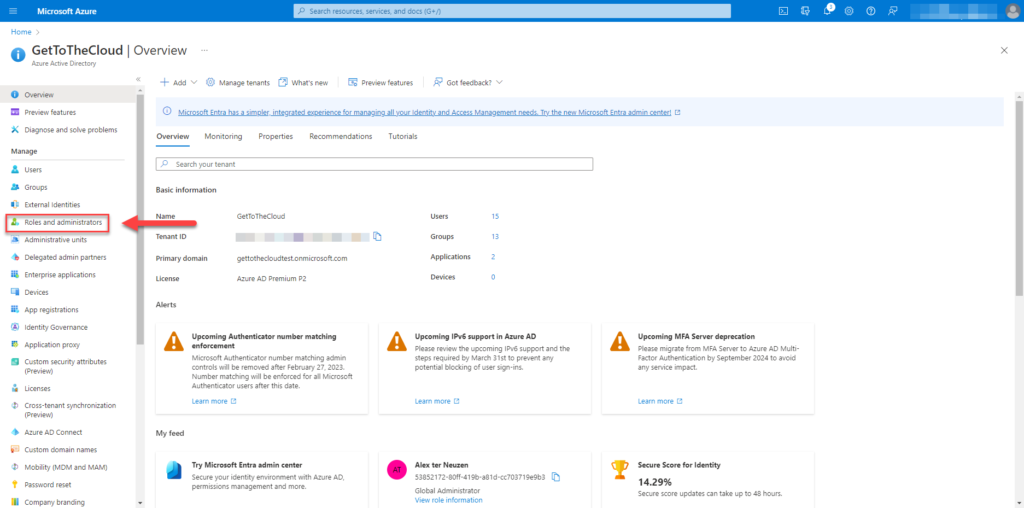
Browse to Azure Active Directory and select Roles and administrators
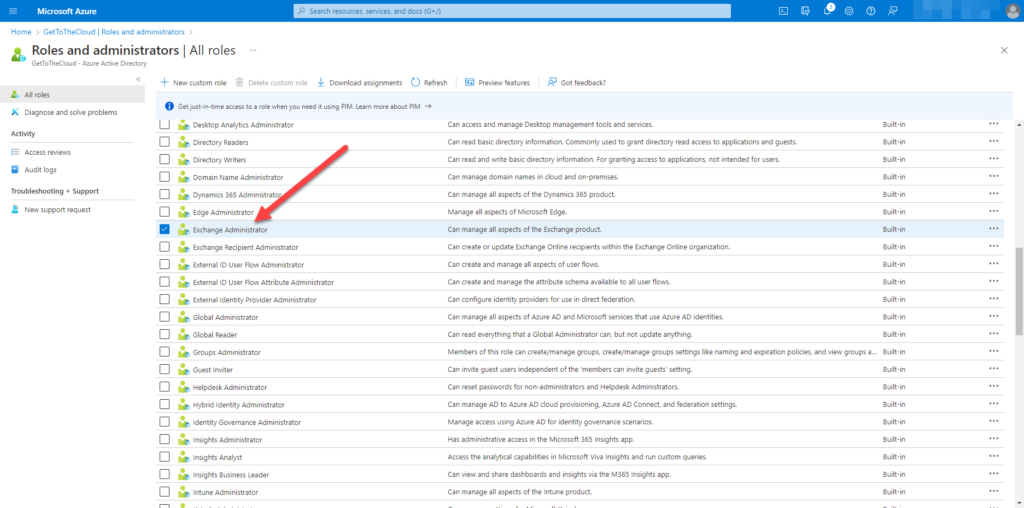
Search for Exchange Administrator and select
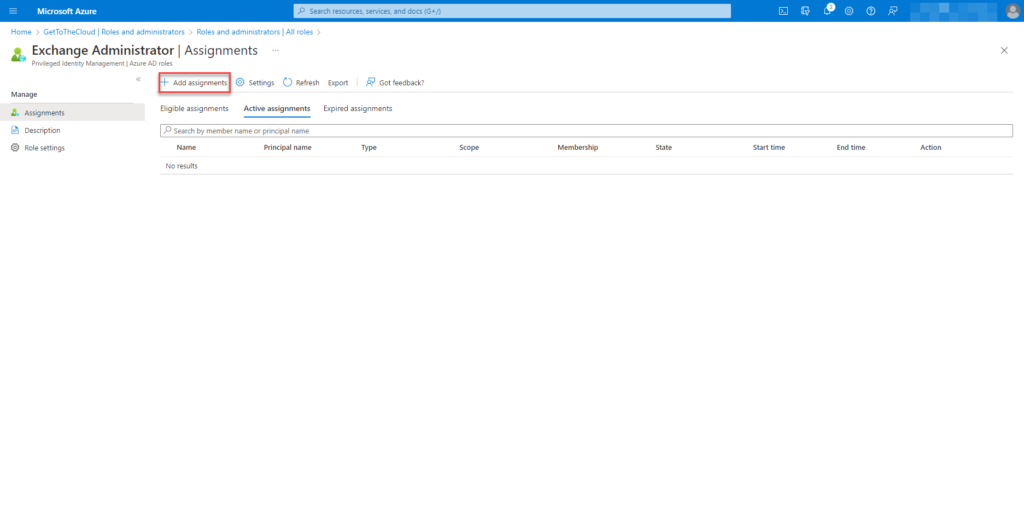
Select Add assignments
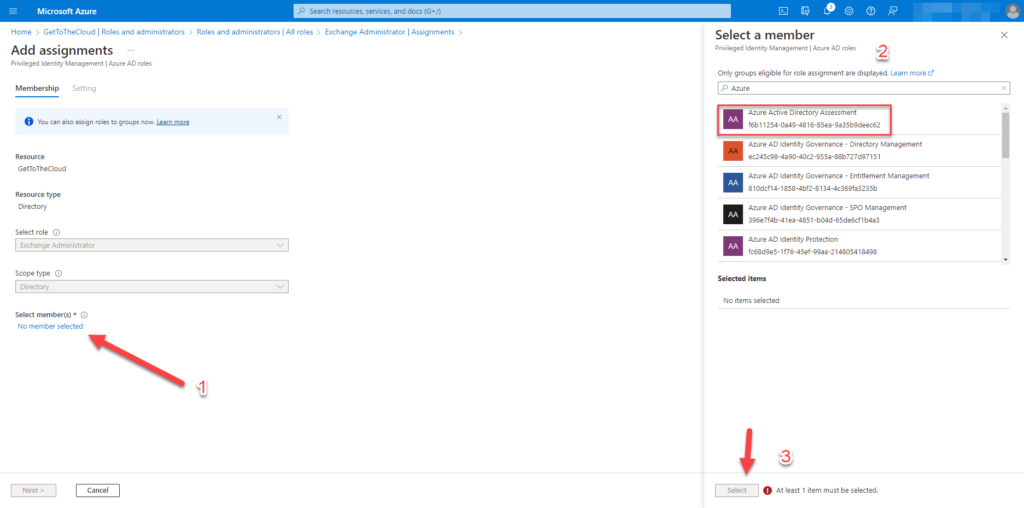
Add the created app to the members
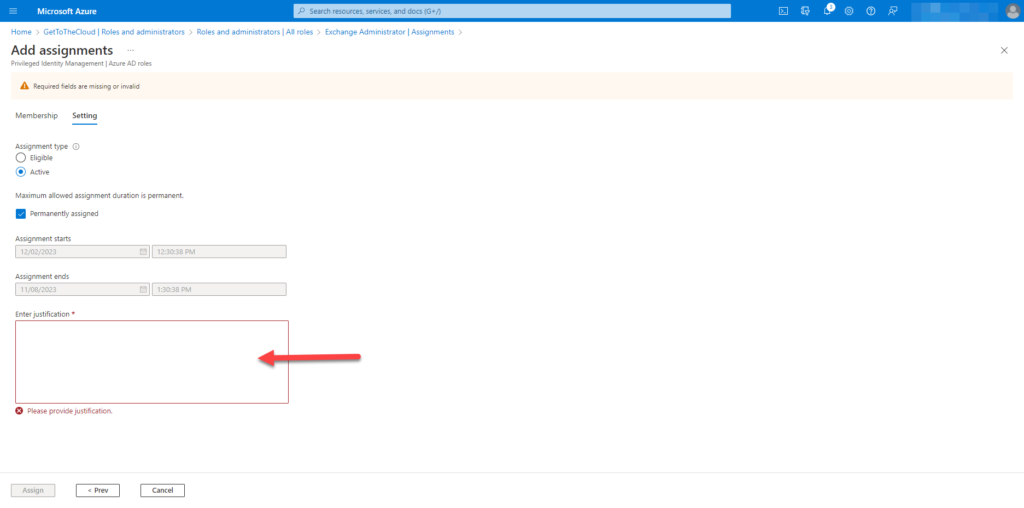
Provide with a valid reason and auditing.
For Exchange Online you will need to create an certificate and attach to the application:
# functions to generate password
function Get-RandomCharacters($length, $characters) {
            $random = 1..$length | ForEach-Object { Get-Random -Maximum $characters.length }
            $private:ofs = ""
            return [String]$characters[$random]
        }
        function Scramble-String([string]$inputString) {
            $characterArray = $inputString.ToCharArray()
            $scrambledStringArray = $characterArray | Get-Random -Count $characterArray.Length
            $outputString = -join $scrambledStringArray
            return $outputString
        }
        # creating a secret for the app
        $password = Get-RandomCharacters -length 9 -characters 'abcdefghiklmnoprstuvwxyz'
        $password += Get-RandomCharacters -length 1 -characters 'ABCDEFGHKLMNOPRSTUVWXYZ'
        $password += Get-RandomCharacters -length 2 -characters '1234567890'
        $password += Get-RandomCharacters -Length 2 -characters '!@#$'
        $password = Scramble-String $password
        $certname = "Exchange Connection"
        $CerExportPath = $connectionPath + $certname + ".cer"
        $pfxExportPath = $connectionPath + $certname + ".pfx"
        $mycert = New-SelfSignedCertificate -Subject "CN=$certname" -CertStoreLocation "Cert:\CurrentUser\My" -KeyExportPolicy Exportable -KeySpec Signature -KeyLength 2048 -KeyAlgorithm RSA -HashAlgorithm SHA256
        # Export certificate to .pfx file
        $mycert | Export-PfxCertificate -FilePath $pfxExportPath -Password (ConvertTo-SecureString $password -asplaintext -force) -InformationAction SilentlyContinue | Out-Null
        # Export certificate to .cer file
        $mycert | Export-Certificate -FilePath $CerExportPath -InformationAction SilentlyContinue | Out-Null
        $passwordoutput = $connectionPath + "certificate_password.txt"
        Write-Output "WARNING: Your password for certificate is: $Password"
Now we have a CER and a PFX file. Browse back to the application in Azure Active Directory
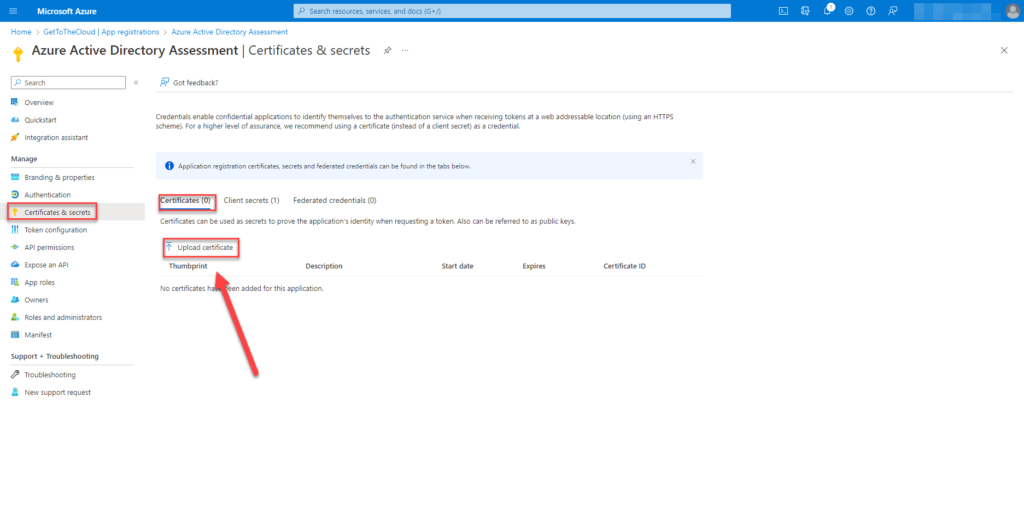
Click on Upload certificate which we just created.
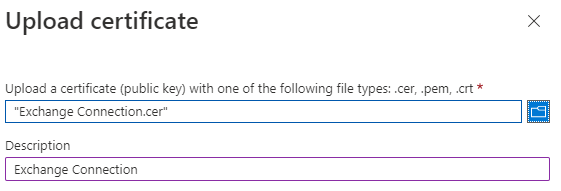
Select the CER and click Add
Creation through PowerShell
To create an app registration through PowerShell you will need some requirements
# Azure Active Directory powershell module
Install-Module AZ.Resources -Force
# MSAL.PS powershell module
Install-Module MSAL.PS -force
Setting the location an variables for the export and connection details
# determining powershell version and operating system
If (($PSVersionTable).psversion -like "*5.*") {
    $rootPath = [Environment]::GetFolderPath("Desktop")
    $switch = "\"
    Write-Output "INFO: Setting Windows as operating system"
}
If (($PSVersionTable).psversion -gt "5.9") {
    if ($IsWindows) {
        $rootPath = [Environment]::GetFolderPath("Desktop")
        $switch = "\"
        Write-Output "INFO: Setting Windows as operating system"
    }
    if ($IsMacOS) {
        $rootPath = $ENV:HOME + "/Desktop"
        $switch = "/"
        Write-Output "INFO: Setting MacOS as operating system"
    }
}
# setting output path
$outputpath = $rootpath + $switch + "Azure Active Directory Assessment"
# checking if folder exists and create if not
if (Test-Path $outputpath) {
    Write-Output "INFO: Folder structure is allready created ..."
}
else {
    try {
        $CSV = $outputpath + $switch + "CSV"
        $Connection = $outputpath + $switch + "connection"
        $Json = $outputpath + $switch + "JSON Exports"
        $create = New-Item -Path $outputpath -ItemType Directory -InformationAction SilentlyContinue
        $create = New-Item -Path $CSV -ItemType Directory -InformationAction SilentlyContinue
        $create = New-Item -Path $Connection -ItemType Directory -InformationAction SilentlyContinue
        $create = New-Item -Path $Json -ItemType Directory -InformationAction SilentlyContinue
    }
    catch {
        Write-Output "ERROR: Unable to create folder structure ..."
    }
    Write-Output "INFO: Folder structure created ..."
}
# checking for connections details file
$connectionFile = $outputpath + $switch + "connection" + $switch + "connection-details.xml"
if (Test-Path $connectionFile) {
    try {
        $connectionDetails = Import-Clixml $connectionFile
        $TenantName = $connectionDetails.Tenantname
    }
    catch {
        Write-Output "CANNOT IMPORT CONNECTION DETAILS"
        break
    }
    Write-Output "INFO: Connection file found and imported ..."
}
Above is checked which operating system was used. This will be able to run on MacOS and Windows. The location for output is set to the Desktop of the user that is running the script. A folder structure is created at the desktop for output and saving of the connection-details file. If the folder structure already exist it will try to import the connection file is is present.
else {
    $CheckForConnection = Get-AzContext
    if (!($CheckForConnection)) {
        start-process "https://microsoft.com/devicelogin"
        Connect-AZAccount -DeviceCode | out-Null
    }
    else {
        Write-Output "INFO: Azure AD is allready connected ..."
        $TenantName = (Get-AZDomain).Domains | Where-Object { $_ -like "*.onmicrosoft.com" -and $_ -notlike "*.mail.onmicrosoft.com" }
        Write-Output "INFO: Connected to $($tenantName)"
    }
    $DisplayName = "Azure Active Directory Assessment"
    $CheckIfAppExists = Get-AZAdApplication | where-Object { $_.DisplayName -eq $DisplayName }
    $permissions = @(
        # reference id from : https://learn.microsoft.com/en-us/graph/permissions-reference#all-permissions-and-ids
        "df021288-bdef-4463-88db-98f22de89214" # user.read.all (Application)
        "5b567255-7703-4780-807c-7be8301ae99b" # group.read.all (Application)
        "7ab1d382-f21e-4acd-a863-ba3e13f7da61" # directory.read.all (Application)
        "9a5d68dd-52b0-4cc2-bd40-abcf44ac3a30" # application.read.all (Application)
        "b0afded3-3588-46d8-8b3d-9842eff778da" # auditlog.read.all (Application)
        "e1a88a34-94c4-4418-be12-c87b00e26bea" # orgcontact.read.all (Application)
        "246dd0d5-5bd0-4def-940b-0421030a5b68" # policy.read.all (Application)
        "38d9df27-64da-44fd-b7c5-a6fbac20248f" # userauthenticationmethod.read.all (Application)
        "230c1aed-a721-4c5d-9cb4-a90514e508ef" # reports.read.all (Application)
        "c7fbd983-d9aa-4fa7-84b8-17382c103bc4" # RoleManagement.Read.all (Application)
        "483bed4a-2ad3-4361-a73b-c83ccdbdc53c" # rolemanagement.read.directory (Application)
        "6e472fd1-ad78-48da-a0f0-97ab2c6b769e" # IdentityRiskEvent.Read.All (application)
        "7438b122-aefc-4978-80ed-43db9fcc7715" # Device.Read.All (application)
        "e321f0bb-e7f7-481e-bb28-e3b0b32d4bd0" # IdentityProvider.Read.All (application)
        "498476ce-e0fe-48b0-b801-37ba7e2685c6" # Organization.Read.All (application)
        "9e3f62cf-ca93-4989-b6ce-bf83c28f9fe8" # RoleManagement.ReadWrite.Directory (application)
    )
Check is there is already a connection to the tenant of your choice, otherwise you can login to browse to https://microsoft.com/devicelogin and enter the code that is generated in the terminal window.
The name for the App registration is set at $DisplayName and there is a check if the App already exist. The permissions are set in a array to be used later.
At https://learn.microsoft.com/en-us/graph/permissions-reference#all-permissions-and-ids the permissions are listed with there id.
    # if app not exist, create one
    if (!($CheckIfAppExists)) {
        #first we create an app registration with the required permissions
        Import-Module Az.Resources
        $Description = "An App registration for the Azure Active Directory Assessment"
        $signInAudience = "AzureADMyOrg"
        $web = "https://portal.azure.com"
        Write-Output "WARNING: Creating a new application in Azure named: $DisplayName"
        $info = New-AzADApplication -DisplayName $DisplayName -Description $Description -SignInAudience $signInAudience -ReplyUrls $web
        ForEach ($permission in $permissions) {
            Add-AzADAppPermission -ObjectId $info.id -ApiId "00000003-0000-0000-c000-000000000000" -PermissionId $permission -Type Role
        }
        Write-Output "WARNING: Permissions added to application"
        Write-Output "INFO: Adding permissions for Exchange.ManageAsApp to Application"
        Try {
            Add-AzADAppPermission -ObjectId $info.id -ApiID "00000002-0000-0ff1-ce00-000000000000" -PermissionId "dc50a0fb-09a3-484d-be87-e023b12c6440" -Type Role
        }
        catch {
            Write-Output "ERROR: Cannot add Exchange.ManageAsApp to $DisplayName" | Red
            break
        }
        do {
            $check = Get-AzADAppPermission -ObjectId $info.id
            Start-Wait -Seconds 2
        } while (
            $Check = $null
        )
Creation of the App registration and permissions set through PowerShell
        # wait for the app to be provisioned in azure
        start-sleep -seconds 60
Azure Active Directory is taking about 60 seconds, before the app will be available in Azure.
        $TenantName = (Get-AZDomain).Domains | Where-Object { $_ -like "*.onmicrosoft.com" -and $_ -notlike "*.mail.onmicrosoft.com" }
        $Tenantid = (Get-AzContext).Tenant.Id
        $applicationid = $info.AppId
        # open a browser to give admin consent to the permissions
        start-process "https://login.microsoftonline.com/$Tenantid/adminconsent?client_id=$applicationid"
Each permission need an AdminConsent. This will be done browsing via an Url and login details
        function Get-RandomCharacters($length, $characters) {
            $random = 1..$length | ForEach-Object { Get-Random -Maximum $characters.length }
            $private:ofs = ""
            return [String]$characters[$random]
        }
        function Scramble-String([string]$inputString) {
            $characterArray = $inputString.ToCharArray()
            $scrambledStringArray = $characterArray | Get-Random -Count $characterArray.Length
            $outputString = -join $scrambledStringArray
            return $outputString
        }
        # creating a secret for the app
        $password = Get-RandomCharacters -length 9 -characters 'abcdefghiklmnoprstuvwxyz'
        $password += Get-RandomCharacters -length 1 -characters 'ABCDEFGHKLMNOPRSTUVWXYZ'
        $password += Get-RandomCharacters -length 2 -characters '1234567890'
        $password += Get-RandomCharacters -Length 2 -characters '!@#$'
        $password = Scramble-String $password
        $certname = "Exchange Connection"
        $CerExportPath = $connectionPath + $certname + ".cer"
        $pfxExportPath = $connectionPath + $certname + ".pfx"
        $mycert = New-SelfSignedCertificate -Subject "CN=$certname" -CertStoreLocation "Cert:\CurrentUser\My" -KeyExportPolicy Exportable -KeySpec Signature -KeyLength 2048 -KeyAlgorithm RSA -HashAlgorithm SHA256
        # Export certificate to .pfx file
        $mycert | Export-PfxCertificate -FilePath $pfxExportPath -Password (ConvertTo-SecureString $password -asplaintext -force) -InformationAction SilentlyContinue | Out-Null
        # Export certificate to .cer file
        $mycert | Export-Certificate -FilePath $CerExportPath -InformationAction SilentlyContinue | Out-Null
        $passwordoutput = $connectionPath + "certificate_password.txt"
        Write-Output "WARNING: Your password for certificate is: $Password"
        Write-OUtput "WARNING: It will be saved to $passwordoutput"
        $password | out-file $passwordoutput
        $cer = New-Object System.Security.Cryptography.X509Certificates.X509Certificate2 $CerExportPath
        $binCert = $cer.GetRawCertData()
        $credValue = [System.Convert]::ToBase64String($binCert)
        $CertSecret = Get-AzADApplication -ApplicationId $applicationId | New-AzADAppCredential -CertValue $credValue -StartDate (Get-Date) -EndDate $Cer.NotAfter
        # adding a client secret to the applicaton
        $AppSecret = Get-AzADApplication -ApplicationId $applicationId | New-AzADAppCredential -StartDate (Get-Date) -EndDate (Get-Date).AddYears(2)
        do {
            $servicePrincipalId = Get-AzADServicePrincipal | Where-Object { $_.DisplayName -Like $DisplayName }
            start-sleep -Seconds 2
        } until (
            $servicePrincipalId -ne $null
        )
        # combine all information
        $connectionDetails = @{
            'TenantId'            = $Tenantid
            'ClientId'            = $applicationid
            'ClientSecret'        = $AppSecret.SecretText | ConvertTo-SecureString -AsPlainText -Force
            'ThumbPrint'          = $cer.Thumbprint
            "ServicePrincipalId"  = $servicePrincipalId.Id
            'Tenant'              = $TenantName
            'CertificatePassword' = $password | ConvertTo-SecureString -AsPlainText -Force
            "cert"                = $pfxExportPath
        }
        # export connection details to XML file
        $connectionDetails | Export-CliXml  -Path $connectionFile
        Write-Output "WARNING: Connection details are exported to $ConnectionFile"
        do {
            try {
                $accessToken = (Get-MSALToken -Clientid $ConnectionDetails.ClientId -ClientSecret $connectionDetails.ClientSecret -TenantId $ConnectionDetails.TenantId).AccessToken
                $mustRetry = 0
            }
            catch {
                $webError = $_
                $mustRetry = 1
                Start-Sleep -seconds 2
            }
        } while (
            $mustRetry -eq 1
        )
        $roles = Invoke-RestMethod -Headers $Header -Method GET -uri "https://graph.microsoft.com/v1.0/directoryRoles"
        $id = $roles.value | Where-Object { $_.DisplayName -eq "Exchange Administrator" }
        $uri = "https://graph.microsoft.com/v1.0/directoryroles/" + $id.id + '/members/$ref'
        $header = @{
            'Authorization' = "BEARER $accesstoken"
        }
        Write-Output "WARNING: Adding $DisplayName to role Exchange Administrator" | Yellow
        $body = @{
            '@odata.id' = "https://graph.microsoft.com/v1.0/directoryObjects/$($ConnectionDetails.ServicePrincipalId)"
        } | ConvertTo-Json
        Try {
            Invoke-RestMethod -Method POST -Headers $header -Body $body -Uri $uri -ContentType application/json
        }
        catch {
            #donothing
        }
        Disconnect-AZAccount | Out-Null
        Write-Output "INFO: Waiting 20 second before client secret is processed on Azure side"
        Start-Sleep -Seconds 20
}
At last a client secret will be added to the app registration and the connection details will be exported to a XML file with the client secret encrypted.
In the next post there will be a start with the inventory of User objects, Group objects and Device objects.